Friday, June 9, 2023

Install kubectl on Ubuntu Instance | How to install kubectl in Ubuntu | Install and Set Up kubectl on Linux

Kubernetes uses a command line utility called kubectl for communicating with the cluster API server. It is tool for controlling Kubernetes clusters. 

The Kubernetes command-line tool, kubectl, allows you to run commands against Kubernetes clusters. You can use kubectl to deploy applications, inspect and manage cluster resources, and view logs. 

kubectl looks for a file named config in the $HOME directory.

How to install Kubectl in Ubuntu instance

Install kubectl binary with curl on Linux
curl -LO "https://dl.k8s.io/release/$(curl -L -s https://dl.k8s.io/release/stable.txt)/bin/linux/amd64/kubectl"

Install kubectl
sudo install -o root -g root -m 0755 kubectl /usr/local/bin/kubectl

Verify if kubectl got installed
kubectl version --short --client


Install Azure CLI in Ubuntu 22.0.4 | How to setup Azure CLI in Ubuntu 22.0.4 | How to Install Azure CLI in Ubuntu

The Azure command-line interface (Azure CLI) is a set of commands used to create and manage Azure resources. The Azure CLI is available across Azure services and is designed to get you working quickly with Azure, with an emphasis on automation. Azure CLI is Microsoft's cross-platform command-line experience for managing Azure resources.

Azure CLI can be installed by following below steps:

Run the update first
sudo apt update

Install with one command

curl -sL https://aka.ms/InstallAzureCLIDeb | sudo bash

Check the version of Azure CLI
az version

Run the Azure CLI with the az command. To sign in, use the az login command.

az login

Install Jenkins in Azure VM using Docker | How to Install Jenkins in Azure VM using Docker Compose on Ubuntu 22.0.4 | Install Jenkins using Docker-Compose

Jenkins is an open source continuous integration/continuous delivery and deployment (CI/CD) automation software DevOps tool written in the Java programming language. It is used to implement CI/CD workflows, called pipelines.

How to setup Jenkins using Docker Compose?

Jenkins is continuous integration server. It is open source and Java based tool. Jenkins can be setup using Docker Compose with less manual steps.


What is Docker Compose?
Compose is a tool for defining and running multi-container Docker applications. With Compose, you use a YAML file to configure your application’s services. Then, with a single command, you create and start all the services from your configuration. Since Docker Compose lets you configure related containers in a single YAML file, you get the same Infrastructure-as-Code abilities as Kubernetes. But they come in a simpler system that’s more suited to smaller applications that don’t need Kubernetes’ resiliency and scaling.
 
The purpose of docker-compose is to function as docker cli but to issue multiple commands much more quickly. To make use of docker-compose, you need to encode the commands you were running before into a docker-compose.yml file
 
Run docker-compose up and Compose starts and runs your entire app.

Pre-requisites:

Change Host Name to Jenkins
sudo hostnamectl set-hostname Jenkins

Perform system update
sudo apt update

Install Docker-Compose
sudo apt install docker-compose -y

Create docker-compose.yml
this yml has all configuration for installing Jenkins.
sudo vi docker-compose.yml 

(Copy the below code high-lighted in yellow color)
version: '3'
services:
  jenkins:
    image: jenkins/jenkins:lts
    restart: always
    privileged: true
    user: root
    ports:
      - 8080:8080
      - 50000:50000
    container_name: jenkins
    volumes:
      - /home/ubuntu/jenkins_compose/jenkins_configuration:/var/jenkins_home
      - /var/run/docker.sock:/var/run/docker.sock

Save the file by entering :wq!

Execute Docker compose command:
sudo docker-compose up -d 


Make sure Jenkins is up and running by checking the logs
sudo docker-compose logs --follow


Once you see the message, that's it. Jenkins is been installed successfully. press control C and enter.
Now access Jenkins UI by going to browser and enter public dns name with port 8080
Now to go to browser --> http://your_jenkins_publicdns_name:8080/

You can get the Admin password from above command as well.

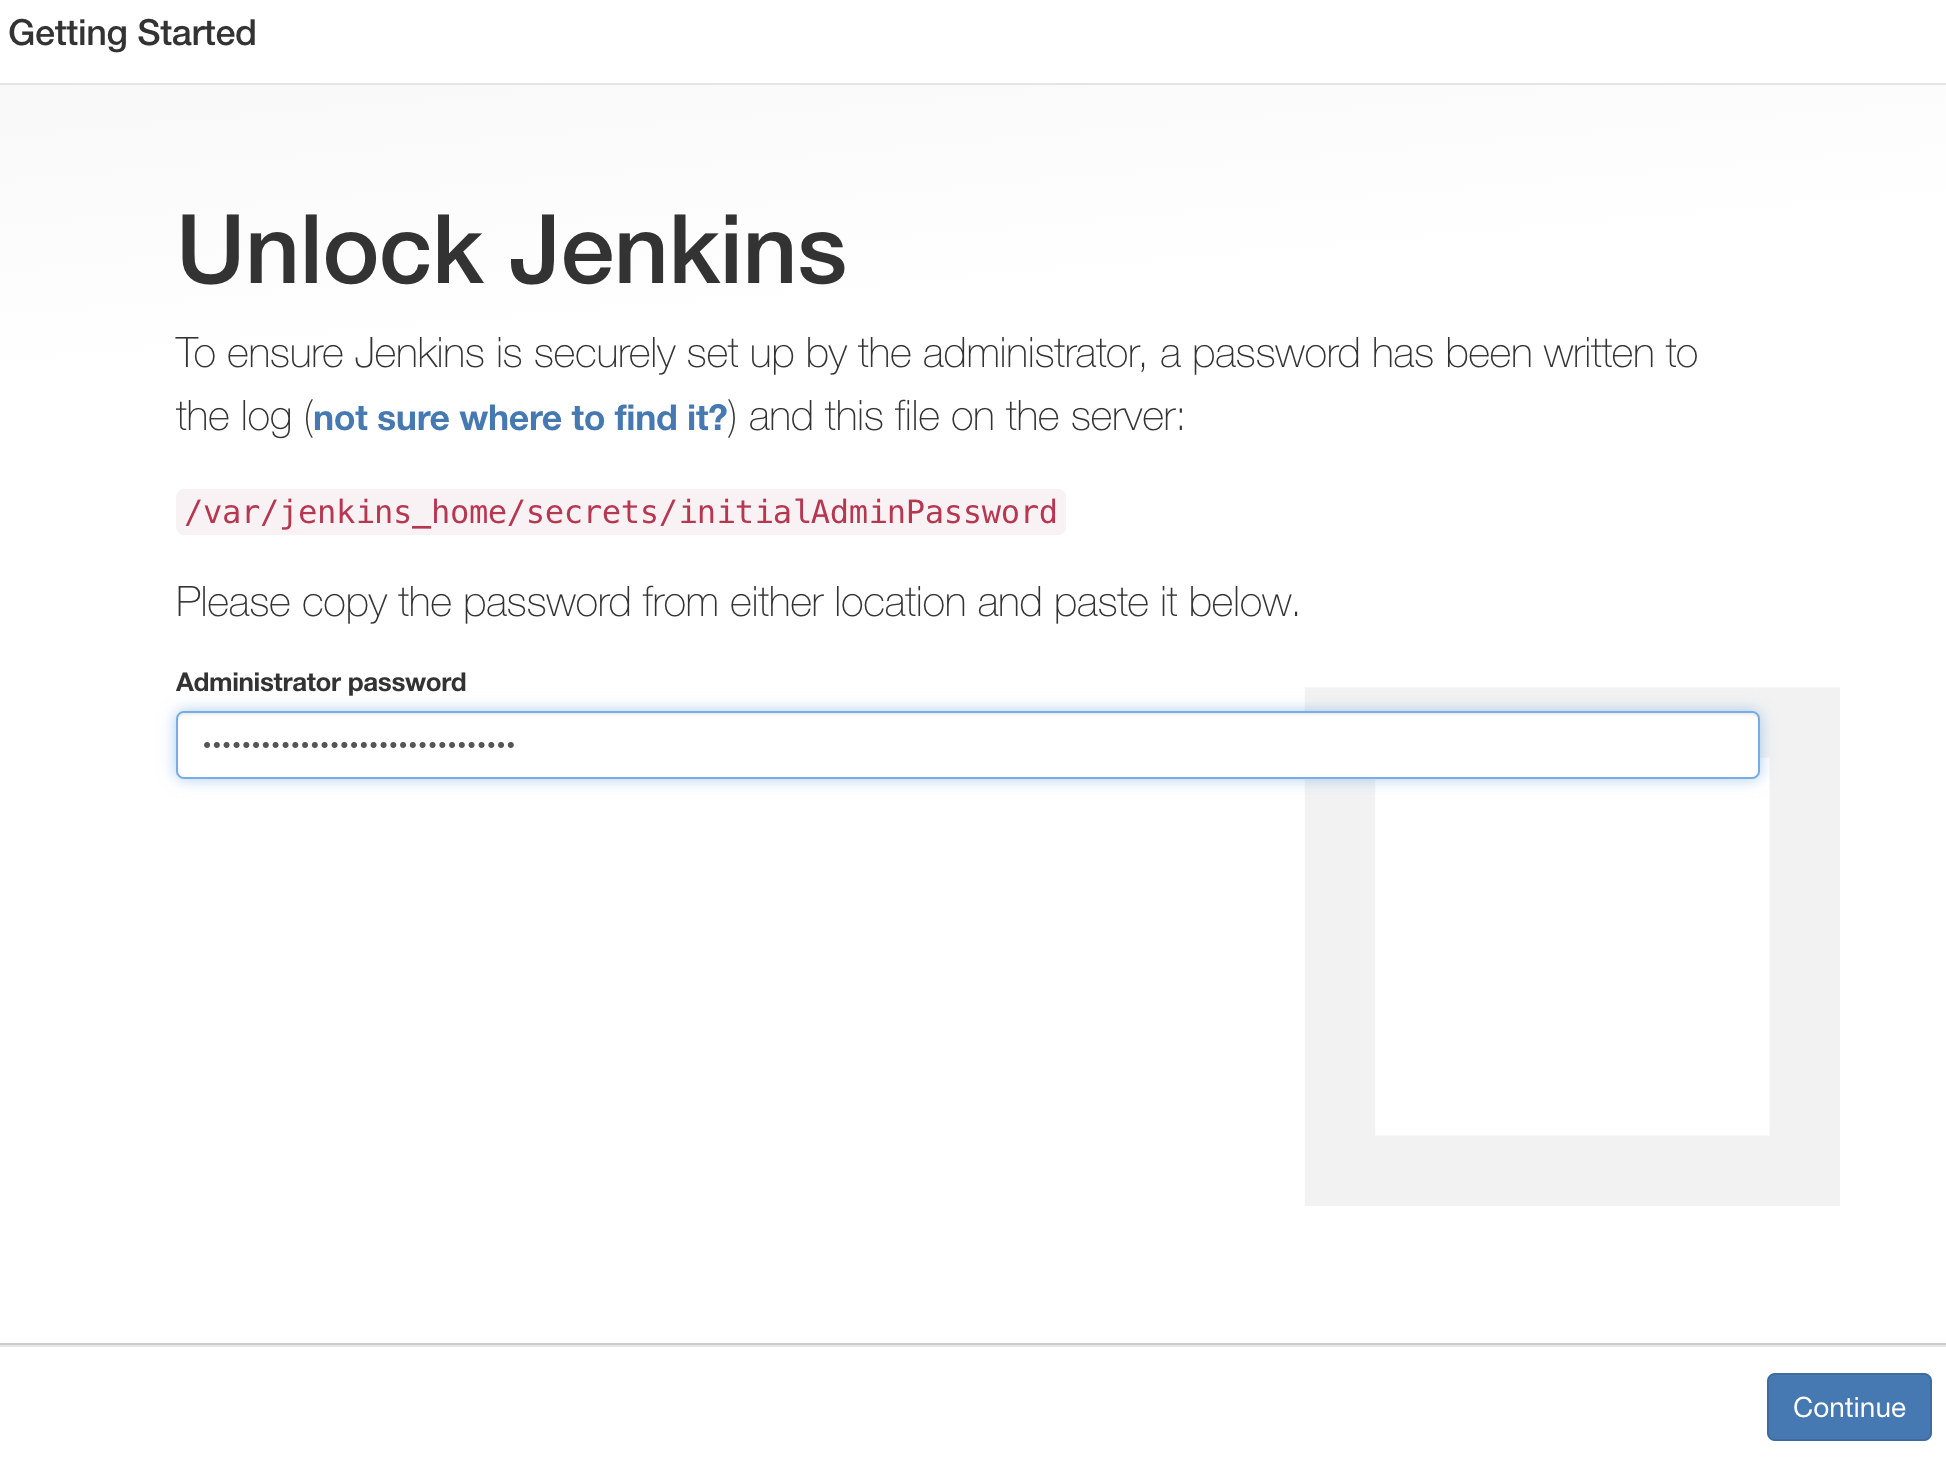
Enter Admin Password

Enter the password and Click on continue.
Then click on install suggested plug-ins. 
Also create user name and password.
enter everything as admin. at least user name as admin password as admin
Click on Save and Finish. Click on start using Jenkins. Now you should see a screen like below:


That's it. You have setup Jenkins successfully using Docker Compose.

To Clean Up Resources

sudo docker compose down


This should stop the Jenkins container that is running.

Click here to learn how to create a FreeStyle job in Jenkins to automate Build and Deployment of Java Web App.
Click here to learn how to create a Pipeline job in Jenkins to automate Build and Deployment of Java Web App.

Watch Steps in YouTube channel:

Friday, May 19, 2023

How to Deploy Springboot Microservices App into EKS cluster using Jenkins Pipeline and Helm | Deploy Microservices into EKS cluster using Helm and Jenkins Pipeline

We are going to learn how to automate build and deployment of Springboot Microservices Docker Container into Elastic Kubernetes Cluster(EKS) using Helm and Jenkins pipeline.

What is Helm?

Helm is a package manager for Kubernetes. Helm is the K8s equivalent of yum or apt. It accomplishes the same goals as Linux system package managers like APT or YUM: managing the installation of applications and dependencies behind the scenes and hiding the complexity from the user.

To learn more about Helm, please click here.

Sample springboot App Code:

I have created a sample Springboot App setup in GitHub. Click here to access code base in GitHub. 

Jenkins pipeline will:

- Automate maven build(jar) using Jenkins
- Automate Docker image creation
- Automate Docker image upload into Elastic container registry(ECR)
- Automate Springboot docker container deployments into Elastic Kubernetes Cluster using Helm charts


Pre-requisites:
1. EKS cluster needs to be up running. Click here to learn how to create Amazon EKS cluster.
2. Jenkins instance is up and running
3. Install AWS CLI on Jenkins instance
4. Helm installed on Jenkins instance for deploying to EKS cluster
5. Install Kubectl on Jenkins instance
6. Install eksctl on Jenkins instance
7. Install Docker in Jenkins and Jenkins have proper permission to perform Docker builds
8. Make sure to Install Docker, Docker pipeline 


10. Dockerfile created along with the application source code for springboot App.
11. Namespace created in EKS cluster

The Code for this video is here:

Create Helm chart using helm command
Go to your root of repo where you have source code for your springboot application. Create helm chart by executing below command:

helm create mychart
tree mychart
Execute the above command to see the files created.


Add Docker image details to download from ECR before deploying to EKS cluster
open mychart/values.yaml.


Enter service type as LoadBalancer
And also
open mychart/templates/deployment.yaml and change containerPort to 8080


Save the files, commit and push into repo.

Step # 1 - Create Maven3 variable under Global tool configuration in Jenkins
Make sure you create Maven3 variable under Global tool configuration. 


Step # 2 - Create a namespace in EKS
kubectl create ns helm-deployment

Step # 3 - Create a pipeline in Jenkins
Create a new pipeline job.

Step # 4 - Copy the pipeline code from below
Make sure you change below red marked values as per your settings highlighted in yellow below:

pipeline {
   tools {
        maven 'Maven3'
    }
    agent any
    environment {
        registry = "account_id.dkr.ecr.us-east-1.amazonaws.com/my-docker-repo"
    }
   
    stages {
        stage('Cloning Git') {
            steps {
                checkout([$class: 'GitSCM', branches: [[name: '*/master']], doGenerateSubmoduleConfigurations: false, extensions: [], submoduleCfg: [], userRemoteConfigs: [[credentialsId: '', url: 'https://github.com/akannan1087/docker-spring-boot']]])     
            }
        }
      stage ('Build') {
          steps {
            sh 'mvn clean install'           
            }
      }
    // Building Docker images
    stage('Building image') {
      steps{
        script {
          dockerImage = docker.build registry 
          dockerImage.tag("$BUILD_NUMBER")
        }
      }
    }
   
    // Uploading Docker images into AWS ECR
    stage('Pushing to ECR') {
     steps{  
         script {
                sh 'aws ecr get-login-password --region us-east-1 | docker login --username AWS --password-stdin account_id.dkr.ecr.us-east-1.amazonaws.com'
                sh 'docker push account_id.dkr.ecr.us-east-1.amazonaws.com/my-docker-repo:$BUILD_NUMBER'
         }
        }
      }
        stage ('Helm Deploy') {
          steps {
            script {
                sh "helm upgrade first --install mychart --namespace helm-deployment --set image.tag=$BUILD_NUMBER"
                }
            }
        }
    }
}

Step # 5 - Build the pipeline


Step # 6 - Verify deployments in EKS
Execute the below command to list the helm deployments:
helm ls -n helm-deployment


kubectl get pods -n helm-deployment

kubectl get services -n helm-deployment

Steps # 7 - Access Springboot App Deployed in EKS cluster
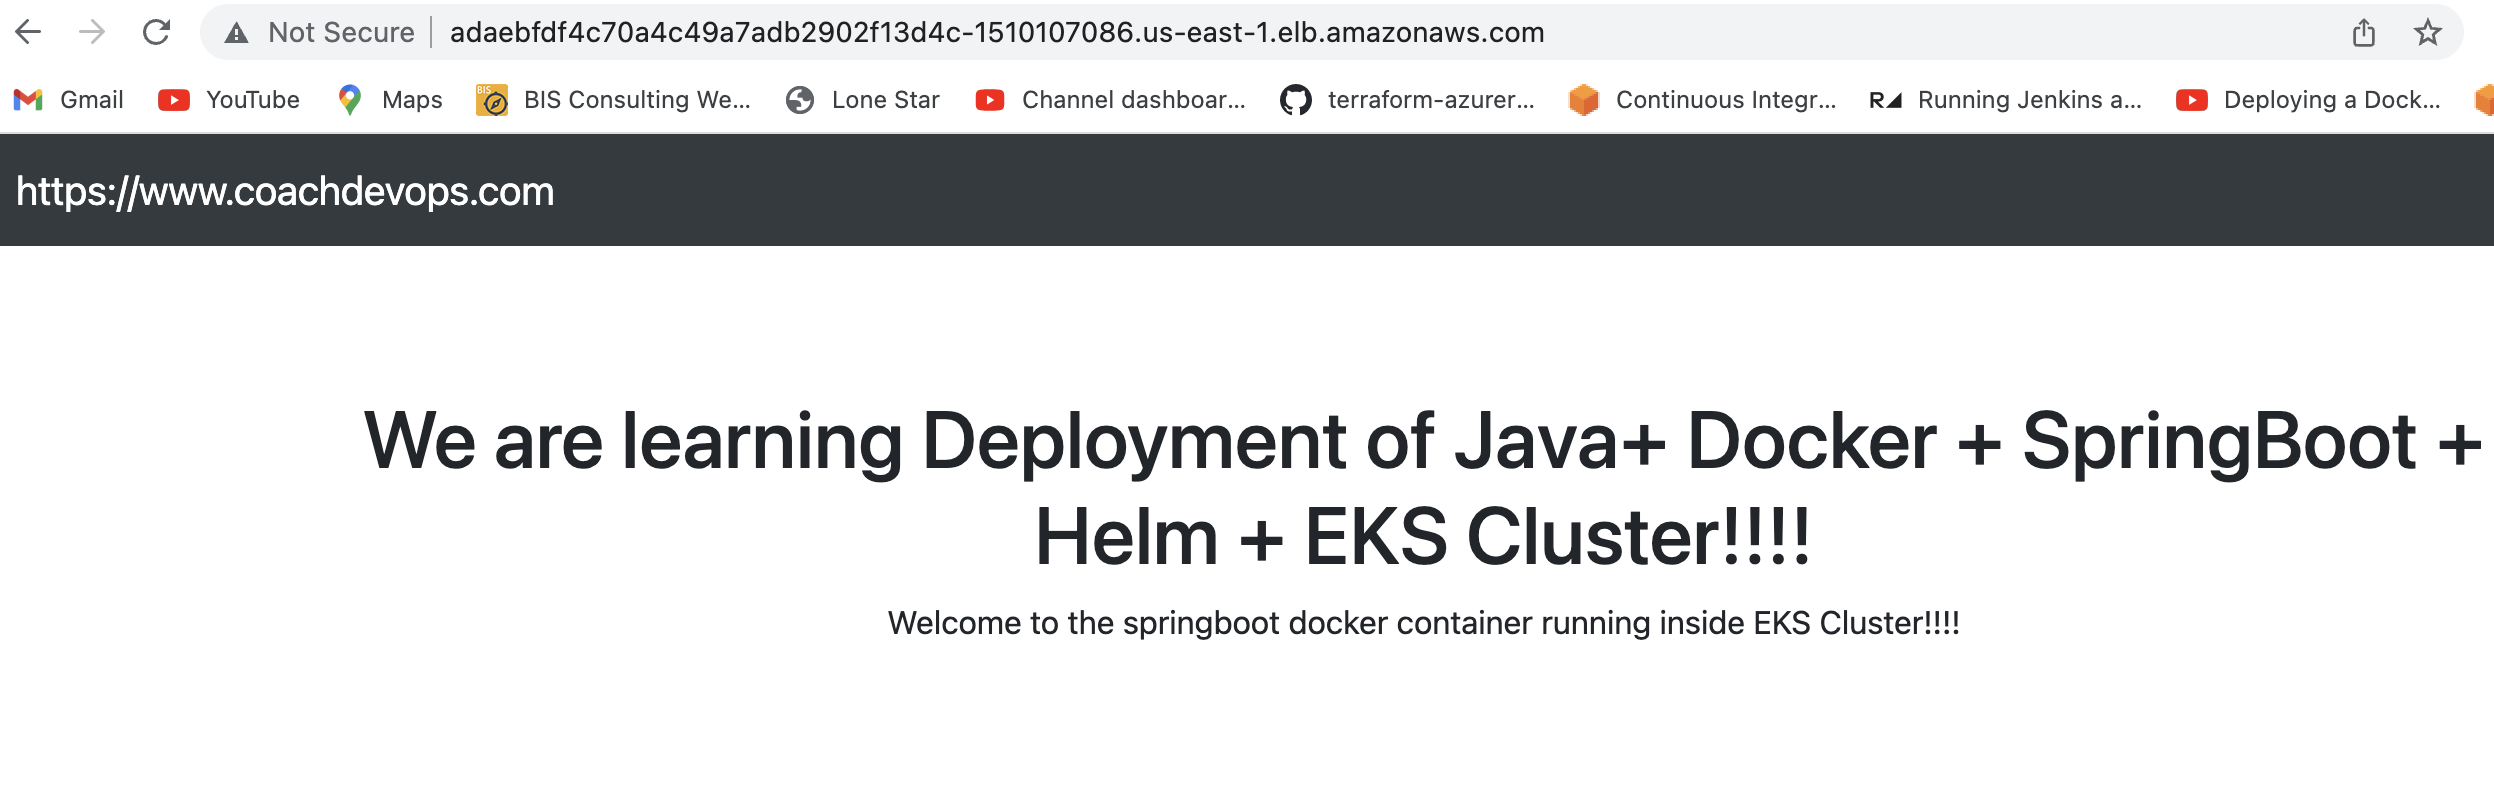
Once deployment is successful, go to browser and enter above load balancer URL mentioned above

You should see page like below:

Cleanup EKS Cluster using eksctl
To avoid charges from AWS, you should clean up resources. 

eksctl delete cluster --name demo-eks --region us-east-1


Watch steps in Youtube channel:

Errors during Deployment:
If you are running into any Deployment errors like below from the pipeline, you can fix it by downgrading helm version.

Root cause and fix:
Downgrading helm version to 3.8.2 would resolve the issue.

curl -L https://git.io/get_helm.sh | bash -s -- --version v3.8.2

Click here for more information


Sunday, May 14, 2023

CICD Process Flow Diagram | Implement CICD using Azure DevOps and Deploy Applications into Azure Cloud

 CICD Process Flow Diagram - How to Implement CICD using Azure DevOps?


Azure DevOps (previously known as VSTS) is Microsoft's cloud based offering for any technology stack, any platform to turn idea into a product. You can migrate any applications into Azure by building pipelines in Azure Devops. Lets us quickly see what are the services provided by Azure Devops.


What is Continuous Integration?

Continuous integration is a DevOps software development practice where developers regularly merge their code changes into a central repository, after which automated builds and tests are run.

The key goals of continuous integration are to find and address bugs quicker, improve software quality, and reduce the time it takes to validate and release new software updates.

Azure DevOps is a software as a service (SaaS) platform that provides DevOps practices and tools for the end-to-end software life cycle.

How does Continuous Integration Work?

Developers frequently commit to a shared repository using a version control system such as Git. Prior to each commit, developers may choose to run local unit tests on their code as an extra verification layer before integrating. A continuous integration service automatically builds and runs unit tests on the new code changes to immediately surface any errors.

Benefits of Continuous Integration
  • Improve Developers productivity 
  • Find bugs early in the software development stage
  • Deliver products into market place sooner
  • Improve the feedback loop
What is Continuous Delivery?

Continuous delivery is a software development practice where code changes are automatically prepared for a release to production. Continuous delivery is the next extension of continuous integration. The delivery phase is responsible for packaging an artifact together to be delivered to end-users. This phase runs automated building tools to generate this artifact.

Benefits of Continuous Delivery
  • Automate the Software Release Process
  • Improve Developer Productivity
  • Find bugs early in the software development stage
  • Deliver updates faster

Tuesday, May 9, 2023

🚀 Live AI-Enabled DevSecOps & Cloud Engineering Bootcamp – Sep 2026

Live AI-Enabled DevSecOps & Cloud Engineering Bootcamp from Coach AK - Sep 2026 Schedule