The Azure command-line interface (Azure CLI) is a set of commands used to create and manage Azure resources. The Azure CLI is available across Azure services and is designed to get you working quickly with Azure, with an emphasis on automation. Azure CLI is Microsoft's cross-platform command-line experience for managing Azure resources.
Azure CLI can be installed in Windows using MSI or Zip distributions:
Download and install the latest release of the Azure CLI. When the installer asks if it can make changes to your computer, select the "Yes" box.
3.Click on + Add or click on Create app service Click on Web App. Choose your Azure subscription, usually Pay as you Go or Free trial subscription Create a new resource group or you can use existing resource group)
Enter App service name(it should be unique) Publish as Code Run time stack as Java 17
Java Web Server stack --> Tomcat 10.0 Operating System as Linux Region as Central US or where ever you are based at
Enter LinuxPlan name Choose pricing plan
Now go to Deployment tab:
Enable basic authentication
and enable Continuous Deployment
Click on GitHub account, Authorize.
Authorize AzureappService
now select organization, repo, branch
You can also click on preview file to get pipeline YAML code
Click on Review and Create
Create Web App
Now make sure AzureAppService_PublishProfile secret is automatically created in GitHub repo you selected.
Create GitHub Actions CICD workflow yaml:
name: Build and deploy WAR app to Azure Web App on: push: branches: - main workflow_dispatch: jobs: build: runs-on: ubuntu-latest steps: - uses: actions/checkout@v4 - name: Set up Java version uses: actions/setup-java@v2 with: java-version: '11' distribution: 'adopt' - name: Build with Maven run: mvn clean install -f MyWebApp/pom.xml - name: Upload artifact for deployment job uses: actions/upload-artifact@v3 with: name: MyWebApp path: '${{ github.workspace }}' deploy: runs-on: ubuntu-latest needs: build environment: name: 'Production' url: ${{ steps.deploy-to-webapp.outputs.webapp-url }} steps: - name: Download artifact from build job uses: actions/download-artifact@v3 with: name: MyWebApp - name: Deploy to Azure Web App id: deploy-to-webapp uses: azure/webapps-deploy@v2 with: app-name: 'spingbootwebapp' slot-name: 'Production' publish-profile: ${{ secrets.AZUREAPPSERVICE_PUBLISHPROFILE_76B948D486E54ED7B06775D572207D40 }} package: '*.war'
Check the output after running the pipeline:
Verify if WebApp has been deployed into Azure App Service by browsing Web App url.
How to setup Ansible on Red Hat Linux VM and Integrate with Azure Cloud?
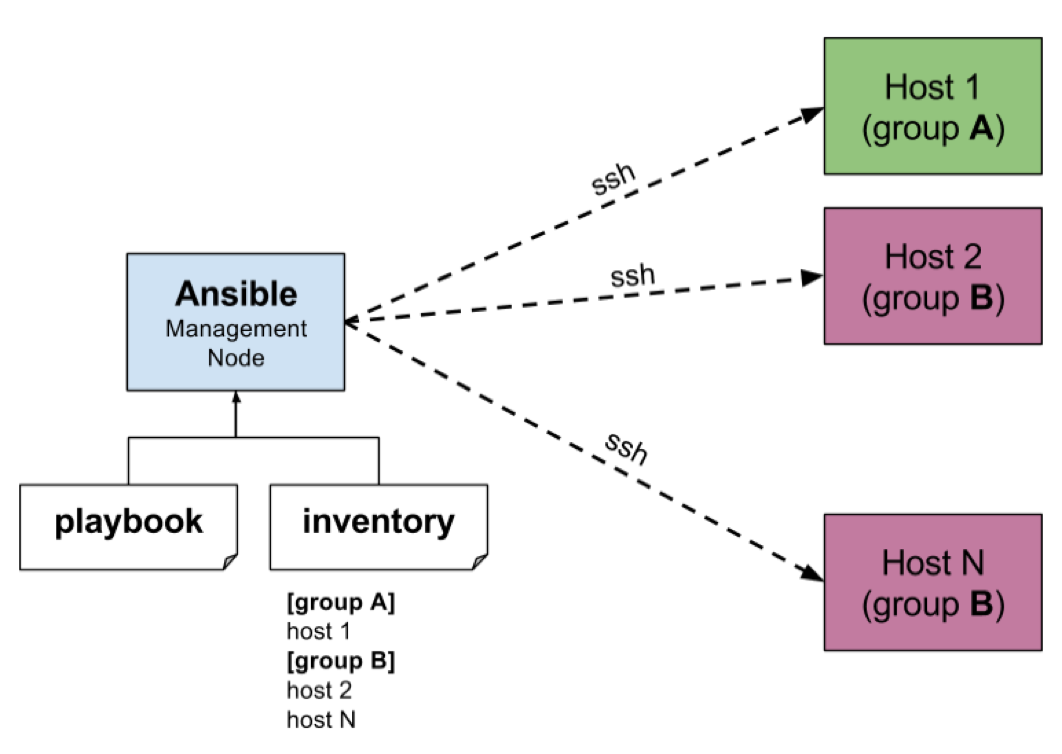
Ansible is #1 configuration management tool. It can also be used for infrastructureprovisioning as well. or You can use Ansible in combination of Terraform which can take care of infra automation and Ansible can do configuration management. We will be setting up Ansible on Red Hat VM in Azure cloud And create some resources in Azure Cloud by using Ansible playbooks.
Ansible Architecture:
The best way to install Ansible in Linux is to use PIP, a package manager for Python.
In this section, you create a local credentials file to provide credentials to Ansible. For security reasons, credential files should only be used in development environments.
mkdir ~/.azure
vi ~/.azure/credentials
Insert the following lines into the file. Replace the placeholders with the service principal values.
Ansible is #1 configuration management tool. It can also be used for infrastructureprovisioning as well. or You can use Ansible in combination of Terraform which can take care of infra automation and Ansible can do configuration management. We will be setting up Ansible on Azure Ubuntu VM.
Ansible Architecture:
The best way to install Ansible for Ubuntu is to add the project's PPA (personal package archive) to your system.
Let's say that you have created any resources in Azure Cloud by some other
means(manually or using azure CLI) before you started using Terraform. You
can import them under Terraform management instead of destroying and
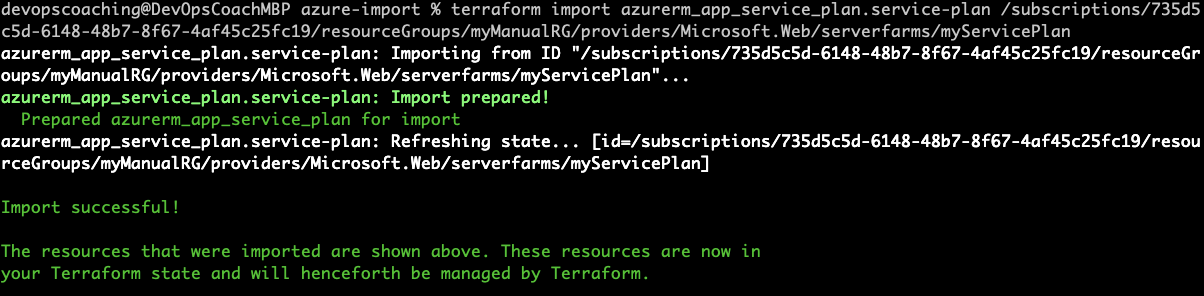
re-creating them from scratch. Theterraform importcommand can be used to import existing resources.
This command currently can import only one resource at a time. This means you can't yet point Terraform import to an entire collection
of resources such as azure resource group and import all the resources under
that group.
To achieve this import exercise, we will do the following:
1. Create resource group, app service manually in Azure cloud (yes, by not
using terraform)
2. Create terraform file and write code to create the resource.
3. Run terraform apply to see the error complaining resource exists
4. run terraform import
5. Verify in the state file that resource is imported into Terraform state.
6. Perform terraform destroy to clean up the imported resources
Watch the steps in YouTube channel:
Pre-requisites:
1. Install Terraform on your machine
2. Azure account setup
3. VS Code or any IDE
Let's create the resource manually in Azure Cloud first
To import any resource, create a tf file first write a resource block for
it in your configuration, establishing the name by which it will be known to
Terraform:


.png)