Checkov is a static code analysis tool designed to scan Infrastructure as Code (IaC) files and identify potential security and compliance misconfigurations.
How to install Checkov on Linux Ubuntu?
There are several ways to install Checkov on Ubuntu 22.04, but we will be using PIP.
1. Using pip (Recommended):
This is the most common and generally recommended method as it installs the latest stable version and manages dependencies easily.
Prerequisites: Ensure you have Python and pip installed. If not, open your terminal and run:
sudo apt update
sudo apt install python3-pip -y
Install Checkov: Once pip is installed, run the following command to install Checkov:
sudo pip3 install checkov
Verify Installation: After the installation is complete, you can verify it by checking the Checkov version:
checkov --version
This should print the installed Checkov version.
How to Scan Terraform files using Checkov?
Make sure Terraform is installed in your machine where you will be performing scanning.
Navigate to Terraform directory where you created Terraform files and execute the below command:
For e.g., if you have created terraform files under project-terraform directory, navigate to that dir.
cd project-terraform
Run the below command to scan terraform files:
checkov -d .
Now you will see the issues(if there are any) with TF files like below:
Based on the errors, you can resolve the issues one by one.
Checkov is an open source, static code analysis tool designed to scan Infrastructure as Code (IaC) files and identify potential security and compliance misconfigurations.
Supported IaC types:
Checkov scans following IaC file types:
Terraform (for AWS, GCP, Azure and OCI)
CloudFormation (including AWS SAM)
Azure Resource Manager (ARM)
Serverless framework
Helm charts
Kubernetes
Docker
Here's a breakdown of Checkov tutorials
Getting Started and Basic Usage:
Installation: Checkov can be installed using pip, brew, or Docker. For example, using pip:
sudo apt install python3-pip -y
sudo pip3 install checkov
Basic Scanning: To scan a single file or a directory, use the -f (file) or -d (directory) flags:
checkov -f main.tf
checkov -d /path/to/your/iac/code
Output: Checkov provides a detailed output of passed and failed checks, including the check ID, description, the resource and file location, and a link to more information about the policy
Specifying Frameworks: You can specify the IaC framework to scan using the --framework flag:
Output Formats: Checkov supports various output formats using the --output flag, such as cli (default), json, junitxml, and sarif. For e.g, for JSON output format, use below command:
GitHub Advanced Security for Azure DevOps brings the secret scanning, dependency scanning and CodeQL code scanning solutions already available for GitHub users and natively integrates them into Azure DevOps to protect your Azure Repos and Pipelines.
These scanning tools will natively embed automated security checks into the Azure DevOps platform, allowing developers to secure their code, secrets and supply chain without leaving their workflow.
Azure DevOps Advanced Security provides below security features to help organizations identify and address security vulnerabilities in their development processes.
Secret Scanning push protection: check if code pushes include commits that expose secrets such as credentials
Secret Scanning on repos: scan your repository and look for exposed secrets that were committed accidentally
Dependency Scanning – search for known vulnerabilities in open source dependencies (direct and transitive)
Code Scanning – use CodeQL static analysis engine to identify code-level application vulnerabilities such as SQL injection and authentication bypass.
Scope of GitHub Advanced Security for Azure DevOps
only available for Git repositories
only available for Azure DevOps services, not available in Azure DevOps Server(old TFS)
You can enable Advanced Security at the organization, project, or repository level.
Organization-level onboarding
Go to your Organization settings for your Azure DevOps organization.
Select Repositories.
Select Enable all and see an estimate for the number of active committers for your organization appear.
Select Begin billing to activate Advanced Security for every existing repository in each project in your organization.
Optionally, select Automatically enable Advanced Security for new repositories so that any newly created projects have Advanced Security enabled upon creation.
Project-level onboarding
Go to your Project settings for your Azure DevOps project.
Select Repos.
Select the Settings tab.
Select Enable all and see an estimate for the number of active committers for your project appear.
Select Begin billing to activate Advanced Security for every existing repository in your project.
Optionally, select Automatically enable Advanced Security for new repositories so that any newly created repositories have Advanced Security enabled upon creation.
Repository-level onboarding
Go to your Project settings for your Azure DevOps project.
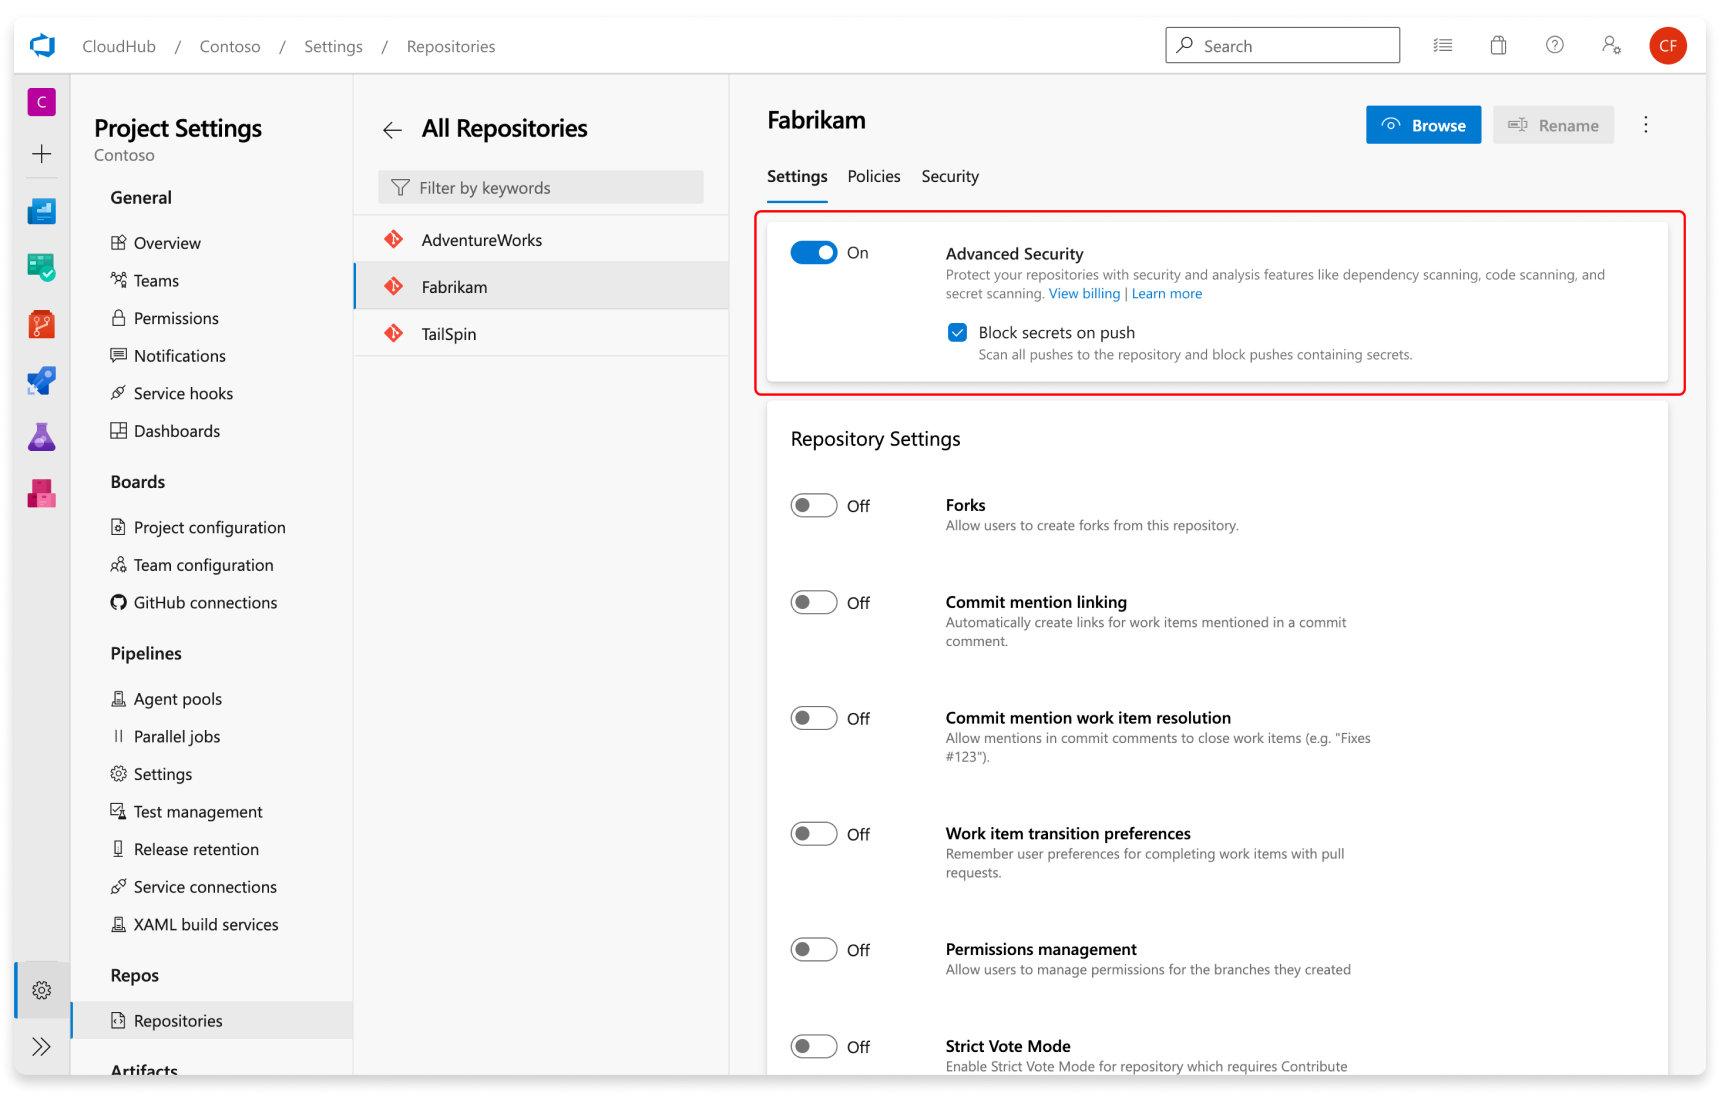
Select Repos > Repositories.
Select the repository you want to enable Advanced Security for.
Select Enable and Begin billing to activate Advanced Security. A shield icon now appears in the repository view for any repository with Advanced Security enabled.
Setup Secret Scanning Secret scanning push protection and repository scanning are automatically enabled when you turn on Advanced Security. You can enable or disable secret push protection from the repository settings page.
As mentioned, secret scanning repository scanning is automatically kicked off upon enabling Advanced Security for a selected repository.