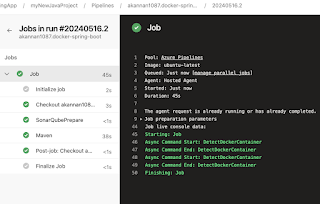
Please find steps below for integrating SonarQube Cloud to perform static code analysis from Azure DevOps and automate this workflow by writing Azure devops yaml pipeline.
Once added SonarQube plug-in, click on proceed to Organization..
How to integrate SonarQube Cloud with Azure DevOps:
Create Token in SonarQube Cloud to authenticate with Azure DevOps
You need to login to SonarQube using your admin password. admin/admin123 and click on Admin on your top side.
Click on My Account, Security.
Under Tokens, Give some value for token name and choose Global analysis token, click on generate Tokens. Copy the token value generated.
Create Service Connections in Azure DevOps
Login to Azure DevOps. Select your project dashboard.
Click on Project settings --> Service connections
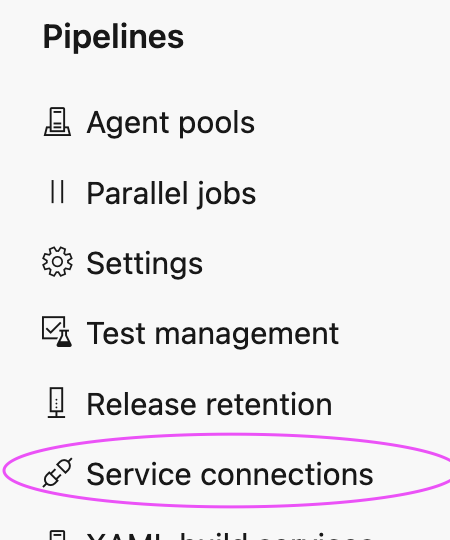
click on New service connection
Type SonarQube and Click Next
Enter SonarQube server url as https://sonarcloud.io/
and enter Token created
Give name for service connection and select grant access permission to all pipelines.
Click on Save.
Create a YAML Pipeline in Azure DevOps
1. Login to Azure DevOps. Go to Azure Pipelines. Click on create a new pipeline, Select GitHub:
2. Select your GitHub repo and select the Maven as YAML pipeline template
3. Click on show assistant on right hand side, type SonarQube and select Prepare Analysis on SonarQube task and then select Service connection from the drop down and choose Integrate with Maven or Gradle option and then click on Add task
Azure DevOps offers two main types of pipelines for automating workflows: Classic Pipelines and YAML Pipelines.
1. Classic Pipelines (GUI-based Pipelines)
These pipelines are created and managed using a graphical user interface (GUI) in Azure DevOps. They are suitable for users who prefer a no-code or low-code approach and need an easier setup. Classic pipelines consist of:
Build Pipelines: Automates the process of compiling code, running tests, and producing binaries.
Release Pipelines: Manages the deployment of applications to various environments such as staging, production, etc.
Features:
Drag-and-drop interface.
Predefined templates.
Suited for users who prefer visual, step-by-step management of tasks.
Example:
Click here for configuring Azure DevOps Classic pipeline for a Java Web App.
2. YAML Pipelines (Code-based Pipelines)
These pipelines are defined as code using YAML syntax, giving you full control over the pipeline's configuration. YAML pipelines offer a more flexible, scalable, and maintainable approach for CI/CD.
Key features:
Continuous Integration (CI): Automates the process of integrating code changes from multiple contributors in a shared repository.
Continuous Delivery (CD): Automates the deployment of applications to production environments.
Advantages:
Fully version-controlled, as the pipeline definition is part of the codebase.
Supports multi-stage pipelines, allowing you to define build, test, and deployment stages in a single file.
Ideal for more complex workflows and teams that require a more DevOps-oriented, infrastructure-as-code approach.
Example:
Click here for configuring Azure DevOps YAML pipeline for a Java Web App.
Once added SonarQube plug-in, click on proceed to Organization..
How to integrate SonarQube with Azure DevOps:
Create Token in SonarQube to authenticate with Azure DevOps
You need to login to SonarQube using your admin password. admin/admin123 and click on Admin on your top side.
Click on My Account, Security.
Under Tokens, Give some value for token name and choose Global analysis token, click on generate Tokens. Copy the token value generated.
Create Service Connections in Azure DevOps
Login to Azure DevOps. Select your project dashboard.
Click on Project settings --> Service connections
click on New service connection
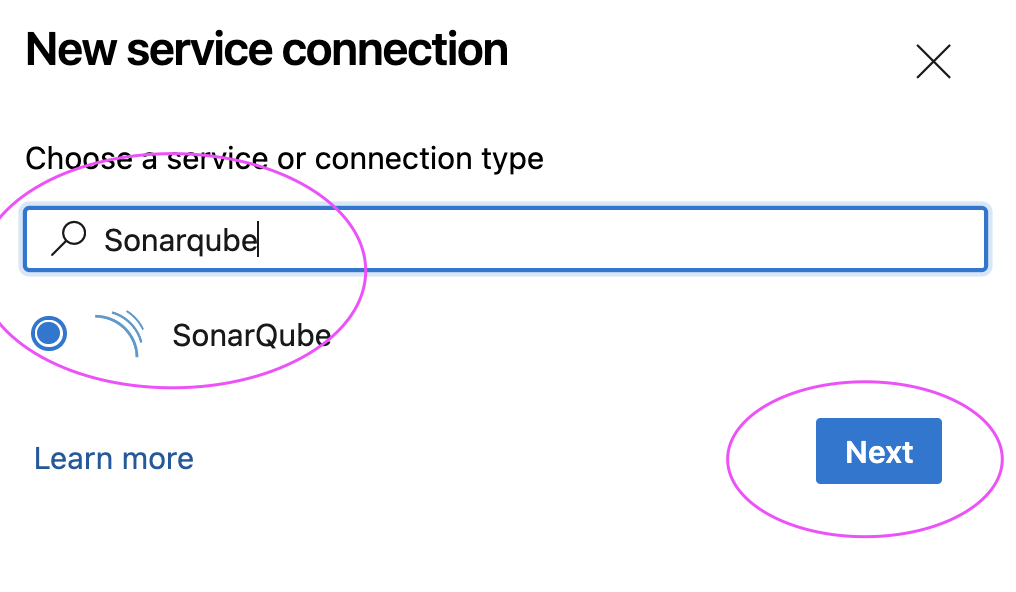
Type SonarQube and Click Next
Enter SonarQube server url and enter Token created
Give name for service connection and select Grant access permission to all pipelines.
Click on Save.
Create a YAML Pipeline in Azure DevOps
1. Login to Azure DevOps. Go to Azure Pipelines. Click on create a new pipeline, Select GitHub:
2. Select your GitHub repo and select the Maven as YAML pipeline template
3. Click on show assistant on right hand side, type SonarQube and select Prepare Analysis on SonarQube task and then select Service connection from the drop down and choose Integrate with Maven or Gradle option and then click on Add task
Sample Code for entire pipeline is here below
Azure DevOps Pipeline YAML Code:
# Maven
# Build your Java project and run tests with Apache Maven.
# Add steps that analyze code, save build artifacts, deploy, and more:
Ansible is an open-source, configuration management tool that automates cloud provisioning, configuration management, and application deployments.
Ansible Playbooks
Ansible playbooksallow you to direct Ansible to configure your environment. Playbooks are coded using YAML so as to be human-readable.
Watch steps in YouTube channel:
Automate Azure Web App setup using Ansible and Azure pipeline
Integrate Ansible with Azure Cloud
Integrating Ansible with Microsoft Azure allows you to automate and manage your Azure infrastructure using Ansible playbooks and modules. Ansible provides a collection of Azure-specific modules that enable you to provision and configure resources in Azure.
To configure Azure credentials, you need the following information:
Your Azure subscription ID and tenant ID
The service principal application ID and secret
Pre-requisites:
Azure account subscription, click here if you don't have one.
Run the following commands to create an Azure Service Principal:
az ad sp create-for-rbac --name ansible-azure-sp --role Contributor --scopes /subscriptions/<subscription_id>
Save the above output in a file as you will not be able retrieve later.
Create an Ansible playbook - create-linux-app-svc.yml
Create a simple playbook to create resource group in Azure and also a Azure App Service. Make sure you modify the name of the resource group, Azure WebApp and location below.
- hosts: localhost
connection: local
vars:
resource_group: myResourceGroup
webapp_name: myfirstAwesomeWebApp
plan_name: myAppServicePlan
location: eastus
tasks:
- name: Ensure resource group exists
azure_rm_resourcegroup:
name: myResourceGroup
location: East US
register: rg_result
- debug:
var: rg_result
- name: Create App Service on Linux with Java Runtime
How to Enable to use classic editor to create a pipeline without YAML in Azure DevOps ?
The "classic pipeline" is simply a term that refers to a simple way of creating pipelines in Azure DevOps using UI. The purpose of this web forms based assistant is basically to hide the complexity of the pipeline’s YAML based syntax. In other words, user can create pipelines without having to deal with “code”.
If classic editor option is disabled in Azure DevOps, you may see something like below in your Azure DevOps project. We can enable it by changing the settings at project or organizational level.
How to enable the classic build and release pipelines?
You can enable/disable it two ways
Organizational level
Project Level
In Azure DevOps, Go to Project Settings, Under Pipelines > Settings > General. Make sure 'Disable creation of classic build pipelines' and 'Disable creation of classic release pipelines' is turned off, to have classic editor shown after creating a project.
If those options are disabled, go to organizational level and do the same in 'Organization Settings'.
Select Pipelines --> Settings
Finally disable the options highlighted in the image below
when you go try creating a new pipeline, you should see the option now.
Optimizing Azure DevOps pipelines is crucial for achieving faster and more efficient software delivery. Here are some best practices and strategies for optimizing Azure DevOps pipelines:
1. Parallel Jobs and Stages:
Parallelization: Break down your pipeline into parallel jobs and stages to execute tasks concurrently, reducing overall pipeline execution time.
jobs:
- job: Build
pool:
vmImage: 'windows-latest'
steps:
- script: echo "Building..."
- job: Test
pool:
vmImage: 'windows-latest'
steps:
- script: echo "Testing..."
2. Agent Pools and Agents:
Agent Pools: Distribute builds across multiple agent pools to utilize available resources effectively. Configure agent capabilities to match job requirements.
3. Artifact Caching:
Cache Dependencies: Utilize caching to store and retrieve build artifacts between different pipeline runs, reducing the time spent on redundant build steps.
Trigger on Changes: Set up your pipeline to trigger builds only for changes in relevant branches. Use CI triggers to avoid unnecessary builds.
5. Artifact Promotion:
Promote Artifacts: Promote artifacts from one environment to another instead of rebuilding them. This helps maintain consistency across environments and reduces build times.
6. Use YAML Pipelines:
YAML Syntax: Use YAML-based pipelines for better version control and code review. YAML pipelines are more maintainable and offer a clearer representation of your CI/CD process.
7. Job and Step Conditions:
Conditions: Use conditions to selectively execute jobs or steps based on criteria such as branch names, variable values, or expressions.
Multi-Stage Builds: Utilize multi-stage Docker builds to create smaller and more efficient Docker images, reducing image size and improving deployment speed.
10. Azure Container Registry (ACR) Tasks:
- **ACR Build and Push:** Use Azure Container Registry Tasks for building and pushing Docker images directly within the pipeline, reducing the need for external scripts.
- task: ACRBuild@2
inputs:
azureSubscription: '<AzureServiceConnection>'
resourceGroupName: '<ResourceGroupName>'
registry: '<ACRName>'
imageName: '<ImageName>'
dockerfilePath: '<DockerfilePath>'
11. Deployment Strategies:
- **Deployment Strategies:** Choose appropriate deployment strategies such as rolling deployments, canary releases, or blue-green deployments based on your application's requirements.
12. Automated Testing:
- **Automated Tests:** Integrate automated tests into your pipeline to catch issues early. Azure DevOps supports various testing frameworks and test runners.
13. Parameterize Pipelines:
- **Pipeline Parameters:** Parameterize your pipelines to make them more flexible and reusable across different environments or scenarios.
14. Infrastructure as Code (IaC):
- **IaC:** Treat your infrastructure as code. Use Azure Resource Manager (ARM) templates or Terraform scripts for defining and deploying infrastructure.
15. Use Deployment Gates:
- **Gates:** Implement deployment gates to add quality checks before promoting changes to the next environment. Gates can include approvals, automated tests, or custom conditions.
Optimizing Azure DevOps pipelines is an iterative process. Regularly review and enhance your pipeline configurations to incorporate new best practices and improvements. Consider the specific needs and constraints of your projects when implementing optimizations.