Showing posts with label Code Quality. Show all posts

Friday, February 20, 2026

How to Integrate SonarQube Cloud with GitHub Actions | GitHub Actions SonarQube Cloud Integration | Automate Static Code Quality Analysis with SonarQube Cloud from GitHub Action

 Automate Static Code Quality Analysis in SonarQube Cloud from GitHub Actions


Pre-requisites in SonarCloud:


Depending on your SCM tool, We will use GitHub. So please click on it.
Enter GitHub credentials to setup your account in SonarCloud. Click Authorize SonarQube Cloud.


Go to SonarCloud → My Account → Organizations → Create/Select organization

Choose “Import from GitHub” (or connect GitHub) and Install the SonarCloud GitHub App

Start analyzing a project:

Select Project and Click on Setup:


Check any one of the options to confirm what is new code:

Select with other CI tools


Select Maven, note organization key, project key and token.

Pre-requisites in GitHub Actions:

    After setting up SonarCloud successfully, login to GitHub Actions. 
    Create two secrets SONAR_TOKEN and SONAR_HOST_URL
    Sonar URL should be https://sonarcloud.io/
     
    GitHub Actions CICD Workflw code for running scan in SonarCloud

    name: Implement static code analysis for a Java App using SonarQube from GitHub Actions
    on:
      push:
        branches:
          - main
      workflow_dispatch:
    jobs:
     build:
      runs-on: ubuntu-latest
      steps:
      - name: checkout code
        uses: actions/checkout@v3
      - name: Set up JDK 17
        uses: actions/setup-java@v4
        with:
          distribution: 'temurin'
          java-version: '17'
          cache: 'maven'
      - name: Build with Maven
        run: mvn clean install -f MyWebApp/pom.xml
      - name: Run SonarQube Scan
        uses: sonarsource/sonarqube-scan-action@master
        with:
          projectBaseDir: .
          args: >
            -Dsonar.organization=akannan1087
            -Dsonar.projectKey=akannan1087_my-javawebapp-repo
            -Dsonar.java.binaries=**/target/classes
        env:
          SONAR_TOKEN: ${{ secrets.SONAR_TOKEN }}
          SONAR_HOST_URL: ${{ secrets.SONAR_HOST_URL }}

    Now login to SonarCloud under --> https://sonarcloud.io/projects


    Watch steps in YouTube channel:

    Wednesday, January 28, 2026

    How to integrate SonarQube Cloud with Azure DevOps YAML Pipeline | SonarQube Cloud Integration with Azure DevOps | Automate Code Scan using SonarQube Cloud In Azure YAML Pipelines

    Please find steps below for integrating SonarQube Cloud to perform static code analysis from Azure DevOps and automate this workflow by writing Azure devops yaml pipeline.


    Pre-requisites in SonarQube Cloud:


      Click on Azure DevOps, enter your Microsoft credentials.
      Create an Organization, click on Import from a DevOps platform

      Create a Token in Azure DevOps with Read & Write Access under Code:

      Import organization details. Select free plan.


      Pre-requisites in Azure DevOps:

      • Azure DevOps Account
      • Make sure Java Project is setup in Azure Repos and default branch is either main or master.
      • Make sure you install SonarCloud plug-in/Add-on in Azure DevOps using below URL:
      How to add SonarQube Cloud plug-in in Azure DevOps?

      And look for SonarQube Cloud Add-on


      Once added SonarQube plug-in, click on proceed to Organization..


      How to integrate SonarQube Cloud with Azure DevOps:

      Create Token in SonarQube Cloud to authenticate with Azure DevOps
      You need to login to SonarQube using your admin password. admin/admin123 and click on Admin on your top side.
      Click on My Account, Security. 
      Under Tokens, Give some value for token name and choose Global analysis token, click on generate Tokens. Copy the token value generated.


      Create Service Connections in Azure DevOps 

      Login to Azure DevOps. Select your project dashboard.


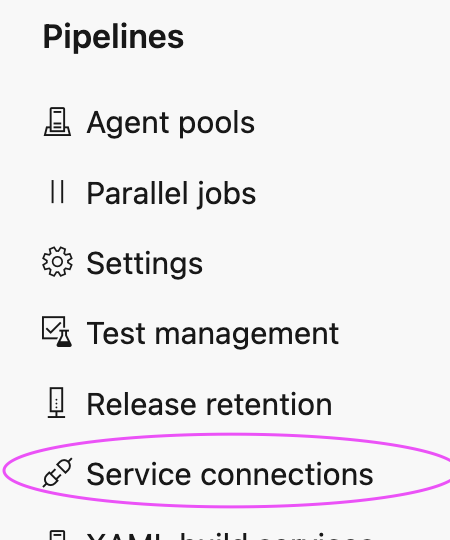
      Click on Project settings --> Service connections


      click on New service connection

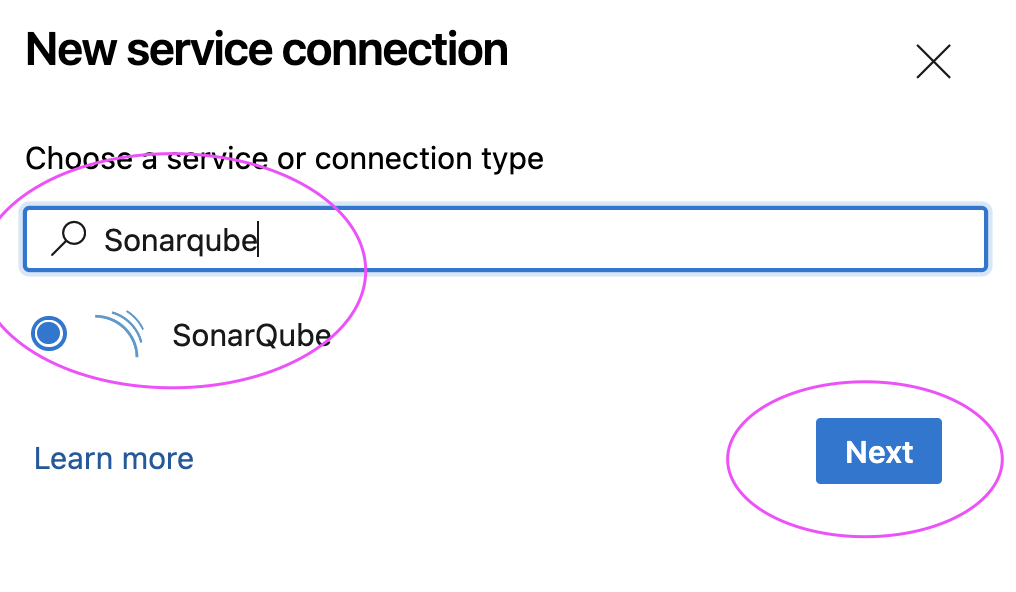
      Type SonarQube and Click Next

      Enter SonarQube server url as https://sonarcloud.io/
      and enter Token created 
      Give name for service connection and select grant access permission to all pipelines.
      Click on Save.


      Create a YAML Pipeline in Azure DevOps

      1. Login to Azure DevOps. Go to Azure Pipelines. Click on create a new pipeline, Select GitHub:

      2. Select your GitHub repo and select the Maven as YAML pipeline template

      3. Click on show assistant on right hand side, type SonarQube and select Prepare Analysis on SonarQube task and then select Service connection from the drop down and choose Integrate with Maven or Gradle option and then click on Add task


      Sample Code for entire pipeline is here below

      Azure DevOps Pipeline YAML Code:

      trigger:
      - main

      pool:
      vmImage: ubuntu-latest

      steps:
      - task: SonarCloudPrepare@4
      inputs:
      SonarQube: 'my_sonar_cloud'
      organization: 'mydevopscoachingapp'
      scannerMode: 'CLI'
      configMode: 'manual'
      cliProjectKey: 'MyDevopsCoachingApp_mySep2025WeekendRepo'
      cliProjectName: 'MyWebApp'
      - task: Maven@4
      inputs:
      mavenPomFile: 'MyWebApp/pom.xml'
      mavenOptions: '-Xmx3072m'
      javaHomeOption: 'JDKVersion'
      jdkVersionOption: '1.17'
      jdkArchitectureOption: 'x64'
      publishJUnitResults: true
      testResultsFiles: '**/surefire-reports/TEST-*.xml'
      goals: 'clean install sonar:sonar'


      Click on Save and Queue to kick start build.
      Now login to SonarCloud dashboard, click on Projects:


      Wednesday, May 15, 2024

      How to integrate SonarQube with Azure DevOps YAML Pipeline | SonarQube Integration with Azure DevOps | How to Automate Code Scan using SonarQube In Azure YAML Pipelines

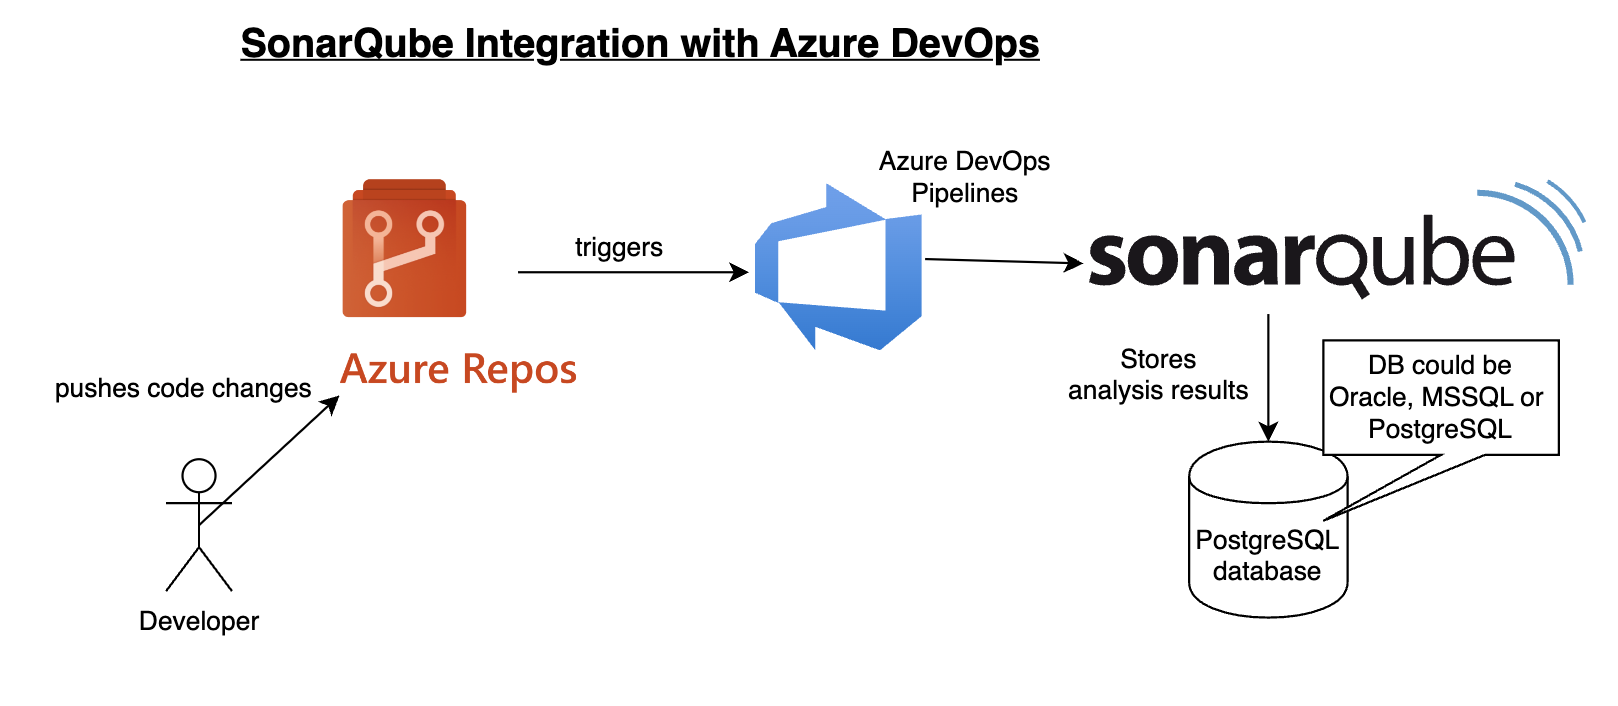
      Please find steps below for integrating SonarQube to perform static code analysis using Azure DevOps YAML pipeline.


      Pre-requisites:

      How to add SonarQube plug-in in Azure DevOps?

      https://marketplace.visualstudio.com/acquisition?itemName=SonarSource.sonarqube


      Once added SonarQube plug-in, click on proceed to Organization..


      How to integrate SonarQube with Azure DevOps:

      Create Token in SonarQube to authenticate with Azure DevOps
      You need to login to SonarQube using your admin password. admin/admin123 and click on Admin on your top side.
      Click on My Account, Security. 
      Under Tokens, Give some value for token name and choose Global analysis token, click on generate Tokens. Copy the token value generated.


      Create Service Connections in Azure DevOps 

      Login to Azure DevOps. Select your project dashboard.


      Click on Project settings --> Service connections


      click on New service connection

      Type SonarQube and Click Next

      Enter SonarQube server url and enter Token created 
      Give name for service connection and select Grant access permission to all pipelines.
      Click on Save.

      Create a YAML Pipeline in Azure DevOps

      1. Login to Azure DevOps. Go to Azure Pipelines. Click on create a new pipeline, Select GitHub:

      2. Select your GitHub repo and select the Maven as YAML pipeline template

      3. Click on show assistant on right hand side, type SonarQube and select Prepare Analysis on SonarQube task and then select Service connection from the drop down and choose Integrate with Maven or Gradle option and then click on Add task


      Sample Code for entire pipeline is here below

      Azure DevOps Pipeline YAML Code:

      # Maven
      # Build your Java project and run tests with Apache Maven.
      # Add steps that analyze code, save build artifacts, deploy, and more:

      trigger:
      - master

      pool:
        vmImage: ubuntu-latest
      steps:
      - task: SonarQubePrepare@5
        inputs:
          SonarQube: 'My_SonarQube'
          scannerMode: 'Other'
      - task: Maven@3
        inputs:
          mavenPomFile: 'pom.xml'
          mavenOptions: '-Xmx3072m'
          javaHomeOption: 'JDKVersion'
          jdkVersionOption: '1.17'
          jdkArchitectureOption: 'x64'
          publishJUnitResults: true
          testResultsFiles: '**/surefire-reports/TEST-*.xml'
          goals: 'clean install sonar:sonar'
      - task: PublishTestResults@2
        inputs:
          testResultsFormat: 'JUnit'
          testResultsFiles: '**/surefire-reports/TEST-*.xml'
          failTaskOnFailedTests: true


      Click on Save and Queue to kick start build.
      Now login to SonarQube dashboard, click on Projects


      Watch steps in YouTube channel:

      Tuesday, April 4, 2023

      SonarQube Server Cannot be reached Error Resolution | SonarQube Troubleshooting | Fix for max virtual memory areas vm.max_map_count [65530] is too low

       How to Resolve SonarQube Server cannot be reached Error?

      Pre-requisites:

      refer this page for pre-requisites to install SonarQube


      Resolution:

      Make sure EC2 instance or server where you are installing SonarQube has enough virtual memory and open file limits for  Linux OS.

      How to change default value for vm.max_map_count temporarily
      sudo sysctl vm.max_map_count=262144
      sudo sysctl fs.file-max=65536
      The above command will load the max_map_count values and open file limits till the next system restart.

      How to update vm.max_map_count directly in sysctl.conf permanently
      Login to instance where you will be installing SonarQube, perform the below command to configure virtual memory permanently for SonarQube to function:
      sudo vi /etc/sysctl.conf

      Add the following lines to the bottom of that file:

      vm.max_map_count=262144
      fs.file-max=65536

      To make sure changes are getting into effect:
      sudo sysctl -p

      Make sure SonarQube is up and running by checking the logs
      sudo docker-compose logs --follow


      Once you see the message, that's it. SonarQube have been configured successfully. press control C and enter.

      Watch Steps in YouTube channel:

      Monday, February 13, 2023

      How to integrate SonarQube with Azure DevOps | SonarQube Integration with Azure DevOps Classic Pipeline | Automate Code Scan using SonarQube In Azure Classic Pipelines

      Please find steps below for integrating SonarQube with Azure DevOps, Previously known as Visual Studio Team Services:


      Pre-requisites:

      https://marketplace.visualstudio.com/acquisition?itemName=SonarSource.sonarqube


      Once added SonarQube plug-in, click on proceed to Organization..


      Watch Steps in YouTube channel:

      How to integrate SonarQube with Azure DevOps:

      Create Token in SonarQube to authenticate with Azure DevOps
      You need to login to SonarQube using your admin password. admin/admin123 and click on Admin on your top side.
      Click on My Account, Security. 
      Under Tokens, Give some value for token name and choose Global analysis token, click on generate Tokens. Copy the token value generated.


      Create Service Connections in Azure DevOps 

      Login to Azure DevOps. Select your project dashboard.


      Click on Project settings --> Service connections


      click on New service connection

      Type SonarQube and Click Next

      Enter SonarQube server url and enter Token created 
      Give name for service connection and select Grant access permission to all pipelines.
      Click on Save.

      Create a Pipeline in Azure DevOps

      1. Login to Azure DevOps. Go to Azure Pipelines. Click on create a new pipeline, use classic editor 
      Select your Azure Repos
      Type Maven and choose maven template as shown below


      2. Click on Add tasks
      3. Type Sonar


      4. Add Prepare Analysis on SonarQube task
      5. move up this task to all the way up.
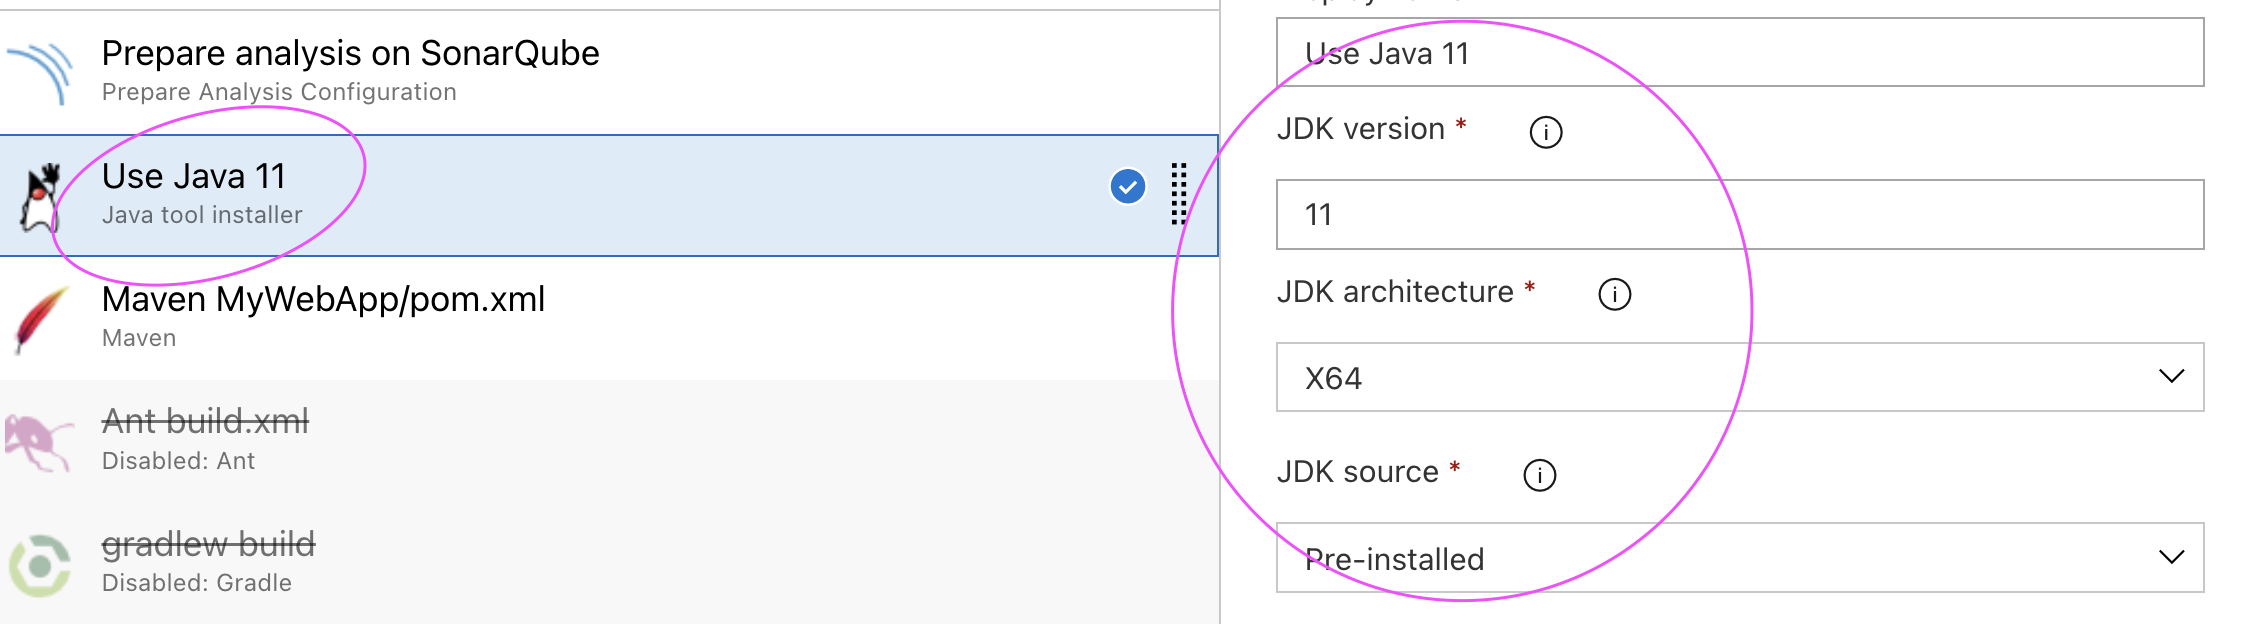
      And also search for Java tool installer task and add it


      It should be like shown below:


      6. Click on prepare sonar analysis configuration task

      select Integrate with Maven or Gradle option

      7.Click on Java tool installer and change to 11 instead of 8


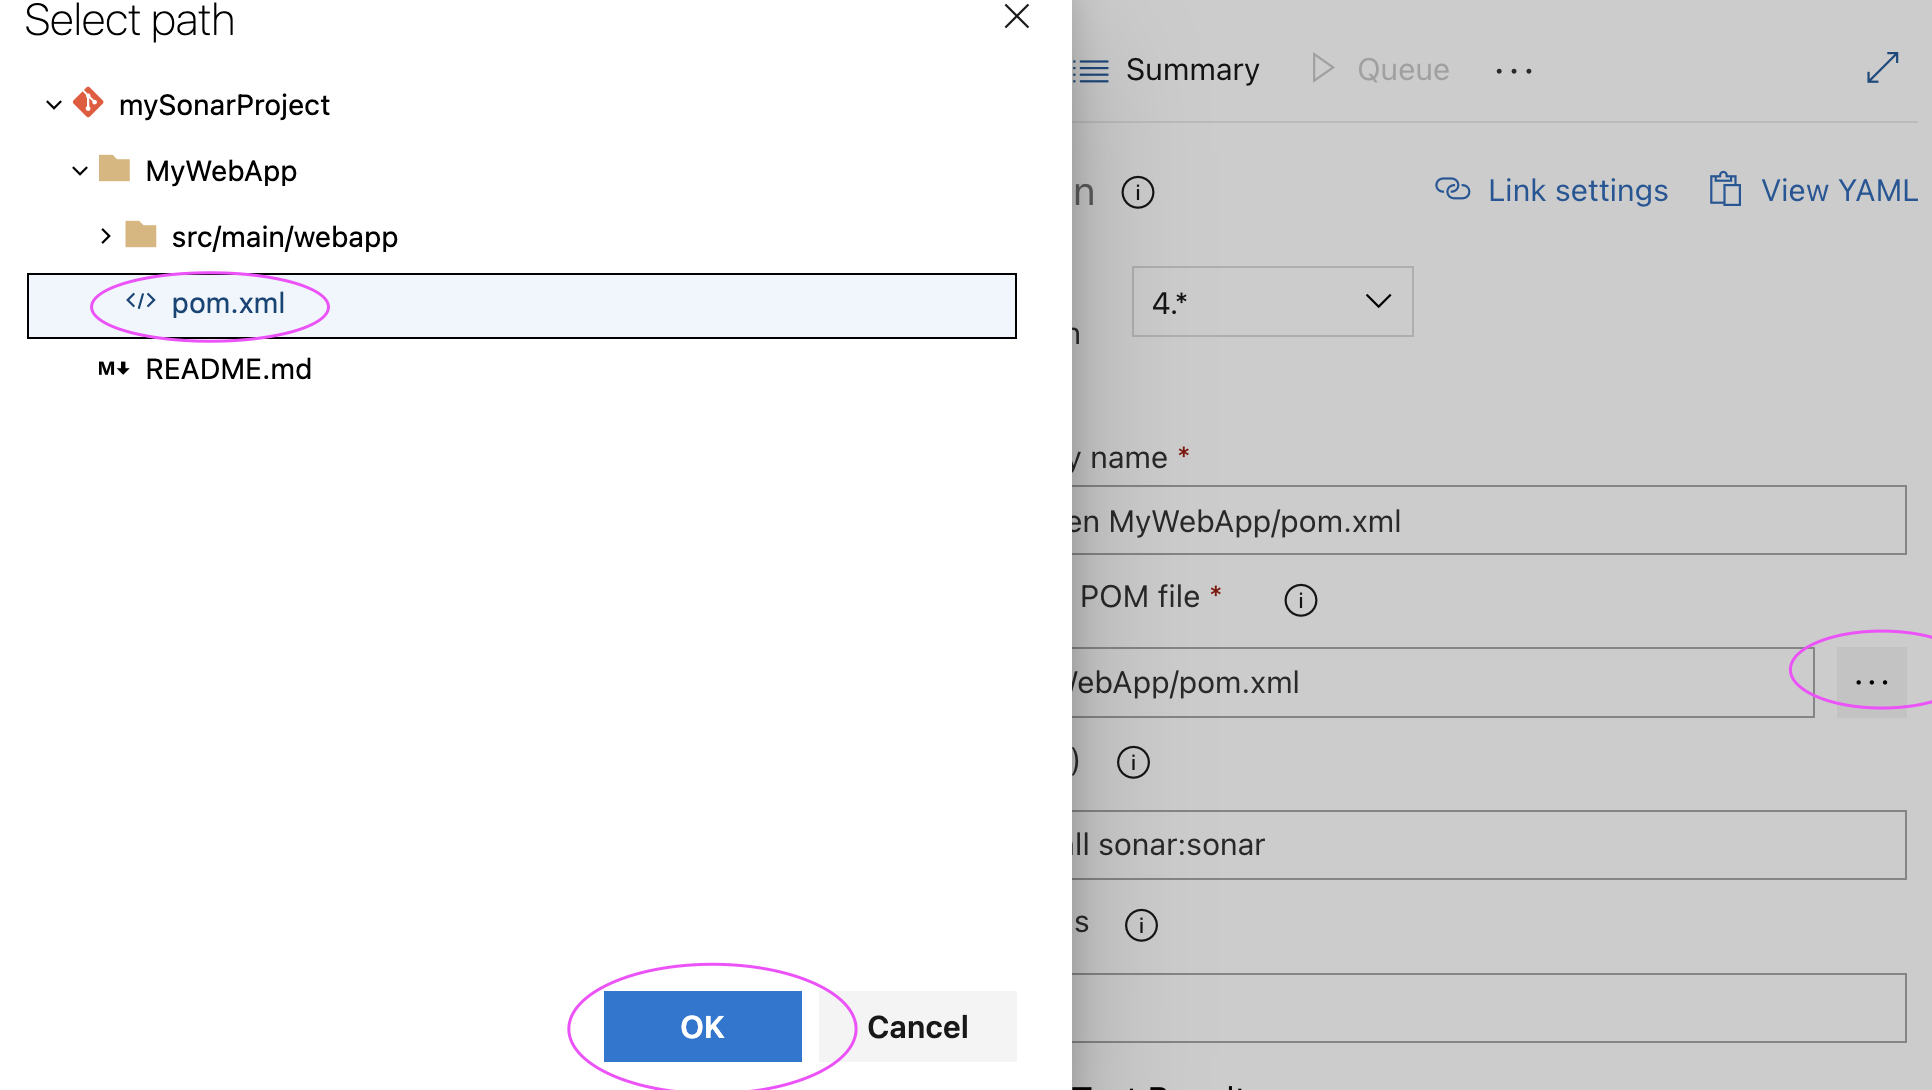
      8. Edit maven task & add install sonar:sonar and also select the path of pom.xml under MyWebApp/pom.xml


      Click on Save and Queue to kick start build.
      9. Now login to SonarQube dashboard, click on Projects


      🚀 Live AI-Enabled DevSecOps & Cloud Engineering Bootcamp – Sep 2026

      Live AI-Enabled DevSecOps & Cloud Engineering Bootcamp from Coach AK - Sep 2026 Schedule