Showing posts with label VSTS. Show all posts

Monday, February 13, 2023

How to integrate SonarQube with Azure DevOps | SonarQube Integration with Azure DevOps Classic Pipeline | Automate Code Scan using SonarQube In Azure Classic Pipelines

Please find steps below for integrating SonarQube with Azure DevOps, Previously known as Visual Studio Team Services:
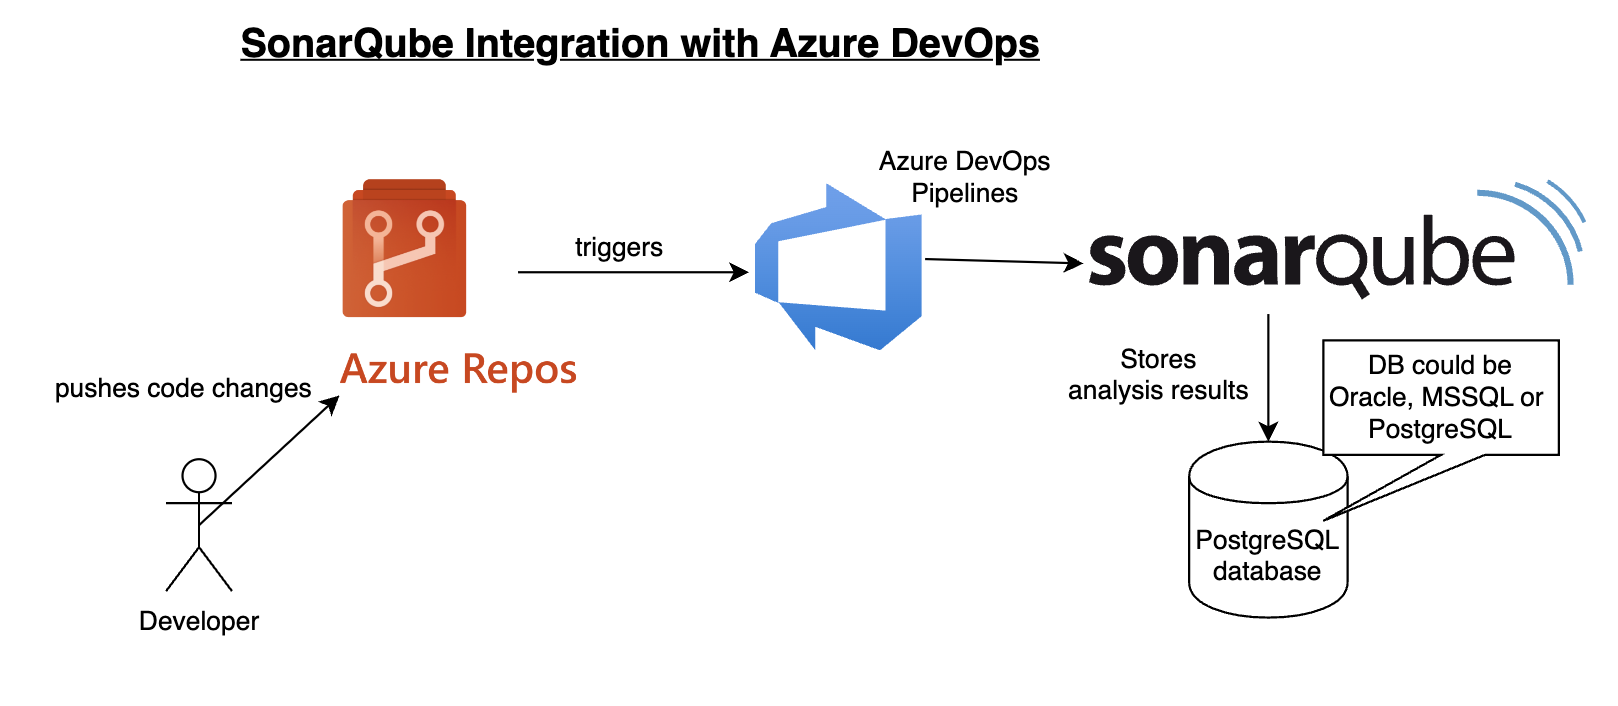

Pre-requisites:

https://marketplace.visualstudio.com/acquisition?itemName=SonarSource.sonarqube


Once added SonarQube plug-in, click on proceed to Organization..


Watch Steps in YouTube channel:

How to integrate SonarQube with Azure DevOps:

Create Token in SonarQube to authenticate with Azure DevOps
You need to login to SonarQube using your admin password. admin/admin123 and click on Admin on your top side.
Click on My Account, Security. 
Under Tokens, Give some value for token name and choose Global analysis token, click on generate Tokens. Copy the token value generated.


Create Service Connections in Azure DevOps 

Login to Azure DevOps. Select your project dashboard.


Click on Project settings --> Service connections
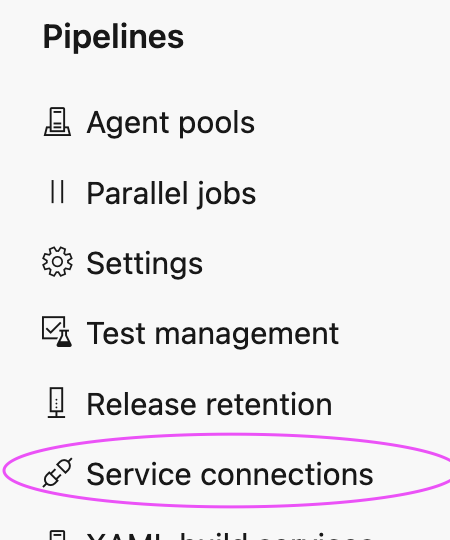

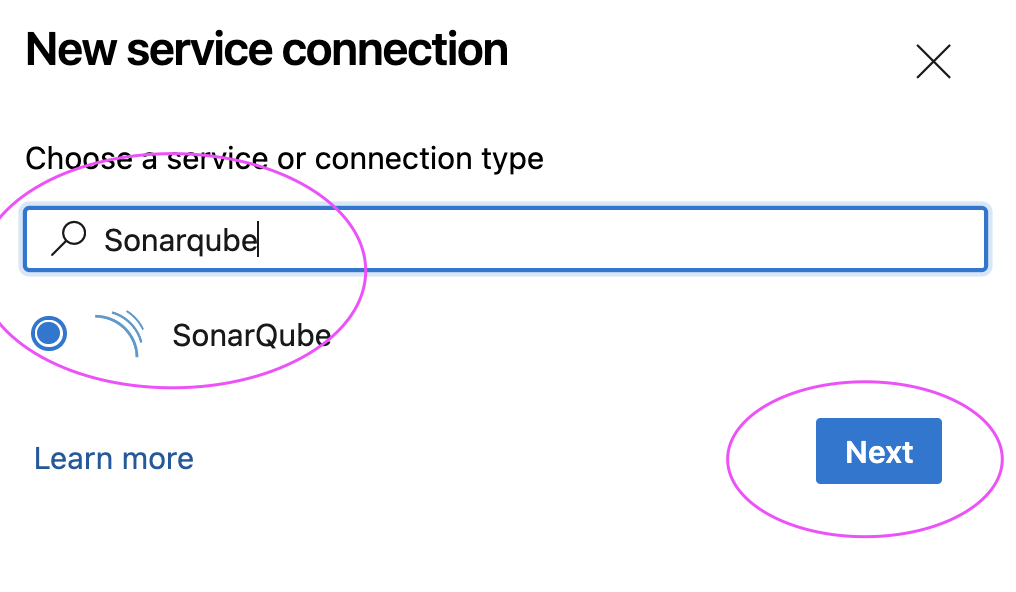
click on New service connection

Type SonarQube and Click Next

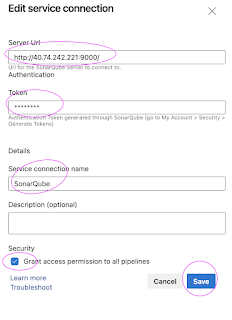
Enter SonarQube server url and enter Token created 
Give name for service connection and select Grant access permission to all pipelines.
Click on Save.
Create a Pipeline in Azure DevOps

1. Login to Azure DevOps. Go to Azure Pipelines. Click on create a new pipeline, use classic editor 
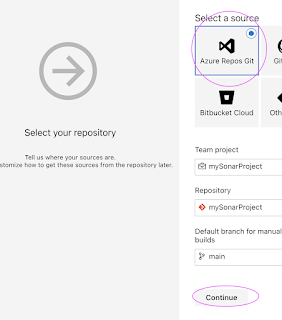
Select your Azure Repos
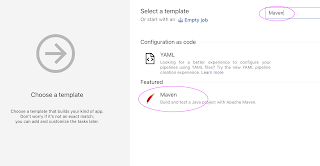
Type Maven and choose maven template as shown below

2. Click on Add tasks
3. Type Sonar


4. Add Prepare Analysis on SonarQube task
5. move up this task to all the way up.
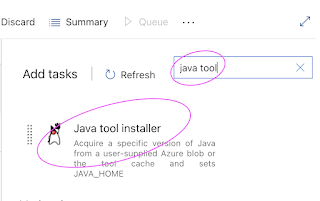
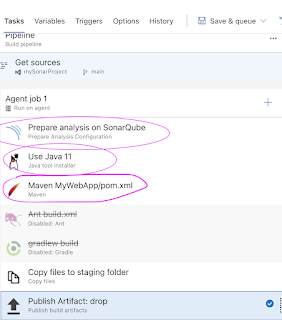
And also search for Java tool installer task and add it


It should be like shown below:


6. Click on prepare sonar analysis configuration task
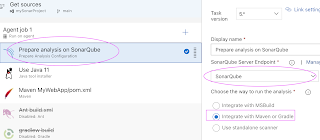
select Integrate with Maven or Gradle option

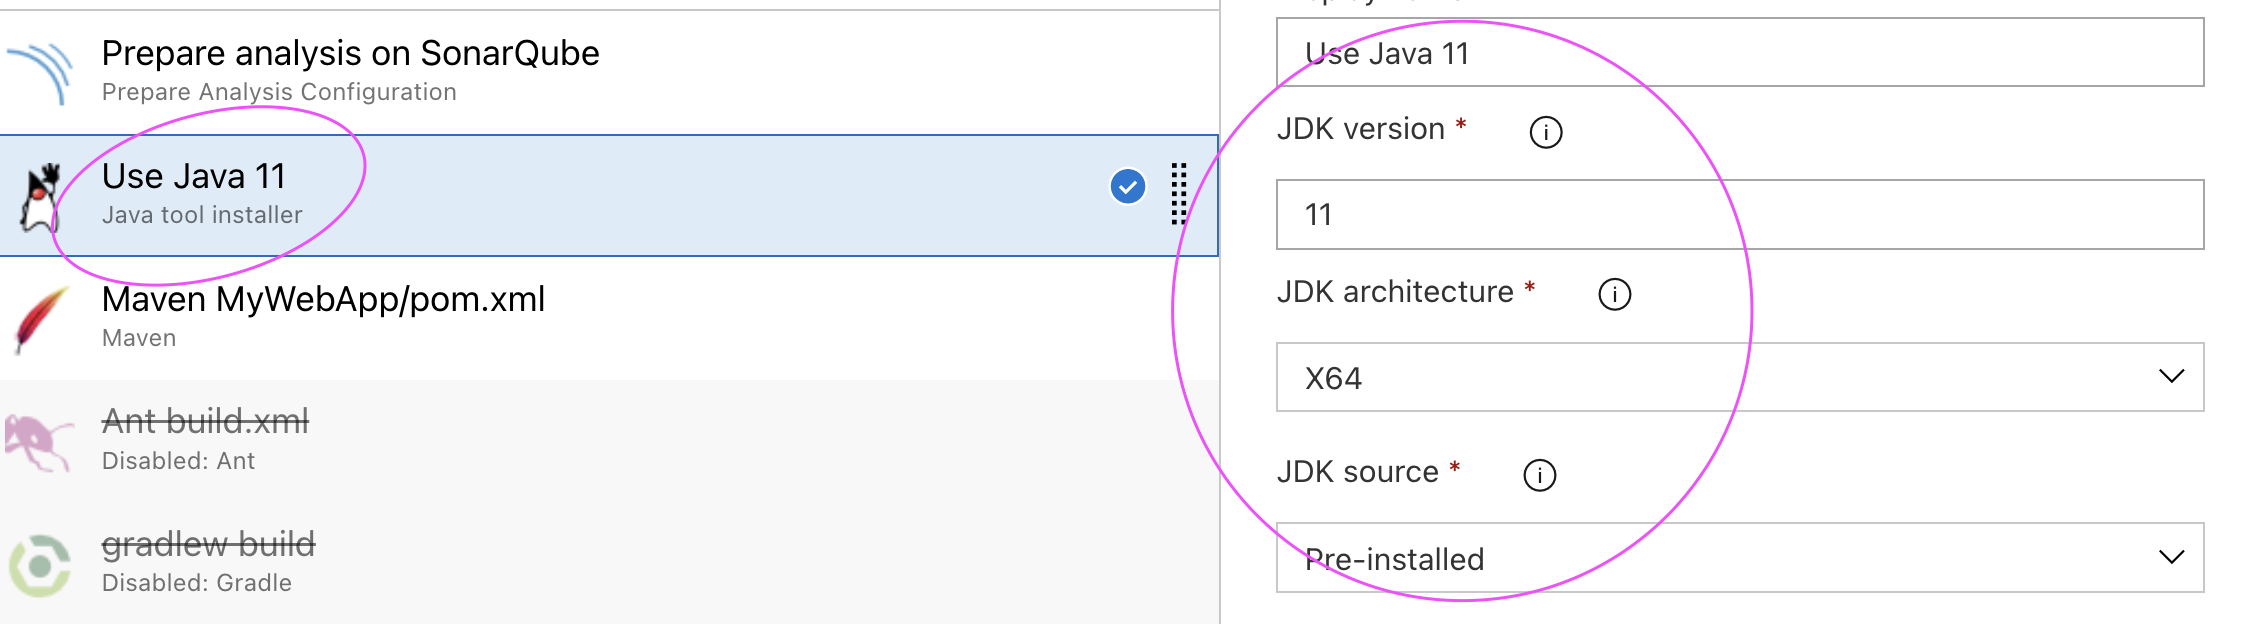
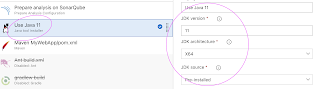
7.Click on Java tool installer and change to 11 instead of 8

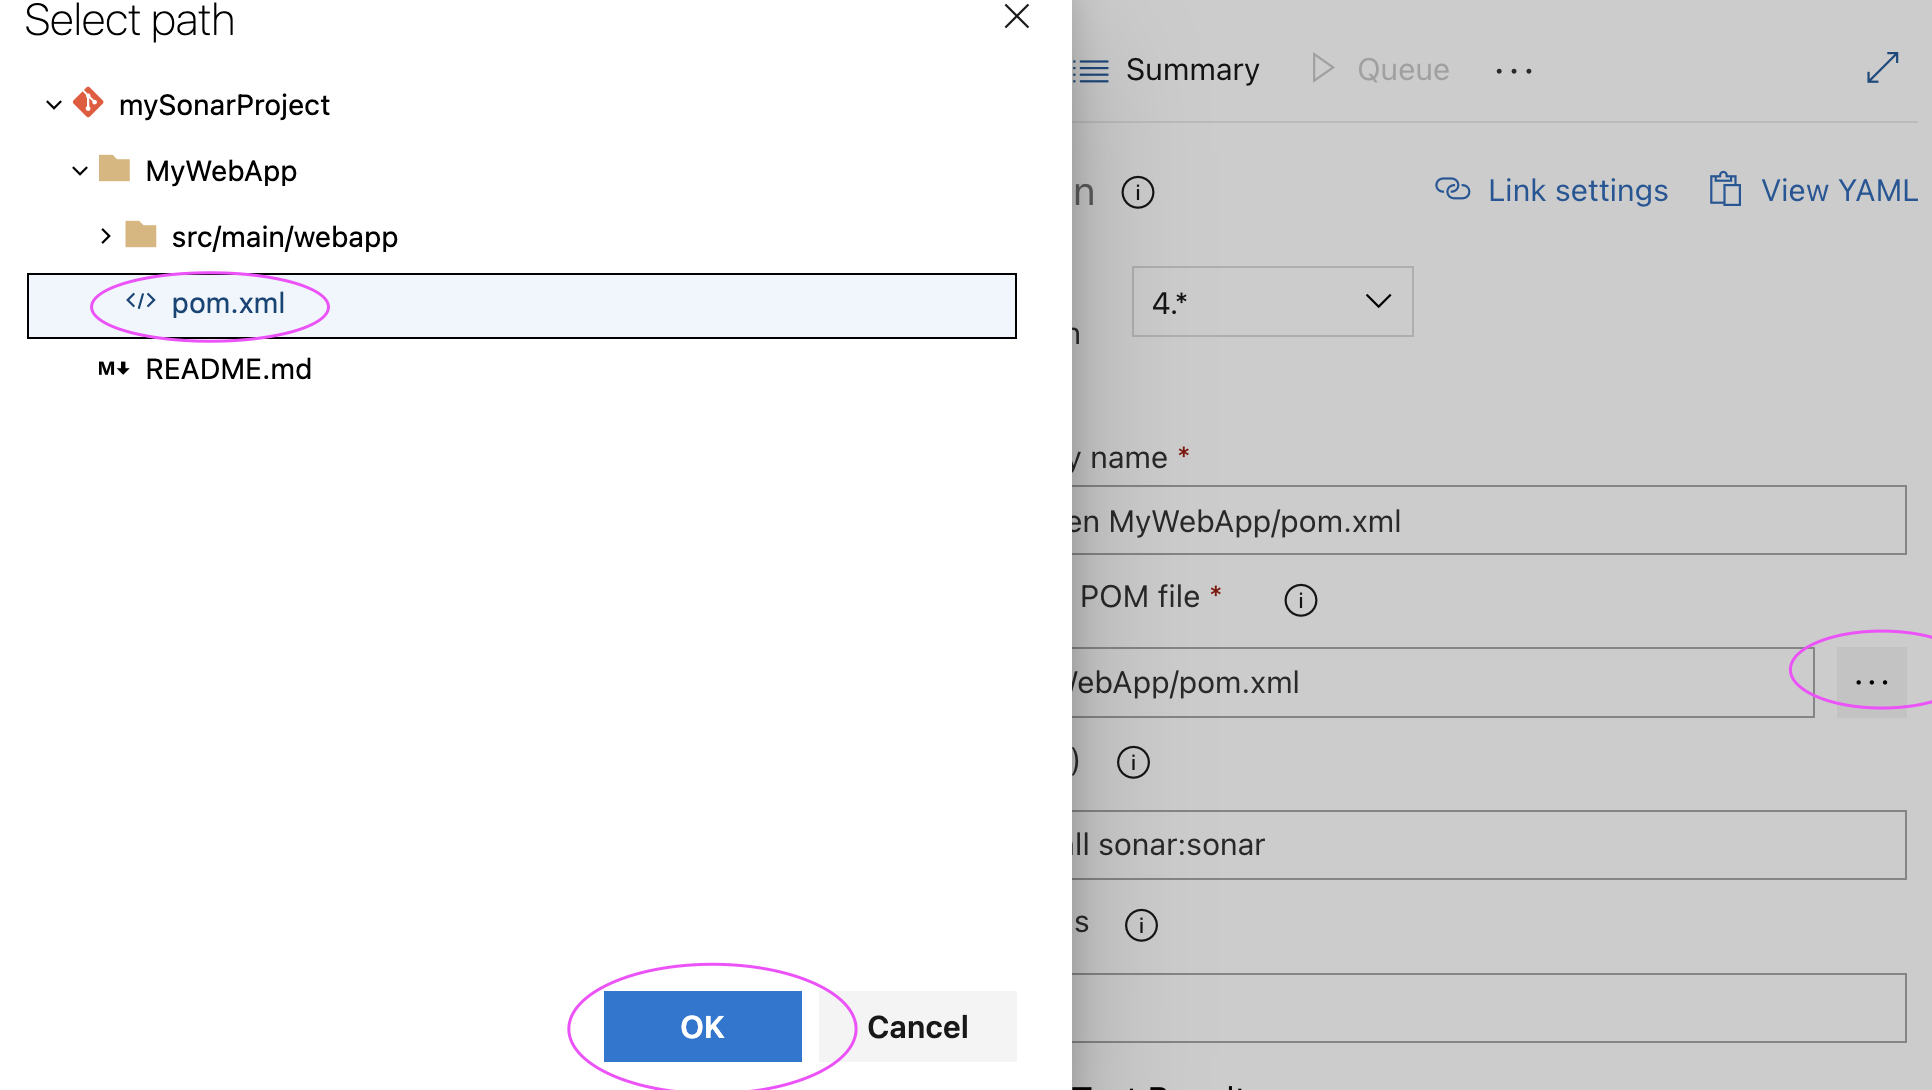
8. Edit maven task & add install sonar:sonar and also select the path of pom.xml under MyWebApp/pom.xml
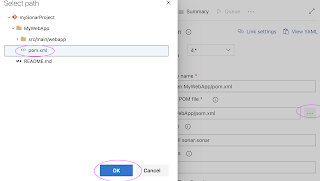


Click on Save and Queue to kick start build.
9. Now login to SonarQube dashboard, click on Projects


Thursday, November 19, 2020

Slack Azure DevOps Integration | How to Integrate Slack with Azure DevOps | Send push notifications from Azure pipelines to Slack

Slack is popular collaboration tool used at work by many companies. Slack can be integrated with CI tools such as Jenkins, Azure DevOps(VSTS). We will see how to integrate with Azure Build pipelines. 

Pre-requisites:
1. Azure pipelines setup
2. Slack channel setup
 
Azure DevOps & Slack integration steps
 
1. Go to slack.com and sign in to workspace.
2. Go to channel where you would like to receive push notification from Azure DevOps. Click on more and Add apps


3. Add Visual Studio Team Services App

4. Add Configuration

5.  And then select channel to post notification and add the channel

6. In Azure DevOps Dashboard, click on Project settings.
7. Click on Service Hooks tab and then click create subscriptions button to add a new service hook.


8. Select Slack from the list of services, and press the Next button.


9. On the Trigger screen, choose the event that you’d like to trigger the notification, and add any filters. Press the Next button to continue.


10. On the Action screen, add the URL as the Slack Webhook URL and press Finish when you are done.


Now whenever Azure pipelines runs any builds, it will send push notifications to the Slack channel. Please watch the above steps in YouTube channel:

Saturday, November 16, 2019

Difference between Jenkins and Azure DevOps(VSTS) - What is the difference between Jenkins and Azure DevOps

Area
Jenkins
Azure DevOps
Type
Continuous integration tool
Project management + CI/CD tool
Git repo setup
Not possible
Git and TFVC repo creation is possible
SonarQube
Can be integrated
Can be integrated
licensing
Open source, java based
Proprietary from Microsoft
Branching and Merging
Not supported
Supported
Tools integration
Through plug-ins
Through add-ons
Release management
Not supported fully
Fully supported
Slack integration
Possible
possible

Tuesday, April 9, 2019

Build Pipelines in Azure DevOps | How to build Azure Build pipelines to migrate Java WebApp to Azure Cloud

Building pipelines in Azure DevOps is really easy, you can migrate your web application code from any where into Azure Cloud by using Azure pipelines.

We are going to migrate Java Web App that was setup in Azure Git into Azure Cloud by creating a WebApp in Azure.

Pre-requisites:

You need to create WebApp in Azure Cloud. WebApp is an App service (mostly Platform as a Service) provide by Azure Cloud to migrate any web applications.

Once you sign in to Azure Portal, you need to create an app service which is a WebApp.

Steps for Creating WebApp in Azure Portal

1. Now login to https://portal.azure.com
2. Click on App services


3.Click on + Add or click on Create app service


Click on Web App.

Choose Free Azure subscription

Create a new resource group(for first time if you create an app service, otherwise you can use existing group name)
Enter App service name(it should be unique)
Publish as Code
Run time stack as Java 11 --> Tomcat9.0
Operating System as Linux
Region as South Central US
Enter LinuxPlan name
Choose SKU and size as given below:
Choose DEV/Test and use 1 GB memory


Click on Apply
Now click on Apply & Create
This will take bit time to create the app service.

Once WebApp is created, go resources, click on WebApp name and click on the URL.


You should see the app service home page some thing like below:


Since our WebApp is up and running, now we can start creating pipelines to migrate to Azure cloud.

2. Creating pipelines in Azure Devops

1. Now go to your visual studio project page --> https://dev.azure.com/
Select the Project dashboard you already created.

Click on Pipelines, Builds.


2. Click on New pipeline and click on use the classic editor to create a pipeline without YAML

3. Select source repository as Azure Repo Git and click continue

4. Since our application is Java stack, type Java and Choose Azure WebApp for Java


5. Click on pipeline name and re-name per your naming standard

6. Modify maven goal as clean install and also choose POM.xml by clicking on three dots ...


7. Leave the value as it is for Copy Files to staging folder

8. Leave the value as it is for Publish Artifact: Drop
9. Click on Stop Azure WebApp step, Enter Azure WebApp details - where  you would like to deploy your app in Azure. Select Free trial subscription from the drop down. Click on Authorize button.
Make sure you disable popup blocker.


10. Do the same in Deploy Azure WebApp & Start Azure WebApp steps.

Enable Webhooks in Pipeline

11. Click on Triggers and then enable check box for Continuous Integration

12. Now click on Save and Queue

13. If your configurations are correct, you should be able to see the build success and able to access in the Azure. Click on Pipelines and pipeline name

Now you will see that Azure DevOps would have started build.

14. Make sure build is success, it should have all green like below.


After successful build, you can check the output by accessing below URL:

https://myAzureWebAppUrl/MyAwesomeApp


🚀 Live AI-Enabled DevSecOps & Cloud Engineering Bootcamp – Sep 2026

Live AI-Enabled DevSecOps & Cloud Engineering Bootcamp from Coach AK - Sep 2026 Schedule