Showing posts with label Pipeline. Show all posts

Saturday, June 6, 2026

How to Implement CICD Pipeline using GitLab Yaml | GitLab CICD Tutorials | GitLab CICD Pipeline | Build Java WAR file using GitLab CICD YAML file

Here below is the code for creating GitLab CICD yaml file for Java Web App project to automate build and deployment. 

What is GitLab CICD?

GitLab CI/CD is a continuous integration and continuous deployment solution built into GitLab.


GitLab CI/CD

GitLab CI/CD is a feature of GitLab that automates:

  • Building code
  • Testing applications
  • Scanning code
  • Deploying applications

whenever developers push code into Git repositories.

What is .gitlab-ci.yml?

The .gitlab-ci.yml file is the heart of GitLab CI/CD pipelines.

It contains:

  • Pipeline stages
  • Jobs
  • Scripts
  • Variables
  • Artifacts
  • Deployment instructions

GitLab automatically reads this file whenever code changes are pushed into the repository. GitLab Runner uses a Docker container image to run the job. 

Pre-requisites:

.gitlab-ci.yml for implementing CICD using GitLab

stages:

  - build

  - deploy


build_war:

  stage: build

  image: maven:3.8.6-eclipse-temurin-11


  script:

    - echo "Building WAR file using Maven"

    - mvn clean install -f MyWebApp/pom.xml

    - echo "Listing target directory"

    - ls -la MyWebApp/target


  artifacts:

    paths:

      - MyWebApp/target/*.war

    expire_in: 1 hour


deploy_to_tomcat:

  stage: deploy

  image: curlimages/curl:latest


  dependencies:

    - build_war


  script:

    - echo "Deploying WAR file to Tomcat running on AWS EC2"


    - |

      curl -v -u ${TOMCAT_USER}:${TOMCAT_PASSWORD} \

      -T MyWebApp/target/MyWebApp.war \

      "http://${TOMCAT_HOST}/manager/text/deploy?path=/MyWebApp&update=true"


Friday, February 20, 2026

How to Integrate SonarQube Cloud with GitHub Actions | GitHub Actions SonarQube Cloud Integration | Automate Static Code Quality Analysis with SonarQube Cloud from GitHub Action

 Automate Static Code Quality Analysis in SonarQube Cloud from GitHub Actions


Pre-requisites in SonarCloud:


Depending on your SCM tool, We will use GitHub. So please click on it.
Enter GitHub credentials to setup your account in SonarCloud. Click Authorize SonarQube Cloud.


Go to SonarCloud → My Account → Organizations → Create/Select organization

Choose “Import from GitHub” (or connect GitHub) and Install the SonarCloud GitHub App

Start analyzing a project:

Select Project and Click on Setup:


Check any one of the options to confirm what is new code:

Select with other CI tools


Select Maven, note organization key, project key and token.

Pre-requisites in GitHub Actions:

    After setting up SonarCloud successfully, login to GitHub Actions. 
    Create two secrets SONAR_TOKEN and SONAR_HOST_URL
    Sonar URL should be https://sonarcloud.io/
     
    GitHub Actions CICD Workflw code for running scan in SonarCloud

    name: Implement static code analysis for a Java App using SonarQube from GitHub Actions
    on:
      push:
        branches:
          - main
      workflow_dispatch:
    jobs:
     build:
      runs-on: ubuntu-latest
      steps:
      - name: checkout code
        uses: actions/checkout@v3
      - name: Set up JDK 17
        uses: actions/setup-java@v4
        with:
          distribution: 'temurin'
          java-version: '17'
          cache: 'maven'
      - name: Build with Maven
        run: mvn clean install -f MyWebApp/pom.xml
      - name: Run SonarQube Scan
        uses: sonarsource/sonarqube-scan-action@master
        with:
          projectBaseDir: .
          args: >
            -Dsonar.organization=akannan1087
            -Dsonar.projectKey=akannan1087_my-javawebapp-repo
            -Dsonar.java.binaries=**/target/classes
        env:
          SONAR_TOKEN: ${{ secrets.SONAR_TOKEN }}
          SONAR_HOST_URL: ${{ secrets.SONAR_HOST_URL }}

    Now login to SonarCloud under --> https://sonarcloud.io/projects


    Watch steps in YouTube channel:

    Thursday, October 31, 2024

    Deploy Python App into Kubernetes Cluster using kubectl Jenkins Pipeline | Containerize Python App and Deploy into EKS Cluster | Kubectl Deployment using Jenkins

    We will learn how to automate Docker builds using Jenkins and Deploy into Kubernetes Cluster in AWS Cloud. We will use kubectl command to deploy Docker images into EKS cluster. We will use Python based application. I have already created a repo with source code + Dockerfile. The repo also have Jenkinsfile for automating the following:

    - Automating builds using Jenkins
    - Automating Docker image creation
    - Automating Docker image upload into Elastic container registry
    - Automating Deployments to Kubernetes Cluster using kubectl CLI plug-in


    Pre-requisites:
    1. EKS Cluster is setup and running. Click here to learn how to create EKS cluster.
    2. Jenkins Master is up and running.
    3. Install Docker in Jenkins.
    4. Docker, Docker pipeline and Kubectl CLI plug-ins are installed in Jenkins


    5. ECR repo created to store docker images.

    The Code for this video is here:
    and make necessary changes in eks-deploy-from-ecr.yaml file after you fork into your account.

    Step #1 - Create Credentials for connecting to EKS cluster using Kubeconfig
    Go to Jenkins UI, click on Credentials -->


    Click on Global credentials
    Click on Add Credentials

    use secret file from drop down.

    execute the below command to login as jenkins user.
    sudo su - jenkins

    you should see the nodes running in EKS cluster.

    kubectl get nodes


    Create namespace to deploy containers
    kubectl create namespace python-app-ns
    kubectl get ns

    Execute the below command to get kubeconfig info, copy the entire content of the file:
    cat /var/lib/jenkins/.kube/config


    Open your text editor or notepad, copy and paste the entire content and save in a file.
    We will upload this file.

    Enter ID as K8S and choose File and upload the file and save.


    Step # 2 - Create a pipeline in Jenkins
    Create a new pipeline job.


    Step # 3 - Copy the pipeline code from below
    Make sure you change values as per your settings highlighted in yellow below:

    pipeline {
        agent any

        environment {
            registry = "account_id.dkr.ecr.us-east-1.amazonaws.com/coachak/my-docker-repo"
        }
        stages {
            stage('checkout') {
                steps {
                    checkout([$class: 'GitSCM', branches: [[name: '*/master']], extensions: [], userRemoteConfigs: [[url: 'https://github.com/akannan1087/myPythonDockerRepo']]])
                }
            }
            
            stage ("build image") 
            {
                steps {
                    script {
                        dockerImage = docker.build registry
                          dockerImage.tag("$BUILD_NUMBER")
                        }
                    }
            }
            
            stage ("upload ECR") {
                steps {
                    script {
                        sh "aws ecr get-login-password --region us-east-2 | docker login --username AWS --password-stdin account_id.dkr.ecr.us-east-2.amazonaws.com"
                    sh 'docker push account_id.dkr.ecr.us-east-1.amazonaws.com/coachak/my-docker-repo:$BUILD_NUMBER'
                    }
                }
            }
            
        // Avoid latest tag image and pass build ID dynamically from Jenkins pipeline
           stage('K8S Deploy') {
            steps{   
                script {
                    withKubeConfig([credentialsId: 'K8S', serverUrl: '']) {
                    echo "Current build number is: ${env.BUILD_ID}"
                   // Replace the placeholders in the deployment.yaml file 
                    sh """ 
                    sed -i 's/\${BUILD_NUMBER}/${env.BUILD_ID}/g' k8s-deployment.yaml
                    """ 
                    sh ('kubectl apply -f  k8s-deployment.yaml -n springboot-app-ns')
                    }
                }
            }
           }
        }    
    }

    Step # 4 - Build the pipeline


    Step # 5 - Verify deployments to EKS

    kubectl get pods


    kubectl get deployments
    kubectl get services


    Steps # 6 - Access Python App in K8S cluster
    Once deployment is successful, go to browser and enter above load balancer URL 

    You should see page like below:


    Sunday, October 27, 2024

    Deploy Springboot Microservices App into Amazon EKS Cluster using Jenkins Pipeline and Kubectl CLI Plug-in | Containerize Springboot App and Deploy into EKS Cluster using Jenkins Pipeline

     We will learn how to create CICD pipeline to deploy springboot microservices using Jenkins pipeline into EKS Cluster with help of Kubernetes CLI plug-in.

    We will use Springboot Microservices based Java application. I have already created a repo with source code + Dockerfile. The repo also have Jenkinsfile for automating the following:

    - Automating builds using Jenkins Pipeline
    - Automating Docker image creation and tagging
    - Automating Docker image upload into AWS ECR
    - Automating Docker Containers Deployments to Kubernetes Cluster


    Watch steps in YouTube channel:


    Same Code for this video is here:

    Pre-requisites:
    1. Amazon EKS Cluster is setup and running. Click here to learn how to create Amazon EKS cluster.
    5. Docker, Docker pipeline and Kubernetes CLI plug-ins are installed in Jenkins

    Install Kubernetes CLI plug-in:

    6. Install kubectl on your instance

    Step # 1 - Create Maven3 variable under Global tool configuration in Jenkins
    Make sure you create Maven3 variable under Global tool configuration. 


    Step #2 - Create Credentials for connecting to Kubernetes Cluster using kubeconfig
    Click on Add Credentials, use Kubernetes configuration from drop down.

    use secret file from drop down.


    execute the below command to login as jenkins user.
    sudo su - jenkins

    you should see the nodes running in EKS cluster.

    kubectl get nodes


    Create namespace to deploy the containers
    kubectl create namespace springboot-app-ns
    kubectl get ns


    Execute the below command to get kubeconfig info, copy the entire content of the file:
    cat /var/lib/jenkins/.kube/config


    Open your text editor or notepad, copy and paste the entire content and save in a file.
    We will upload this file.

    Enter ID as K8S and choose File and upload the file and save.


    Enter ID as K8S and choose enter directly and paste the above file content and save.

    Step # 3 - Create a pipeline in Jenkins
    Create a new pipeline job.


    Step # 4 - Copy the pipeline code from below
    Make sure you change red highlighted values below as per your settings:
    Your docker user id should be updated.
    your registry credentials ID from Jenkins from step # 1 should be copied

    pipeline {
       tools {
            maven 'Maven3'
        }
        agent any
        environment {
            registry = "account_id.dkr.ecr.us-east-1.amazonaws.com/coachak/my-docker-repo"
        }
       
        stages {
            stage('Cloning Git') {
                steps {
                    checkout([$class: 'GitSCM', branches: [[name: '*/main']], doGenerateSubmoduleConfigurations: false, extensions: [], submoduleCfg: [], userRemoteConfigs: [[credentialsId: '', url: 'https://github.com/akannan1087/springboot-app']]])     
                }
            }
          stage ('Build') {
              steps {
                sh 'mvn clean install'           
                }
          }
        // Building Docker images
        stage('Building image') {
          steps{
            script {
              dockerImage = docker.build registry 
              dockerImage.tag("$BUILD_NUMBER")
            }
          }
        }
       
        // Uploading Docker images into AWS ECR
        stage('Pushing to ECR') {
         steps{  
             script {
                    sh 'aws ecr get-login-password --region us-east-1 | docker login --username AWS --password-stdin account_id.dkr.ecr.us-east-1.amazonaws.com'
                    sh 'docker push account_id.dkr.ecr.us-east-1.amazonaws.com/coachak/my-docker-repo:$BUILD_NUMBER'
             }
            }
          }
        // Avoid latest tag image and pass build ID dynamically from Jenkins pipeline
           stage('K8S Deploy') {
            steps{   
                script {
                    withKubeConfig([credentialsId: 'K8S', serverUrl: '']) {
                    echo "Current build number is: ${env.BUILD_ID}"
                   // Replace the placeholders in the deployment.yaml file 
                    sh """ 
                    sed -i 's/\${BUILD_NUMBER}/${env.BUILD_ID}/g' eks-deploy-k8s.yaml
                    """ 
                    sh ('kubectl apply -f  eks-deploy-k8s.yaml -n springboot-app-ns')
                    }
                }
            }
           }
        }
    }

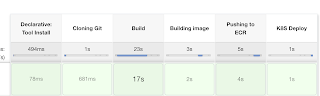
    Step # 5 - Build the pipeline
    Once you create the pipeline and changes values per your configuration, click on Build now:


    Step # 6 - Verify deployments to K8S

    kubectl get deployments -n springboot-app-ns


    kubectl get pods -n springboot-app-ns


    kubectl get services -n springboot-app-ns


    If you see any errors after deploying the pods, you can check the pod logs.
    kubectl logs <pod_name> -n spring-app-ns

    Steps # 7 - Access SpringBoot App in K8S cluster
    Once build is successful, go to browser and enter master or worker node public ip address along with port number mentioned above
    http://loadbalancer_ip_address

    You should see page like below:


    Note:

    and make changes in eks-deploy-k8s.yaml to pull Docker image from your AWS ECR repo.

    🚀 Live AI-Enabled DevSecOps & Cloud Engineering Bootcamp – Sep 2026

    Live AI-Enabled DevSecOps & Cloud Engineering Bootcamp from Coach AK - Sep 2026 Schedule