Showing posts with label Sonarqube. Show all posts

Tuesday, June 9, 2026

How to integrate SonarQube with GitLab CICD Pipeline | SonarQube Integration with GitLab CICD | Automate Code Scan using SonarQube In GitLab CICD

 Please find steps for integrating SonarQube with GitLab CICD


Pre-requisites:

How to integrate SonarQube with GitLab CICD:
We will be following below steps:
  • Create Token in SonarQube to authenticate with GitLab
  • Add Sonar Token, SonarQube URL as Secrets in GitLab
  • Create GitLab CICD yaml
  • Add tasks for Maven build and Sonar Scan
  • Verify scan report in SonarQube

Create Token in SonarQube to authenticate with GitLab
You need to login to SonarQube using your admin password and click on Admin on your top side.
Click on My Account, Security. 
Under Tokens, Give some value for token name and choose global analysis token, click on generate Tokens. Copy the token value generated.


Add Sonar Token and Sonar Host URLs as Secret in GitLab
Go to your GitLab Repo --> Click on Settings --> CICD --> Variables


Click new Repository Secret


Add another variable for storing Sonar token


Create GitLab CICD workflow yaml:

Go to GitLab repo where your Java project is, create a new file:.gitlab-ci.yml

The below file have three stages:
    - build
    - sonar
    - deploy

Create .gitlab-ci.yml CICD Pipeline:
stages:
  - build
  - sonar
  - deploy

build_war:
  stage: build
  image: maven:3.8.6-eclipse-temurin-11

  script:
    - echo "Building WAR file using Maven"
    - mvn clean install -f MyWebApp/pom.xml
    - echo "Listing target directory"
    - ls -la MyWebApp/target

  artifacts:
    paths:
      - MyWebApp/target/*.war
    expire_in: 1 hour

sonarqube_scan:
  stage: sonar
  image: maven:3.9.6-eclipse-temurin-17

  script:
    - |
      mvn sonar:sonar \
        -f MyWebApp/pom.xml \
        -Dsonar.projectKey=MyWebApp \
        -Dsonar.host.url="${SONAR_HOST_URL}" \
        -Dsonar.token="${SONAR_TOKEN}"
      
deploy_to_tomcat:
  stage: deploy
  image: curlimages/curl:latest

  dependencies:
    - build_war

  script:
    - echo "Deploying WAR file to Tomcat running on AWS EC2"

    - |
      curl -v -u ${TOMCAT_USER}:${TOMCAT_PASSWORD} \
      -T MyWebApp/target/MyWebApp.war \
      "http://${TOMCAT_HOST}/manager/text/deploy?path=/MyWebApp&update=true"

Commit the file.

As soon as you commit, build will run immediately in GitLab CICD. 
Now you can see the output of build in Actions tab.


Now login to SonarQube to see the Scan report


Friday, February 20, 2026

How to Integrate SonarQube Cloud with Jenkins | Jenkins SonarQube Cloud Integration | Automate Static Code Quality Analysis with SonarQube Cloud from Jenkins

Automate Static Code Quality Analysis with SonarCloud from Jenkins


Pre-requisites in SonarCloud:


Depending on your SCM tool, We will use GitHub. So please click on it.
Enter GitHub credentials to setup your account in SonarCloud. Click Authorize SonarQube Cloud.


Go to SonarCloud → My Account → Organizations → Create/Select organization

Choose “Import from GitHub” (or connect GitHub) and Install the SonarCloud GitHub App

Start analyzing a project:

Select Project and Click on Setup:


Check any one of the options to confirm what is new code:

Select with other CI tools

Select Maven, note organization key, project key and token.


Pre-requisites in Jenkins:
  • SonarQube plug-in - Make sure this plug-in is installed.
  • pipeline stage view plug-in

    After setting up SonarCloud successfully, login to Jenkins. Manage Jenkins --> Configure System --> SonarQube installation 

    Server URL should be https://sonarcloud.io/
    Enter Sonar token as secret text and select it from the drop down

     
    Jenkins Pipeline code for running scan in SonarCloud

    node {

        def mvnHome = tool 'Maven3'
        stage ("checkout")  {
            git branch: 'main', credentialsId: '', url: 'https://github.com/akannan1087/my-javawebapp-repo'
        }

       stage ('build')  {
        sh "${mvnHome}/bin/mvn clean install -f MyWebApp/pom.xml"
        }

         stage ('Code Quality scan')  {
           withSonarQubeEnv('SonarCloud') {
                sh """
                  ${mvnHome}/bin/mvn -f MyWebApp/pom.xml \
                 org.sonarsource.scanner.maven:sonar-maven-plugin:4.0.0.4121:sonar \
                  -Dsonar.organization=org_key \
                  -Dsonar.projectKey=com.dept.app:MyWebApp \
                  -Dsonar.projectName=MyWebApp
                """
            }
       }
    }

    Now login to SonarCloud under --> https://sonarcloud.io/projects


    Here is the pipeline view:

    Watch steps in YouTube Video:

    Saturday, January 24, 2026

    What is SonarQube Cloud? What is the difference between SonarQube Server and SonarQube Cloud | SonarQube Cloud vs SonarQube Server Explained

    What Is SonarQube Cloud?

      SonarQube Cloud is a cloud-based code quality and security analysis tool.

      • It automatically scans your code to find: 

        • Bugs
        • Security vulnerabilities
        • Code smells (bad coding practices)
      • Managed by SonarSource
      • Works directly with cloud CI/CD pipelines
      • No server installation or maintenance needed

        👉 Think of SonarCloud as a “code quality checker in the cloud”

        What Is SonarQube Server?

        • SonarQube is the self-hosted version of Sonar’s code analysis platform
        • You install and manage it On-prem servers or Virtual machines or Kubernetes
        • Requires Server setup, Database & maintenance

        Why SonarQubeCloud Matters in DevOps

        • Detects issues early in CI/CD pipelines
        • Prevents bad or insecure code from reaching production
        • Enforces Quality Gates (pass/fail rules)
        • Improves Code maintainability, Security posture, Team collaboration

          👉 Think of SonarQube as “code quality on your own servers”

          🔄 SonarQube Server vs SonarQube Cloud (Easy Comparison)

          Feature SonarQube Server SonarQube Cloud
          Hosting Self-hosted (on-prem or private cloud) Fully cloud-hosted (SaaS)
          Setup Manual install & config No setup needed
          Maintenance You manage servers, upgrades, scaling Zero maintenance, Sonar handles everything
          Cost Free + paid tiers for advanced features Subscription based on lines of code; free for public repos
          Data Control Full control over data and environment Data stored in SonarCloud’s infrastructure
          Best For Enterprises, regulated orgs Cloud & DevOps teams
          Integrations Works with most CI/CD systems, including on-prem Deep integration with GitHub, GitLab, Bitbucket Cloud, Azure DevOps
          Branch/PR Analysis Requires Developer Edition or higher Included by default
          Customization Supports plugins, custom rules, and deep configuration More limited customization compared to SonarQube
          Scalability You scale it Auto-scales                                                

          When Should You Use SonarQube Cloud?

          • You use GitHub / Azure DevOps / Bitbucket
          • You want quick setup
          • You don’t want to manage servers
          • You’re building Cloud-native apps or DevSecOps pipelines or Open-source projects

          🧠 Additional Context (Industry Understanding)

          Even though the article highlights practical differences, other sources also emphasize technical nuance:
          • Both tools use the same core analysis engine (so results and rules are similar), but SonarCloud is optimized for cloud workflows and integrates first-class with GitHub, GitLab, Bitbucket, and Azure DevOps.
          • SonarCloud is typically easier to start with because it’s SaaS, but enterprises with strict compliance might prefer SonarQube’s on-prem deployment options.

          📝 Final Thoughts 

          • SonarQube Cloud = Best for modern DevOps & cloud teams
          • SonarQube Server = Best for enterprise & on-prem needs
          • Both help you shift-left security and quality

            👉 If you’re learning DevOps, DevSecOps, or CI/CD, mastering SonarQube Cloud is a must.

            SonarQube Cloud is ideal for teams who want zero maintenance and fast cloud adoption. SonarQube Server is best for organizations needing data control, customization, and on‑prem compliance.

             Difference between SonarQube Cloud and SonarQube Server:

            Wednesday, May 15, 2024

            How to integrate SonarQube with Azure DevOps YAML Pipeline | SonarQube Integration with Azure DevOps | How to Automate Code Scan using SonarQube In Azure YAML Pipelines

            Please find steps below for integrating SonarQube to perform static code analysis using Azure DevOps YAML pipeline.


            Pre-requisites:

            How to add SonarQube plug-in in Azure DevOps?

            https://marketplace.visualstudio.com/acquisition?itemName=SonarSource.sonarqube


            Once added SonarQube plug-in, click on proceed to Organization..


            How to integrate SonarQube with Azure DevOps:

            Create Token in SonarQube to authenticate with Azure DevOps
            You need to login to SonarQube using your admin password. admin/admin123 and click on Admin on your top side.
            Click on My Account, Security. 
            Under Tokens, Give some value for token name and choose Global analysis token, click on generate Tokens. Copy the token value generated.


            Create Service Connections in Azure DevOps 

            Login to Azure DevOps. Select your project dashboard.


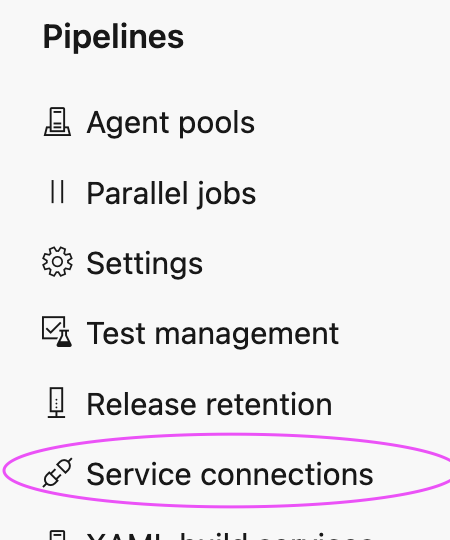
            Click on Project settings --> Service connections


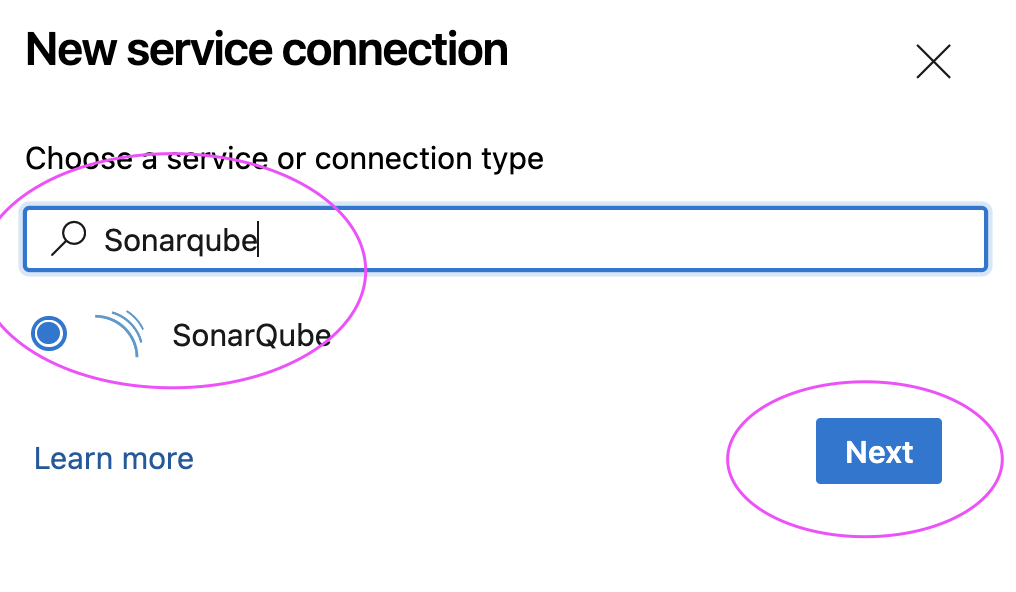
            click on New service connection

            Type SonarQube and Click Next

            Enter SonarQube server url and enter Token created 
            Give name for service connection and select Grant access permission to all pipelines.
            Click on Save.

            Create a YAML Pipeline in Azure DevOps

            1. Login to Azure DevOps. Go to Azure Pipelines. Click on create a new pipeline, Select GitHub:

            2. Select your GitHub repo and select the Maven as YAML pipeline template

            3. Click on show assistant on right hand side, type SonarQube and select Prepare Analysis on SonarQube task and then select Service connection from the drop down and choose Integrate with Maven or Gradle option and then click on Add task


            Sample Code for entire pipeline is here below

            Azure DevOps Pipeline YAML Code:

            # Maven
            # Build your Java project and run tests with Apache Maven.
            # Add steps that analyze code, save build artifacts, deploy, and more:

            trigger:
            - master

            pool:
              vmImage: ubuntu-latest
            steps:
            - task: SonarQubePrepare@5
              inputs:
                SonarQube: 'My_SonarQube'
                scannerMode: 'Other'
            - task: Maven@3
              inputs:
                mavenPomFile: 'pom.xml'
                mavenOptions: '-Xmx3072m'
                javaHomeOption: 'JDKVersion'
                jdkVersionOption: '1.17'
                jdkArchitectureOption: 'x64'
                publishJUnitResults: true
                testResultsFiles: '**/surefire-reports/TEST-*.xml'
                goals: 'clean install sonar:sonar'
            - task: PublishTestResults@2
              inputs:
                testResultsFormat: 'JUnit'
                testResultsFiles: '**/surefire-reports/TEST-*.xml'
                failTaskOnFailedTests: true


            Click on Save and Queue to kick start build.
            Now login to SonarQube dashboard, click on Projects


            Watch steps in YouTube channel:

            Tuesday, March 12, 2024

            How to Create Quality Gate in SonarQube and integrate with GitHub Actions | SonarQube Integration with GitHub Actions | Automate Code Scan using SonarQube In GitHub Actions and Force build to Fail or Pass


            Pre-requisites:

            How to Create Quality gate in SonarQube and integrate with GitHub Actions?

            Make sure SonarQube is up and running and integrated with GitHub Actions. Please click here if you would like to setup SonarQube and integrate with GitHub Actions.

            We will be executing below steps:
            • Login to SonarQube
            • Create Quality Gate in SonarQube
            • Add conditions in Quality Gate
            • Make quality gate as Default
            • Create GitHub Actions CICD workflow yaml
            • Add tasks for Maven build and Sonar Scan
            • Add tasks for integrating Quality gate 
            • pass/fail the builds in SonarQube

            What is Quality gate?

            In SonarQube a quality gate is a set of conditions that must be met in order for a project to be marked as passed.

            Create Quality Gate

            Login to SonarQube, Click on Quality gate, enter some name

            Once you create the quality gate. Click on Add condition. 

            Select new issues from the drop down and enter 2 


            Select new bugs from the drop down and enter 1 as error


            Setup a Default Gate


            Create GitHub Actions CICD workflow yaml:

            Go to GitHub repo where your Java project is, create a new file:

            .github/workflows/cicd.yml


            The below file have four steps(tasks) 
                - Checkout
                - Install Java on runner
                - Build using Maven
                - run Sonar Scan (this task need to have projectKey defined, otherwise build will fail)
                - run quality gate check
                - pass/fail the build

            Copy the the whole yellow color marked content from below:

            name: CI/CD workflow for Maven Build, Sonar Code scan and Quality gate check
            on:
              push:
                branches:
                  - main
              workflow_dispatch:
            jobs:
              build:
                runs-on: ubuntu-latest
                steps:
                - name: Checkout code
                  uses: actions/checkout@v3
                - name: Set up JDK 11
                  uses: actions/setup-java@v2
                  with:
                    distribution: 'adopt'
                    java-version: '11'
                - name: Build with Maven
                  run: mvn install -f MyWebApp/pom.xml
                - name: SonarQube Scan
                  uses: sonarsource/sonarqube-scan-action@master
                  with:
                    projectBaseDir: .
                    args: >
                      -Dsonar.organization=my-org
                      -Dsonar.projectKey=my-Java-web-app
                  env:
                    SONAR_TOKEN: ${{ secrets.SONAR_TOKEN }}
                    SONAR_HOST_URL: ${{ secrets.SONAR_HOST_URL }}
                # Check the Quality Gate status.
                - name: SonarQube Quality Gate check
                  id: sonarqube-quality-gate-check
                  uses: sonarsource/sonarqube-quality-gate-action@master
                  # Force to fail step after specific time.
                  timeout-minutes: 5
                  env:
                   SONAR_TOKEN: ${{ secrets.SONAR_TOKEN }}
                   SONAR_HOST_URL: ${{ secrets.SONAR_HOST_URL }} #OPTIONAL
                # Show the output from the Quality Gate.
                # The possible outputs of the `quality-gate-status` variable are `PASSED`, `WARN` or `FAILED`.
                - name: "Here is SonarQube Quality Gate Status value.."
                  run: echo "The Quality Gate status is ${{ steps.sonarqube-quality-gate-check.outputs.quality-gate-status }}"


            Commit the file.

            As soon as you commit, build will run immediately in GitHub Actions. 
            Now you can see the output of build in Actions tab.


            Now login to SonarQube to see the Scan report


            If your code have any defects, you can see some build fails.

            SonarQube Quality gate failed:

            Watch Steps in YouTube channel:

            Wednesday, February 14, 2024

            How to integrate SonarQube with GitHub Actions CICD Pipeine | SonarQube Integration with GitHub Actions CICD Workflow | Automate Code Scan using SonarQube In GitHub Actions

            Please find steps for integrating SonarQube with GitHub Actions:


            Pre-requisites:

            How to integrate SonarQube with GitHub Actions:
            We will be following below steps:
            • Create Token in SonarQube to authenticate with GitHub Actions
            • Add Sonar Token, SonarQube URL as Secrets in GitHub Actions
            • Create GitHub Actions CICD workflow yaml
            • Add tasks for Maven build and Sonar Scan
            • Run the workflow in GitHub hosted runner(Ubuntu)
            • Verify scan report in SonarQube

            Create Token in SonarQube to authenticate with GitHub Actions
            You need to login to SonarQube using your admin password and click on Admin on your top side.
            Click on My Account, Security. 
            Under Tokens, Give some value for token name and choose global analysis token, click on generate Tokens. Copy the token value generated.


            Add Sonar Token and Sonar Host URLs as Secret in GitHub Actions
            Go to your GitHub Repo --> Settings --> 

            Click on Secrets and Variables under Security in left nav 
            Click new Repository Secret


            Add another variable for storing Sonar token


            Create GitHub Actions CICD workflow yaml:

            Go to GitHub repo where your Java project is, create a new file:

            .github/workflows/cicd.yml


            The below file have four steps(tasks) 
                - Checkout
                - Install Java on runner
                - Build using Maven
                - run Sonar Scan (this task need to have projectKey defined, otherwise build will fail)

            Copy the content from below:

            name: CI/CD workflow for Maven Build and Sonar Code scan
            on:
              push:
                branches:
                  - main
              workflow_dispatch:
            jobs:
              build:
                runs-on: ubuntu-latest
                steps:
                - name: Checkout code
                  uses: actions/checkout@v2
                - name: Set up JDK 17
                  uses: actions/setup-java@v4
                  with:
                    distribution: 'temurin'
                    java-version: '17'
                    cache: 'maven'
                - name: Build with Maven
                  run: mvn clean install -f MyWebApp/pom.xml
                - name: SonarQube Scan with Quality Gate
                  run: |
                    mvn -f MyWebApp/pom.xml sonar:sonar \
                      -Dsonar.projectKey=MyWebApp \
                      -Dsonar.projectName=MyWebApp \
                      -Dsonar.host.url=${{ secrets.SONAR_HOST_URL }} \
                      -Dsonar.token=${{ secrets.SONAR_TOKEN }} \

            Commit the file.

            As soon as you commit, build will run immediately in GitHub Actions. 
            Now you can see the output of build in Actions tab.


            Now login to SonarQube to see the Scan report


            Notes:
            You can also refer the documentation below from below websites.


            Watch steps in YouTube channel:

            🚀 Live AI-Enabled DevSecOps & Cloud Engineering Bootcamp – Sep 2026

            Live AI-Enabled DevSecOps & Cloud Engineering Bootcamp from Coach AK - Sep 2026 Schedule