GitHub Advanced Security for Azure DevOps brings the secret scanning, dependency scanning and CodeQL code scanning solutions already available for GitHub users and natively integrates them into Azure DevOps to protect your Azure Repos and Pipelines.
These scanning tools will natively embed automated security checks into the Azure DevOps platform, allowing developers to secure their code, secrets and supply chain without leaving their workflow.
Azure DevOps Advanced Security provides below security features to help organizations identify and address security vulnerabilities in their development processes.
- Secret Scanning push protection: check if code pushes include commits that expose secrets such as credentials
- Secret Scanning on repos: scan your repository and look for exposed secrets that were committed accidentally
- Dependency Scanning – search for known vulnerabilities in open source dependencies (direct and transitive)
- Code Scanning – use CodeQL static analysis engine to identify code-level application vulnerabilities such as SQL injection and authentication bypass.
Scope of GitHub Advanced Security for Azure DevOps
- only available for Git repositories
- only available for Azure DevOps services, not available in Azure DevOps Server(old TFS)
Pre-requisites:
Enable GitHub Advanced Security
You can enable Advanced Security at the organization, project, or repository level.
Organization-level onboarding
- Go to your Organization settings for your Azure DevOps organization.
- Select Repositories.
- Select Enable all and see an estimate for the number of active committers for your organization appear.
- Select Begin billing to activate Advanced Security for every existing repository in each project in your organization.
- Optionally, select Automatically enable Advanced Security for new repositories so that any newly created projects have Advanced Security enabled upon creation.
Project-level onboarding
- Go to your Project settings for your Azure DevOps project.
- Select Repos.
- Select the Settings tab.
- Select Enable all and see an estimate for the number of active committers for your project appear.
- Select Begin billing to activate Advanced Security for every existing repository in your project.
- Optionally, select Automatically enable Advanced Security for new repositories so that any newly created repositories have Advanced Security enabled upon creation.
Repository-level onboarding
- Go to your Project settings for your Azure DevOps project.
- Select Repos > Repositories.
- Select the repository you want to enable Advanced Security for.
- Select Enable and Begin billing to activate Advanced Security. A shield icon now appears in the repository view for any repository with Advanced Security enabled.
Setup Secret Scanning
Secret scanning push protection and repository scanning are automatically enabled when you turn on Advanced Security. You can enable or disable secret push protection from the repository settings page.
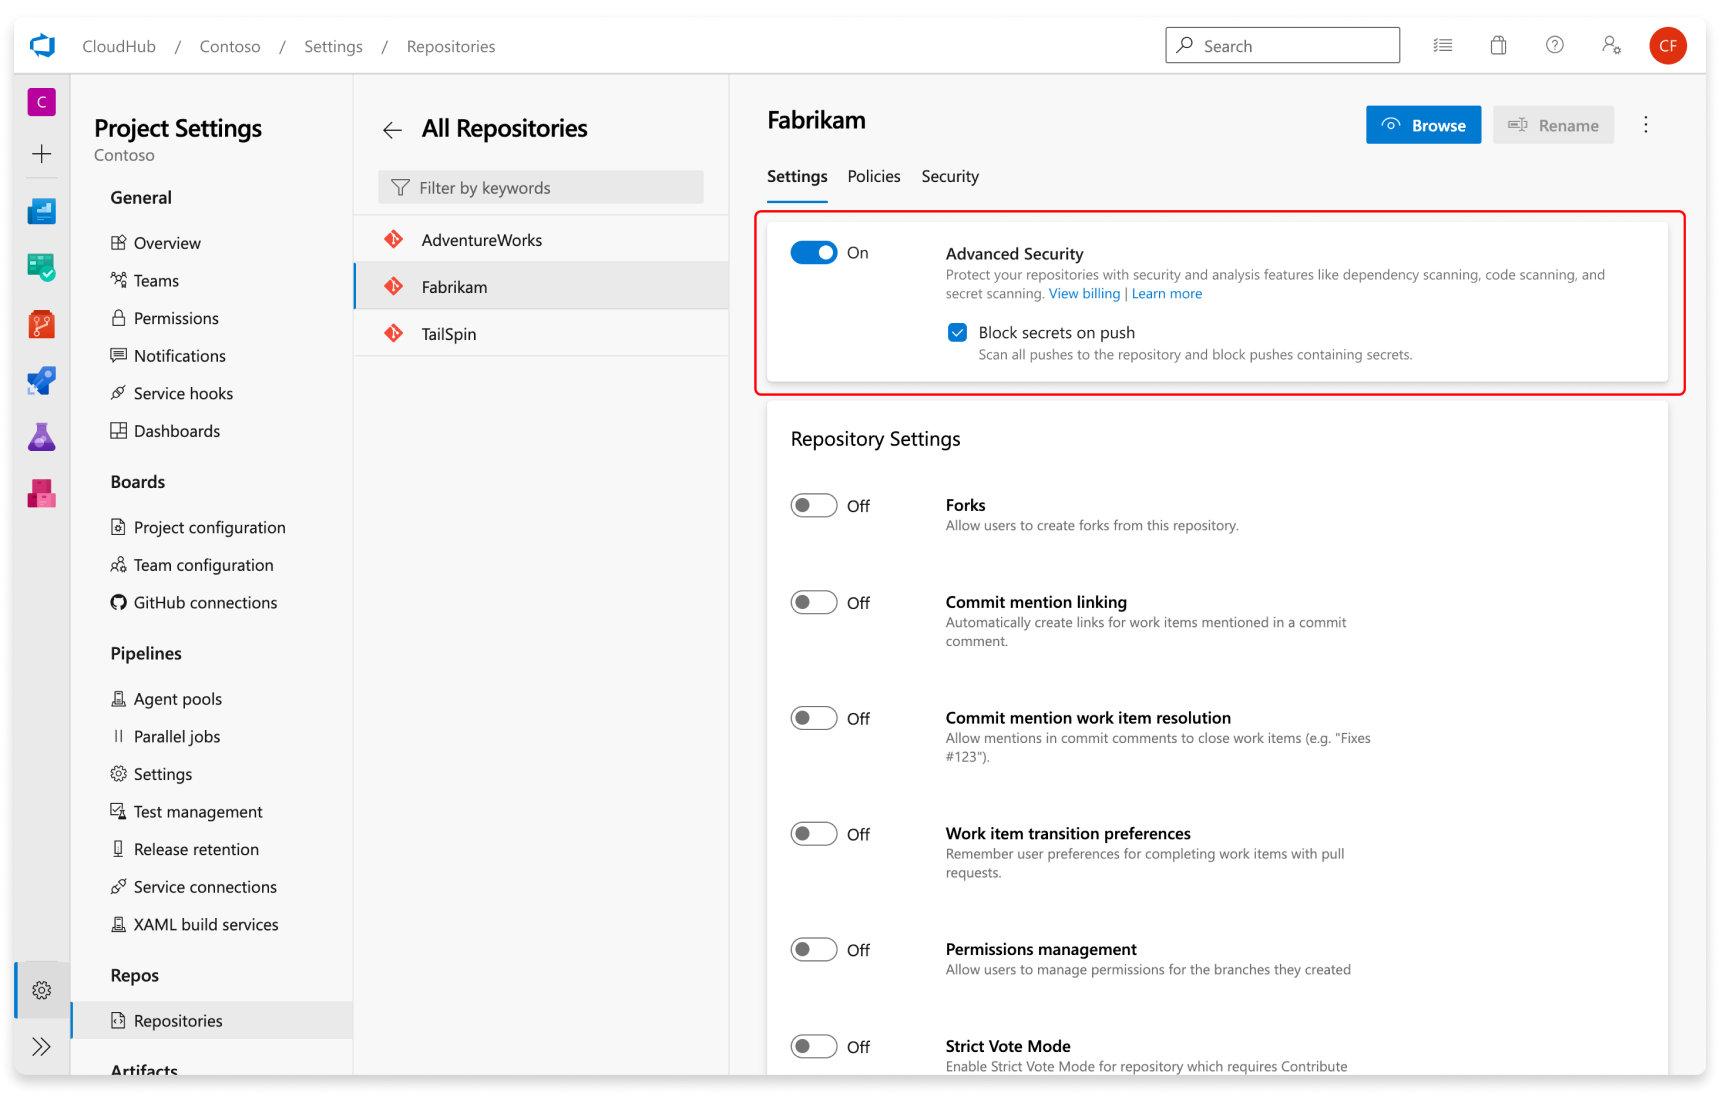
As mentioned, secret scanning repository scanning is automatically kicked off upon enabling Advanced Security for a selected repository.


