Hands on DevSecOps Coaching that is provided on AWS and Azure Cloud platforms. Contact Coach AK at devops.coaching@gmail.com for more info. You can also reach out to Coach AK at +1(469) 733-5248
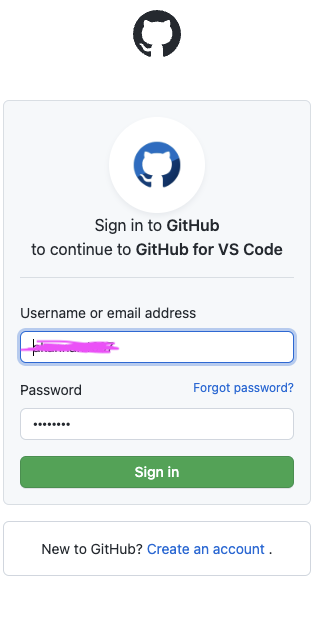
GitHub is popular Git based SCM, hosted on cloud for storing and sharing code amongst developers. Using GitHub with Visual Studio Code lets you share your source code and collaborate with other developers right within your editor.
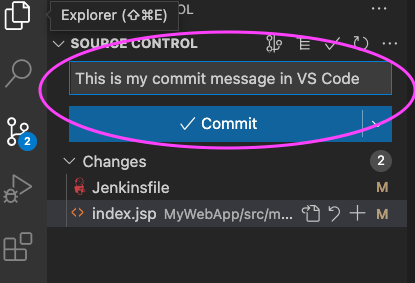
There are many ways to integrate with GitHub, using the website or using Git client(CLI) or using VS Code as well. We will be learning how to integrate with GitHub from VS Code. Git Support is provided out-of-the-box in VS Code.
How to migrate a Git Repo from GitHub to Azure Repos including all history?
Pre-requisites:
1. GitHub repo setup in GitHub
2. Azure DevOps account setup and project dashboard created.
Steps to migrate an existing repo from GitHub to Azure Repos
There are many ways to migrate from one Git repo to another Git repo. We will learn how to migrate using UI.
Using import option You can easily migrate or import a Repo from GitHub into Azure Repos using import option. This will include importing all the branches and history.
1. Login to Azure Repos first. Create a target repo. You will be importing a GitHub Repo into this Repo.
2. Do not check Add a README file option, click on Create
3. Click on import repo
4. Enter source repo details like GitHub Repo url, and select Requires authentication checkbox.
enter username and Personal Access Token or password.
5. Click Import
6. Now you will see GitHub repo fully imported here including history + all the branches.
GitHub removed password authentication support from August 13, 2021 instead it recommends to use either OAuth or Personal Access Token. We will see how to connect to GitHub from Jenkins using SSH keys instead of using user name and password.
It is also a good practice to use SSH keys in Jenkins jobs instead of using user name and password.
Watch the steps in YouTube channel:
Pre-requisites:
Jenkins is up and running
Credentials plug-in installed in Jenkins
Create SSH keys in your Jenkins EC2 instance
ssh-keygen
enter four times. this will create keys in .ssh folder.
Copy and paste the public key
sudo cat ~/.ssh/id_rsa.pub
Add public Keys into your respective GitHub
Add public keys into your Repository--> settings--> Deploy keys section
Click on Add Deploy Key and enter public keys and save.
Add Private Keys in Jenkins Master
Login Jenkins. Go to Manage Jenkins. click on Credentials
Click on Jenkins
Click on Global Credentials
Click on Add Credentials
Choose SSH username with private key
Choose SSH username with private key username can be anything Click on enter directly under private key option and Click Add
Copy and paste private key(not public key) of your from Jenkins instance. command is below: sudo cat ~/.ssh/id_rsa
copy the content of whole output from above command.
Click OK to save.
Now go to any Jenkins Job, you can choose this option for checking out from GitHub. Make sure you enter SSH url not https url.
That's it. This is how you use SSH url and private keys to checkout code from bitbucket or Github without entering username/password in Jenkins.
Click here to authenticate with GitHub using Personal Access Token.
Most of version control systems such as SVN, TFVC or CVS work on client-server model. After making code changes, when developers check-in the code changes, it goes to central server. All history is being maintained in a central server, not locally.
Whereas in Git, developers clone the remote repo into local machine which is called local repo. When they clone in local machine, all history is copied into local repo. After making code changes, when they commit the code, it goes into local repo with new version. Then they can push code changes into remote repo where it is available to others. Client and remote server will have full repository.
Here below is the difference Git and other control systems:
Area
Git
SVN/TFVC
Repository type
Distributed
Centralized
Full History
Local machine
Central machine
Checkout
They clone the whole repository and do locally changes
Developer checkout working copy which is snapshot of a code
Work Offline
Yes
No
Branching and Merging
Reliable, used often, supports fat forward merge and 3-way merge
Reliable, use with caution
Operations speed
Fast and most are local
Network-dependent
Learning Curve
Needs a bit time
Relatively simple
Staging area
Supported to stash the temporary changes and retrieve it back
later
How to set up SSHkeys in Azure Repos and Setup WebApp in Azure Repo
Pre-requisites:
Git client installed on your source or local machine.
Steps:
Go to your visual studio home page. You should be able to go by clicking on the below URL. https://dev.azure.com/
Create a new project by clicking on New project and enter project details like below. This will create a project dashboard.
Once project is created, Click on Repos.
Click on initialize link to add README.
Click on clone link on the top right hand side. Click on SSH link Click Manage SSHkeys
Click Add
Go to any virtual machine you had setup that has both Java and Maven installed. If you would like to know how to create a Virtual Machine in Azure Cloud, click here to do so.
Login to your VM
Create the SSH keys by executing the below command: (If you already have keys generated, you can overwrite it or skip to next step to copy keys) ssh-keygen
execute the below command to copy the keys:
cat ~/.ssh/id_rsa.pub
Add the public keys. Once keys added into Azure DevOps, go to Repos, copy the SSH clone url
Go to your machine where you have installed Java, Maven, preferably your EC2. Execute this command: git clone <ssh_url>
This should download the empty repo from Azure DevOps to local machine(or ec2). now after cloning, it will create a folder with repo name..
type
ls -al to see the folder name after you cloned.
go inside that folder by cd reponame
Install Maven
sudo apt install maven -y
Now create the maven project executing the below command: mvn archetype:generate -DgroupId=com.cf -DartifactId=MyAwesomeApp -DarchetypeArtifactId=maven-archetype-webapp -DinteractiveMode=false
type git status --> to see the newly created project git add * git status
git commit -m "my first project check-in to Azure Git" git push
Now go to Azure DevOps, Select the Repos —> Files —> you should see the project uploaded here.
Building pipelines in Azure DevOps is really easy, you can migrate your web applications from any where into Azure Cloud by using Azure pipelines. We are going to migrate Java Web App that was setup in BitBucket into Azure Cloud. Since it is a Java WebApp, we need to create a WebApp in Azure Cloud.
WebApp is a Platform as a service capability provided by Azure to deploy any kind of apps including Web apps, APIs, mobile apps.
How are we going to do?
1. Create a Webapp in Azure Cloud.
2. Create Azure pipeline in Azure DevOps
3. configure pipeline to check out code from BitBucket and deploy into Azure Cloud on WebApps
4. Run the apps
You need to create WebApp in Azure Cloud. WebApp is an App service (Platform as a Service) provided by Azure Cloud to migrate any web applications.
Once you sign in to Azure Portal, you need to create an app service which is a WebApp.
3.Click on + Add or click on Create app service(Web App)
Click on Web App. Choose your Azure subscription, usually Pay as you Go or Free trial subscription Create a new resource group(for first time if you are creating an appservice, otherwise you can use existing group)
Enter App service name(it should be unique) Publish as Code Run time stack as Java 17
Java Web Server stack --> Tomcat 10.0 Operating System as Linux Region as Central US or where ever you are based at Enter LinuxPlan name Choose SKU and size as given below: Choose DEV/Test and use 1 GB or 1.75 GB memory
Click on Apply Now click on Apply & Create This will take bit time to create the app service.
Once WebApp is created, go resources, click on WebApp name and click on the URL.
You should see the app service home page some thing like below:
Since our WebApp is up and running, now we can start creating pipelines to migrate to Azure cloud. 2. Creating pipelines in Azure Devops
1. Now go to your visual studio project page --> https://dev.azure.com/ Select the Project dashboard you already created.
Click on Pipelines, Builds.
2. Click on New pipeline and click on use the classic editor to create a pipeline without YAML
3. Select source repository as BitBucket cloud and click use user name and password to continue
4. Enter bitbucket user name and password and click on authorize.
Choose your repo by click on ... dots. click continue
5. Since our application is Java stack, type Java and Choose Azure WebApp for Java
6. Modify maven goal as clean install and also choose POM.xml by clicking on three dots ...choose pom.xml
7. Leave the value as it is for Copy Files to staging folder
8. Leave the value as it is for Publish Artifact: Drop 9. Click on Stop Azure WebApp step, Enter Azure WebApp details - where you would like to deploy your app in Azure. Select Free trial subscription from the drop down. Click on Authorize button. Make sure you disable popup blocker.
10. Do the same in Deploy Azure WebApp & Start Azure WebApp steps.
Enable Webhooks in Pipeline
11. Click on Triggers and then enable check box for Continuous Integration
12. Now click on Save and Queue
13. If your configurations are correct, you should be able to see the build success and able to access in the Azure. Click on Pipelines and pipeline name
Now you will see that Azure DevOps would have started build.
14. Make sure build is success, it should have all green like below.
After successful build, you can check the output by accessing the URL of WebApp:
https://myAzureWebAppUrl
You can watch the above steps in action in YouTube video:
Clean-up Resources:
After successfully finishing the labs, make sure to delete all the resources created in Azure portal to avoid charges from Microsoft.
Select the resource group in Azure portal, delete the resource group. This will ensure that all the resources will be deleted under the resource group.


