Azure Repos allows you to create Pull Request (PR) templates to standardize and streamline the PR process for your team. This ensures that all necessary information is included, making the review process more efficient.
Step-by-Step Guide
Navigate to Your Repository:
Go to the Azure Repos repository where you want to create a PR template.
Create a .azuredevops Directory:
create a new directory named .azuredevops in the root of your repository. This is where Azure Repos looks for configuration files, including PR templates.
Create a PULL_REQUEST_TEMPLATE File:
Inside the .azuredevops directory, create a file named PULL_REQUEST_TEMPLATE.md. This file will contain the template for your pull requests.
4. Add Template Content:
Open the PULL_REQUEST_TEMPLATE.md file and add the content you want to include in your PR template. You can use Markdown to format the template. Here’s an example of a basic PR template:
## What type of PR is this? (check all applicable) - [ ] 🍕 New Feature - [ ] 🎨 Enhancment Feature - [ ] 🐛 Bug ## Describe about your code changes <!-- Please do not leave this blank This PR [adds/removes/fixes/replaces] the [feature/bug/etc]. --> ## Related Feature & Documents <!-- Please use this format link issue numbers: Fixes #123 --> ## Screenshots/Recordings Link In Sharepoint <!-- Visual changes require screenshots --> ## Created Unit tests, etc? - [ ] 👍 yes - [ ] 🙅 no, because they aren't needed - [ ] 🙋 no, because I need help ## Added to documentation? - [ ] 📜 README.md - [ ] 📕 wiki - [ ] 🙅 no documentation needed ## [optional] Are there any post-deployment tasks we need to perform?
5. Commit and Push:
Commit the PULL_REQUEST_TEMPLATE.md file to your repository and push it to Azure Repo.
GitHub Advanced Security for Azure DevOps brings the secret scanning, dependency scanning and CodeQL code scanning solutions already available for GitHub users and natively integrates them into Azure DevOps to protect your Azure Repos and Pipelines.
Dependency scanning is a pipeline-based scanning tool. Results are aggregated per repository. It's recommended that you add the dependency scanning task to all the pipelines you'd like to be scanned.
Add the task Advanced Security Dependency Scanning task (AdvancedSecurity-Dependency-Scanning@1) directly to your YAML pipeline file or select the Advanced Security Dependency Scanning task from the task assistant.
How to Set up code scanning
Code scanning is also a pipeline-based scanning tool where results are aggregated per repository.
GitHub Advanced Security for Azure DevOps brings the secret scanning, dependency scanning and CodeQL code scanning solutions already available for GitHub users and natively integrates them into Azure DevOps to protect your Azure Repos and Pipelines.
These scanning tools will natively embed automated security checks into the Azure DevOps platform, allowing developers to secure their code, secrets and supply chain without leaving their workflow.
Azure DevOps Advanced Security provides below security features to help organizations identify and address security vulnerabilities in their development processes.
Secret Scanning push protection: check if code pushes include commits that expose secrets such as credentials
Secret Scanning on repos: scan your repository and look for exposed secrets that were committed accidentally
Dependency Scanning – search for known vulnerabilities in open source dependencies (direct and transitive)
Code Scanning – use CodeQL static analysis engine to identify code-level application vulnerabilities such as SQL injection and authentication bypass.
Scope of GitHub Advanced Security for Azure DevOps
only available for Git repositories
only available for Azure DevOps services, not available in Azure DevOps Server(old TFS)
You can enable Advanced Security at the organization, project, or repository level.
Organization-level onboarding
Go to your Organization settings for your Azure DevOps organization.
Select Repositories.
Select Enable all and see an estimate for the number of active committers for your organization appear.
Select Begin billing to activate Advanced Security for every existing repository in each project in your organization.
Optionally, select Automatically enable Advanced Security for new repositories so that any newly created projects have Advanced Security enabled upon creation.
Project-level onboarding
Go to your Project settings for your Azure DevOps project.
Select Repos.
Select the Settings tab.
Select Enable all and see an estimate for the number of active committers for your project appear.
Select Begin billing to activate Advanced Security for every existing repository in your project.
Optionally, select Automatically enable Advanced Security for new repositories so that any newly created repositories have Advanced Security enabled upon creation.
Repository-level onboarding
Go to your Project settings for your Azure DevOps project.
Select Repos > Repositories.
Select the repository you want to enable Advanced Security for.
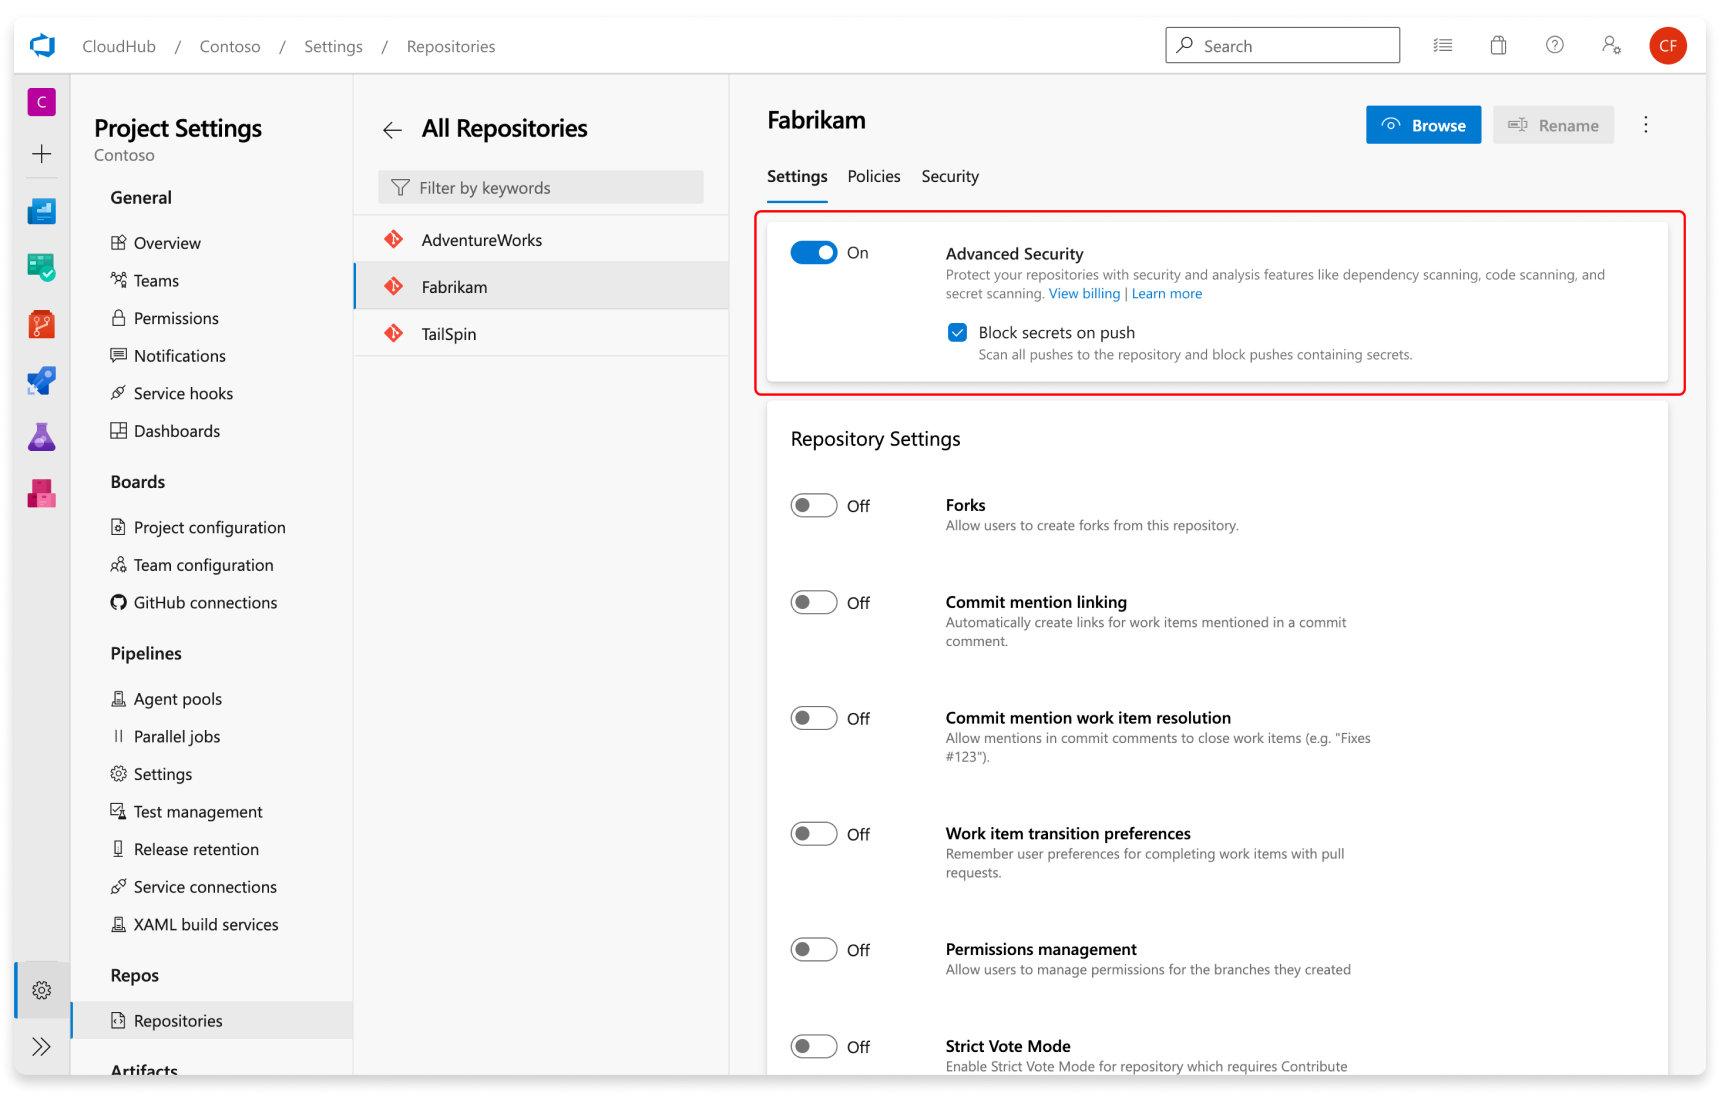
Select Enable and Begin billing to activate Advanced Security. A shield icon now appears in the repository view for any repository with Advanced Security enabled.
Setup Secret Scanning Secret scanning push protection and repository scanning are automatically enabled when you turn on Advanced Security. You can enable or disable secret push protection from the repository settings page.
As mentioned, secret scanning repository scanning is automatically kicked off upon enabling Advanced Security for a selected repository.
Creating pull request (PR) templates in GitHub can help streamline the process
of submitting PRs by providing a predefined structure. This ensures that all
necessary information is included, making the review process more
efficient.
Step-by-Step Guide
Navigate to Your Repository:
Go to the GitHub repository where you want to create a PR template.
Create a .github Directory:
If it doesn't already exist, create a new directory named
.github in the root of your repository. This is where
GitHub looks for configuration files, including PR templates.
Create a PULL_REQUEST_TEMPLATE File:
Inside the .github directory, create a file named
PULL_REQUEST_TEMPLATE.md. This file will contain the template
for your pull requests.
4. Add Template Content:
Open the PULL_REQUEST_TEMPLATE.md file and add the content you want to include in your PR template. You can use Markdown to format the template. Here’s an example of a basic PR template:
## What type of PR is this? (check all applicable) - [ ] 🍕 New Feature - [ ] 🎨 Enhancment Feature - [ ] 🐛 Bug ## Describe about your code changes <!-- Please do not leave this blank This PR [adds/removes/fixes/replaces] the [feature/bug/etc]. --> ## Related Feature & Documents <!-- Please use this format link issue numbers: Fixes #123 --> ## Screenshots/Recordings Link In Sharepoint <!-- Visual changes require screenshots --> ## Created Unit tests, etc? - [ ] 👍 yes - [ ] 🙅 no, because they aren't needed - [ ] 🙋 no, because I need help ## Added to documentation? - [ ] 📜 README.md - [ ] 📕 wiki - [ ] 🙅 no documentation needed ## [optional] Are there any post-deployment tasks we need to
perform?
5. Commit and Push:
Commit the PULL_REQUEST_TEMPLATE.md file to your repository
and push it to GitHub.
git add .github/PULL_REQUEST_TEMPLATE.md
git commit -m
"Add pull request template"
git push origin main
Optional: Multiple Templates
If you want to offer multiple PR templates, you can place them in the
.github/PULL_REQUEST_TEMPLATE/ directory. Each template
should be a separate Markdown file.
Using PR templates helps maintain consistency and completeness in pull
requests, making it easier for reviewers to understand and review changes.
Adjust the templates according to the needs and standards of your project.