Friday, February 17, 2023

How to Create a Docker Image for Springboot App and Push Docker image into Amazon ECR from Azure DevOps Pipelines | Azure DevOps Pipelines to Build and Push a Docker image to AWS ECR

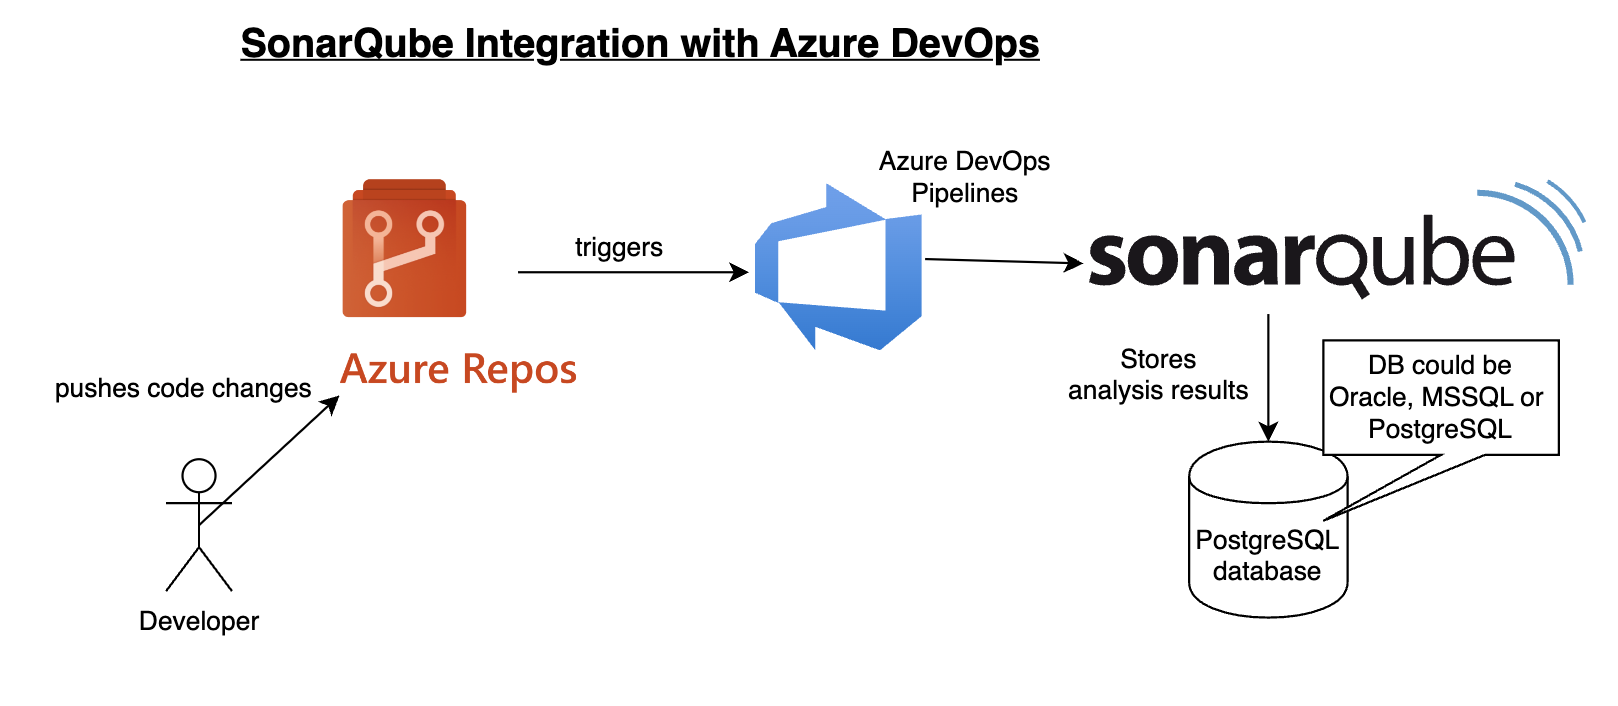
Amazon Elastic Container Registry (ECR) is a fully managed Docker container registry that makes it easy to store, share, and deploy container images. We will learn how to build docker image for a springboot microservices app using Azure DevOps(ADO) build pipeline and push docker image into AWS ECR.


What are we going to do in this lab?
1. Create a Repository in AWS ECR for storing docker images
2. Create an IAM user and AmazonEC2ContainerRegistryFullAccess policy.
3. Create access keys for IAM user in AWS console
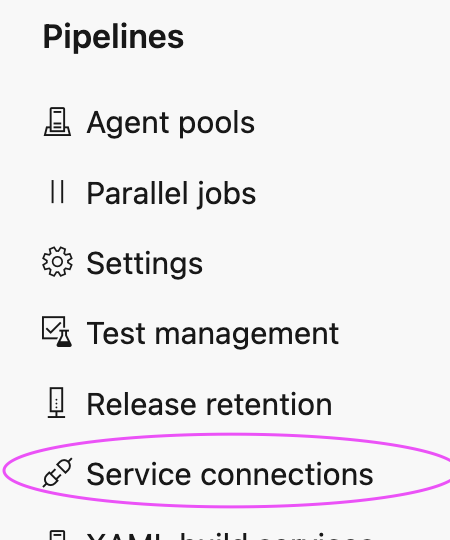
4. Create service connection in AzureDevOps to connect to AWS using IAM user access & secret keys.
5. Create Azure DevOps Build pipeline with below tasks:
  • maven build for building JAR
  • build docker image
  • push docker image into ECR
6. Verify if docker image has been pushed to AWS ECR

Pre-requisites:

Watch Steps in YouTube channel:

Step 1 - Create a repo in ECR 

Go to AWS console, type ECR


Click on Create Repository

Enter name for your repo - all lower case and Click create repository


Create an IAM user

Go to AWS console --> IAM --> Add Users

Enter name for the user
Search for EC2 and choose AmazonEC2ContainerRegistryFullAccess
Click on Create User

Create security credentials

Click on user name ecr-user
Click on Security credentials


Create Access key

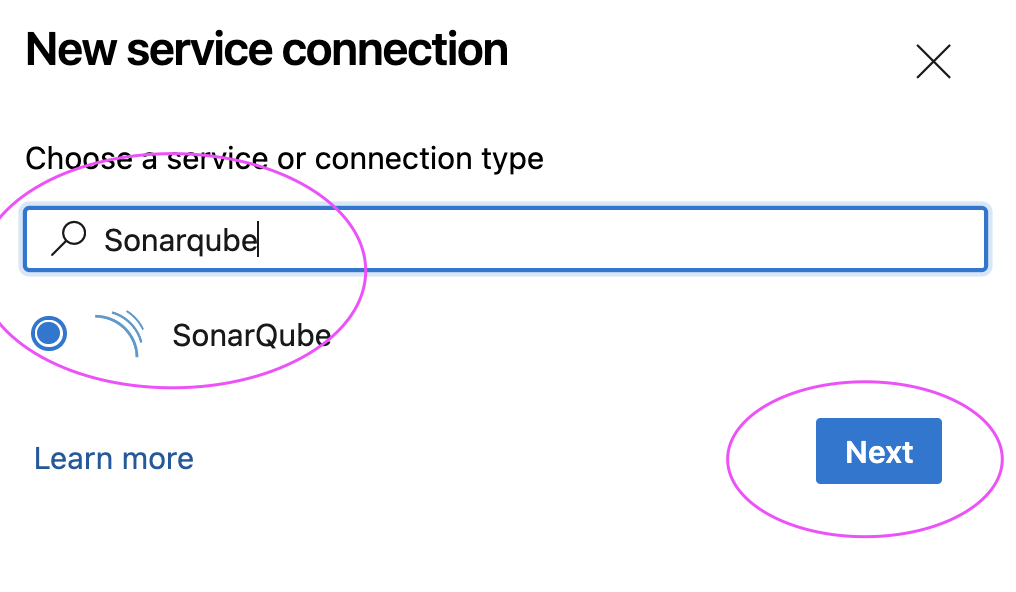
Create Service connection 

Go to Project settings --> Service Connections


Enter Access keys and Secret keys

Enter Connect name and select Grant access to all pipelines
Click on save

Create a classic Azure Build pipeline

Click on use the classic editor

Select GitHub and choose your spring-boot project and click continue


Choose a template for the pipeline, type docker and select docker container

Click on Apply

Select build Agent for the Pipeline
Choose Ubuntu latest as build agent


Add Pipeline variables
imageName as springboot-app
repoName as my-springboot-repo

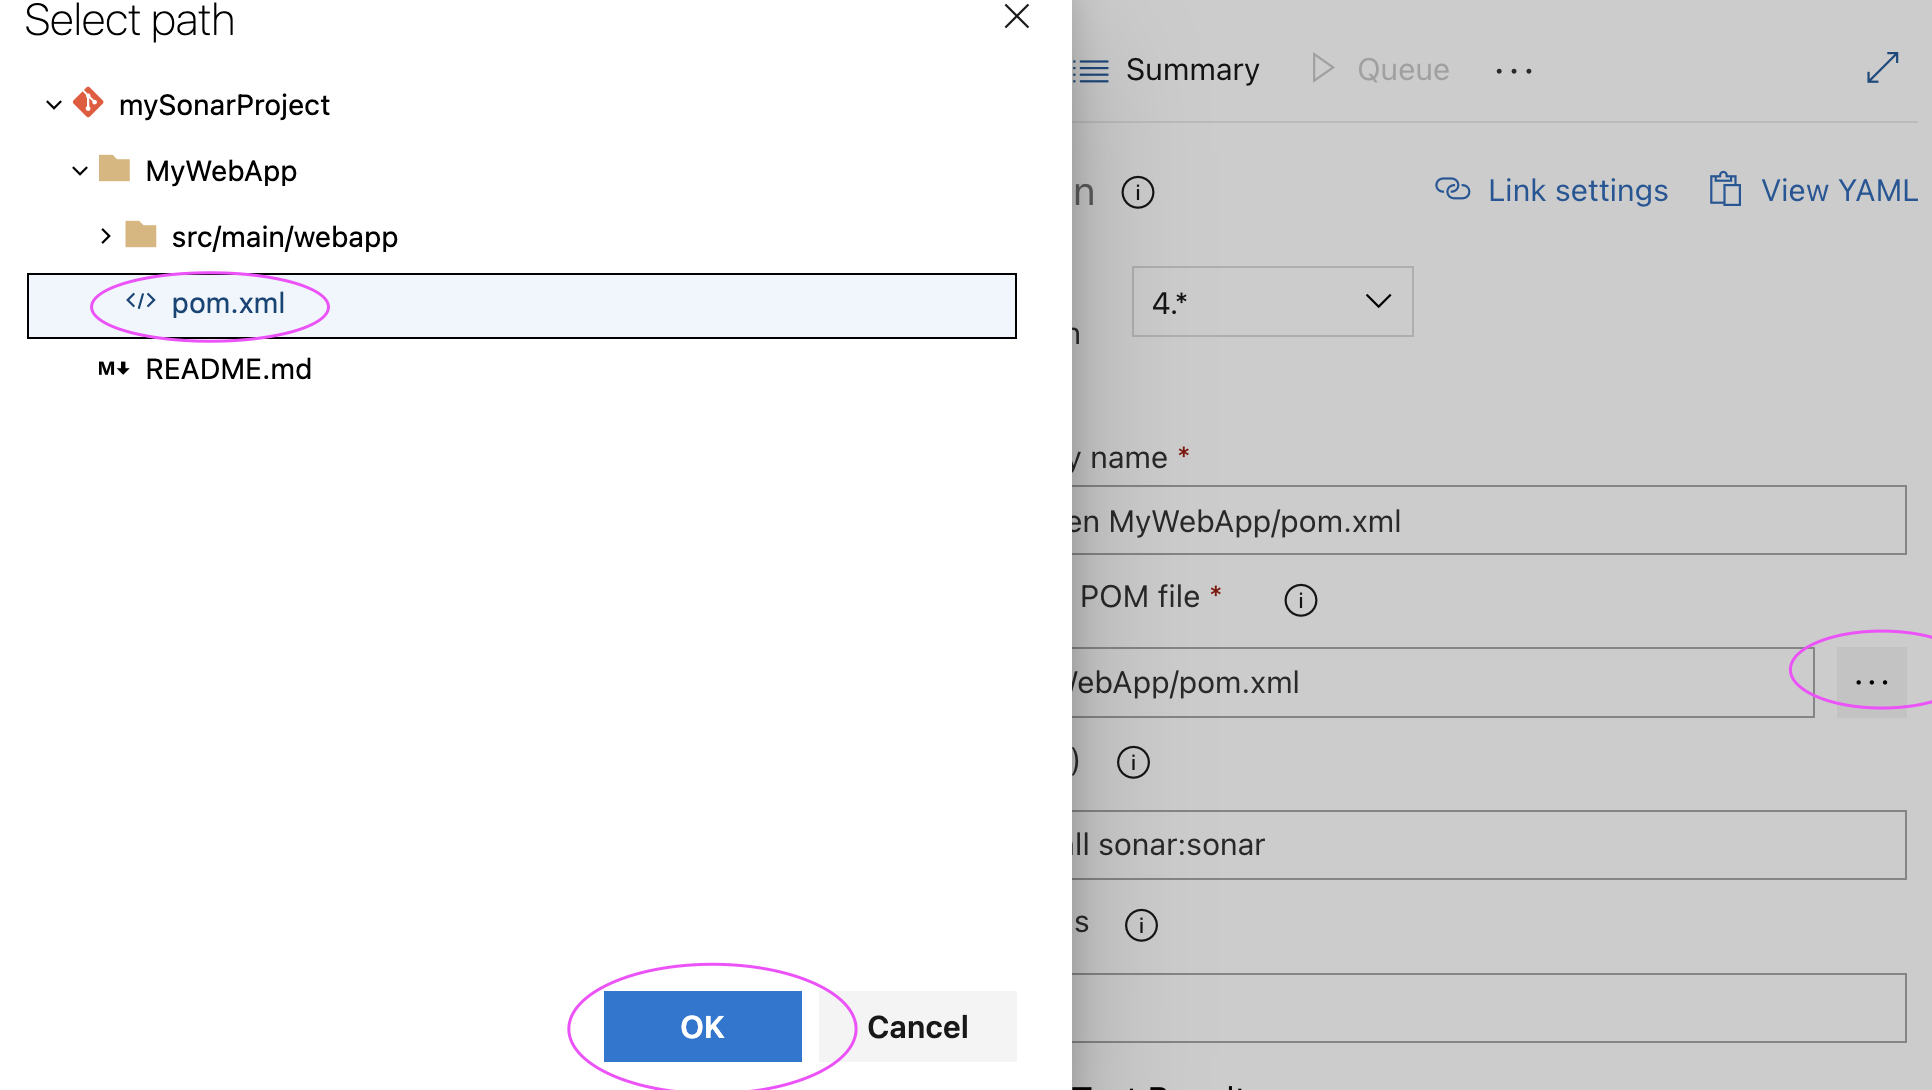
Add Maven task for building springboot JAR file
Make sure Maven task is moved up..it should be a first task

enter maven goas as install


Customize build an image Task 

start customizing the task, choose the version as 2.0
Enter $(imageName) as  Container repository 
Select build as command from drop down
Tags as it have shown below
Remove push an image task


Add ECR push task


now configure the task

Select as shown in screenshot
Choose aws service connection from drop down
select region as per your settings.
select Image ID
enter as $(imageName):$(Build.BuildId)


Repo Name as $(repoName)
$(Build.BuildId) as tar repo tag


Save and Queue
Select ubuntu latest as build agent..do NOT select window agents.

Now make sure build is successful.


Verify if Docker image has been pushed into AWS ECR

Now login to AWS console --> Go to ECR--> select your repo. verify if image has been uploaded successfully.

Monday, February 13, 2023

How to integrate SonarQube with Azure DevOps | SonarQube Integration with Azure DevOps | Automate Code Scan using SonarQube In Azure Pipelines

Please find steps below for integrating SonarQube with Azure DevOps, Previously known as Visual Studio Team Services:


Pre-requisites:

https://marketplace.visualstudio.com/acquisition?itemName=SonarSource.sonarqube


Once added SonarQube plug-in, click on proceed to Organization..


Watch Steps in YouTube channel:

How to integrate SonarQube with Azure DevOps:

Create Token in SonarQube to authenticate with Azure DevOps
You need to login to SonarQube using your admin password. admin/admin123 and click on Admin on your top side.
Click on My Account, Security. 
Under Tokens, Give some value for token name and choose Global analysis token, click on generate Tokens. Copy the token value generated.


Create Service Connections in Azure DevOps 

Login to Azure DevOps. Select your project dashboard.


Click on Project settings --> Service connections


click on New service connection

Type SonarQube and Click Next

Enter SonarQube server url and enter Token created 
Give name for service connection and select Grant access permission to all pipelines.
Click on Save.

Create a Pipeline in Azure DevOps

1. Login to Azure DevOps. Go to Azure Pipelines. Click on create a new pipeline, use classic editor 
Select your Azure Repos
Type Maven and choose maven template as shown below


2. Click on Add tasks
3. Type Sonar


4. Add Prepare Analysis on SonarQube task
5. move up this task to all the way up.
And also search for Java tool installer task and add it


It should be like shown below:


6. Click on prepare sonar analysis configuration task

select Integrate with Maven or Gradle option

7.Click on Java tool installer and change to 11 instead of 8


8. Edit maven task & add install sonar:sonar and also select the path of pom.xml under MyWebApp/pom.xml


Click on Save and Queue to kick start build.
9. Now login to SonarQube dashboard, click on Projects


Friday, February 10, 2023

How to fix bugs found during SonarQube code analysis | How to resolve defects found in Java Web App during Sonar Scan

Let's say you have configured a build job in Jenkins to implement CI and you are performing code scan using SonarQube. Code scan results shown some defects(bugs) in your Java Code.

If you look at Jenkins console output, you can see analysis was successful.


If you look at SonarQube project dashboard, you are seeing defects like shown below. How do fix those defects? Let's see the steps to fix those defects.


Pre-requisites:
  • Sonarqube is setup and running
  • Jenkins is up and running
  • Java WebApp setup in GitHub
  • build job configured in Jenkins to perform code scan
Now login to SonarQube
Click on Project name MyWebApp


Click on Overall code, click on 3 Bugs
Now this shows what is the issue with code. it needs <!DOCTYPE> declaration before <html> tag


Click on Why this an issue to learn more about the issue and how you can fix it.
Now code to GitHub where Java WebApp is configured, edit the index.jsp under MyWebApp/src/main/webapp

Fix for bug # 1

add <!DOCTYPE html> above <html> tag

Fix for bug # 2

add <html lang="en">

Fix for bug # 3
    <head>
          <title>My WebApp</title>
          <meta content="text/html; charset=utf-8" />
    </head>  


Now commit the code changes.

run the build in Jenkins by clicking on Build now.
Login to SonarQube, now you will see no bugs.


This is how you can fix defects found by SonarQube.

DevOps Interview Preparation Useful real time tips | Crack DevOps Interviews | How to clear DevOps Interviews

Are you failing in DevOps Interviews? Are you not be able to next round in the Interview process?  Let's find out how to fix this:   Fir...