Showing posts with label Build Agents. Show all posts

Friday, December 15, 2023

Different types of GitHub runners | GitHub runners various types | Self hosted vs GitHub Hosted runner


A self-hosted GitHub runner is a machine (physical or virtual) that you set up and manage to run GitHub Actions workflows. GitHub Actions is a CI/CD (Continuous Integration/Continuous Deployment) and automation service provided by GitHub. It allows you to define workflows in your GitHub repositories to automate build, test, and deployment processes. 

  • GitHub-hosted runner
  • Self-hosted runner
  • Larger runner 
  • ephemeral self-hosted runners (on-demand)

GitHub-hosted runners:

  • These are runners provided by GitHub, and they are hosted on GitHub's infrastructure.
  • GitHub provides various virtual machine configurations for different operating systems and environments.
  • They are automatically scaled based on the demand, and you don't have to manage their infrastructure.
  • GitHub-hosted runners have time and resource limitations, and you may need to consider these limitations based on your project's needs.


Self-hosted runners:

A self-hosted runner differs from the default GitHub-hosted runners in that it runs on infrastructure that you control. Self-hosted runners can be physical, virtual, in a container, on-premises, or in a cloud.


GitHub-hosted large runners:

GitHub offers customers on GitHub Team and GitHub Enterprise Cloud plans a range of managed virtual machines with more RAM, CPU, and disk space. These runners are hosted by GitHub and have the runner application and other tools preinstalled.


Ephemeral self-hosted runners:

GitHub Actions now supports ephemeral (i.e. single job) self-hosted runners to make autoscaling your runners easier. After a job is run, ephemeral runners are automatically unregistered from the service, allowing you to do any required post-job management. Ephemeral runners are a good choice for self-managed environments where you need each job to run on a clean image.

    Friday, August 12, 2022

    How to setup Docker Containers as Build Agents | Setup dynamic Docker Slave and Integrate with Jenkins Master | Jenkins Build Agent Setup using Docker

    Jenkins has powerful feature of master slave architecture which enables distributed builds. This article we will learn how to setup slave nodes using Docker and integrate with Jenkins Master.


    Advantages of using Docker Containers as Jenkins Build Agents
    • Ephemeral 
    • Better resource utilization
    • Customized agents as it can run different builds like Java 8, Java 11 
    • Scalability 
    Let us see how to configure slave nodes dynamically using Docker. If you like to learn how to setup Jenkins Master on Ubuntu EC2 instance, click here.

    Watch this in YouTube channel:

    Pre-requisites:

    Step 1 - Configure Docker Host with Remote API

    Login to Docker host machine. Open docker service file. Search for ExecStart and replace that line with the following.
    sudo vi /lib/systemd/system/docker.service

    You can replace with below line:
    ExecStart=/usr/bin/dockerd -H tcp://0.0.0.0:4243 -H unix:///var/run/docker.sock

    Restart Docker service
       sudo systemctl daemon-reload
       sudo service docker restart

    Validate API by executing below curl command
    curl http://localhost:4243/version

    Step 2 - Build Jenkins slave Docker image

    Download Dockerfile from below repo.
    git clone https://github.com/akannan1087/jenkins-docker-slave; cd jenkins-docker-slave

    Build Docker image

    sudo docker build -t my-jenkins-slave .

    Perform below command to see the list of docker images:

    sudo docker images

    Step 3 - Configure Jenkins Server with Docker plug-in

    Now login to Jenkins Master. Make sure you install Docker plug-in in Jenkins.


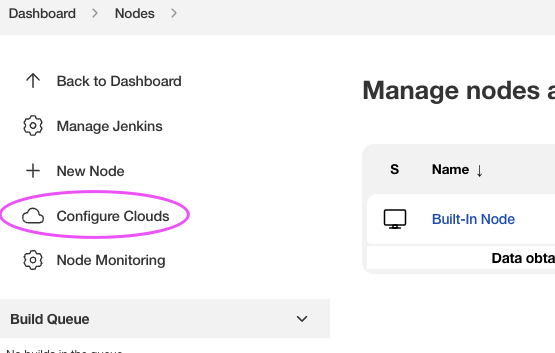
    Now go to Manage Jenkins -> Configure Nodes Cloud


    Click on Docker Cloud Details
    Enter docker host dns name or ip address
    tcp://docker_host_dns:4243
    Make sure Enabled is selected
    Now click on Test Connection to make sure connecting with docker host is working. 


    Step 4 - Configure Docker Agent Templates

    Now click on Docker Agent templates:
    Enter label as "docker-slave" and give some name
    Click on Enabled
    Now enter the name of the docker image you have built previously in docker host.
    enter /home/jenkins as Remote file system root
     

    Choose Connect with SSH as connection method:
    Enter SSH credentials per your Dockerfile - jenkins/password


    choose Never Pull as pull strategy as we have already image stored in DockerHost.
    Click on Save.

    Step 5 - Create build job in Jenkins

    Now Create a pipeline job in Jenkins with below pipeline code:

    pipeline {
        agent { 
            label "docker-slave"
         }
        stages {
            stage('Hello') {
                steps {
                    echo 'Hello World'
                }
            }
        }
    }

    Click Apply and Save. 
    Now build the job. Now you will see output like below:


    Create a free style job

    Choose Restrict where this project can be run and enter docker-slave as label


    Complete AI-Enabled DevOps Learning Roadmap for 2026 | Skills Required to Become a Modern DevSecOps Engineer

    🚀  AI-Enabled DevOps Engineer Roadmap for 2026 The future belongs to AI-Enabled DevOps Engineers, not AI-only Engineers. Strong DevOps fund...