Learn. Build. Secure. Automate. Accelerate with AI. Live Training • Hands-On Labs • Expert Mentorship by Coach AK Contact: +1 (469) 733-5248 | devops.coaching@gmail.com
🔴 FREE LIVE WEBINAR
How to Become a DevOps Engineer in 2027
From Zero to DevOps Champion!
November 21st, 2026
9:30 AM CST
Live DevSecOps CI/CD Demo
Career Roadmap • Live Q&A
You can install plug-in called Artifactory plug-in to integrate Artifactory with Jenkins. Let us see how to integrate Jenkins with Artifactory and able to upload any binary file such as War/Ear/Jar/Exe/DLLs from Jenkins.
go to Jenkins, Manage Jenkins, Click on Available plug-ins, type Artifactory. Click on Artifactory and click install without restart
Configure Maven in Jenkins
Make sure Maven 3 is also configured under Manage Jenkins--> Global Tool configuration Enter Name as Maven3 /usr/share/maven as MAVEN_HOME
Configure Artifactory in Jenkins: 1. Go to Manage Jenkins, Click on configure system. Look for JFrog section, click on Add JFrog Platform instance
2. Enter some name and Artifactory url like given below. Enter admin user name as ciadmin and admin password of ciadmin user you have configured.
You should get the message like below:
3. Once you configured Artifactory in Jenkins, let us integrate from our Jenkins job.
How to Integrate from Jenkins Job
1. Create a new free style job in Jenkins
2. Provide your repo details to check out the project you want to build
3. Go under Build environment Select Maven 3 - Artifactory integration check box and click on refresh Repositories and choose repos as mentioned below:
4.Click on Add Build step and choose Invoke Artifactory Maven 3
5. Enter value as below, MyWebApp/pom.xml as root POM and goal as install
6. Now click on Build, Jenkins should build using Maven and upload WAR file into Artifactory.
7. Login to Artifactory, Click on Artifactory --> Artifacts
That's it folks!
Please watch the steps in details in my YouTube channel:
Artifactory is open source, binary repository manager. Artifactory is the single solution for managing all the artifacts, binaries, files and containers throughout your software supply chain.
Some of the key features of Artifactory:
Supports 27 different package types including helm charts, docker images regardless of tech stack.
A single source of truth for all your binaries
Integration with all CICD tools
role based authorization with teams to manage artifacts
you can create local, remote and virtual repositories
What is Docker Compose?
Compose is a tool for defining and running multi-container Docker applications. With Compose, you use a YAML file to configure your application’s services. Then, with a single command, you create and start all the services from your configuration. Since Docker Compose lets you configure related containers in a single YAML file, you get the same Infrastructure-as-Code abilities as Kubernetes. But they come in a simpler system that’s more suited to smaller applications that don’t need Kubernetes’ resiliency and scaling.
The purpose of docker-compose is to function as docker cli but to issue multiple commands much more quickly. To make use of docker-compose, you need to encode the commands you were running before into a docker-compose.yml file
Run docker-compose up and Compose starts and runs your entire app.
Watch the Steps in YouTube channel:
Pre-requisites:
Ubuntu EC2 up and running with at least t2.medium (4GB RAM), 2GB will not work
Port 8081, 8082 is opened in security firewall rule
instance should have docker-compose installed
Change Host Name to Artifactory sudo hostnamectl set-hostname Artifactory
Perform System update
sudo apt update
Install Docker-Compose
sudo apt install docker-compose -y
Create docker-compose.yml
this yml has all the configuration for installing Artifactory on Ubuntu EC2.
sudo vi docker-compose.yml
(Copy the below code high-lighted in yellow color)
You can use a personal access token (PAT) as an alternate password to authenticate into Azure DevOps.
A personal access token(PAT) contains your security credentials for Azure DevOps. A PAT identifies you, your accessible organizations, and scopes of access. As such, they're as critical as passwords, so you should treat them the same way.
Create Personal Access Token
1. Sign into your organization
https://dev.azure.com/{yourorganization}
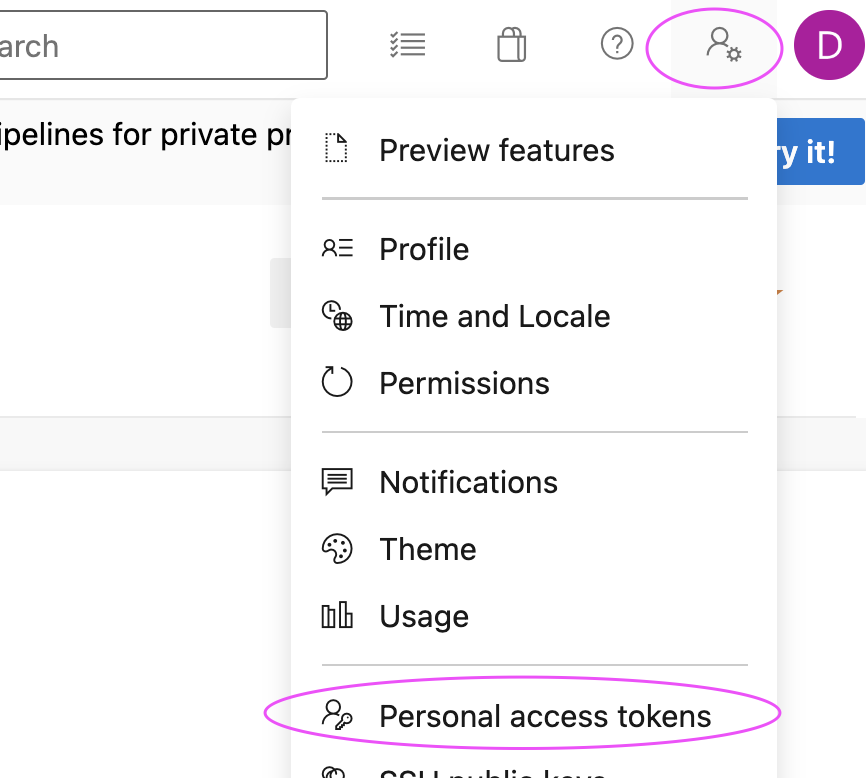
2. Click on User settings, Select personal access tokens
3. Click on New Token
4. Enter a name, select custom defined.
For the scope select Agent Pools (read, manage) and make sure all the other boxes are cleared.
5. Now copy the token and secure in a place where you can refer it. We will use this when configuring build agent in Azure DevOps