terraform {
required_providers {
aws = {
source = "hashicorp/aws"
}
}
}
resource "aws_iam_role" "eks-iam-role" {
name = "devops-eks-iam-role"
path = "/"
assume_role_policy = <<EOF
{
"Version": "2012-10-17",
"Statement": [
{
"Effect": "Allow",
"Principal": {
"Service": "eks.amazonaws.com"
},
"Action": "sts:AssumeRole"
}
]
}
EOF
}
resource "aws_iam_role_policy_attachment" "AmazonEKSClusterPolicy" {
policy_arn = "arn:aws:iam::aws:policy/AmazonEKSClusterPolicy"
role = aws_iam_role.eks-iam-role.name
}
resource "aws_iam_role_policy_attachment" "AmazonEC2ContainerRegistryReadOnly-EKS" {
policy_arn = "arn:aws:iam::aws:policy/AmazonEC2ContainerRegistryReadOnly"
role = aws_iam_role.eks-iam-role.name
}
resource "aws_eks_cluster" "my-eks" {
name = var.cluster_name
role_arn = aws_iam_role.eks-iam-role.arn
vpc_config {
subnet_ids = [var.subnet_id_1, var.subnet_id_2]
}
depends_on = [
aws_iam_role.eks-iam-role,
]
}
resource "aws_iam_role" "workernodes" {
name = "eks-node-group-example"
assume_role_policy = jsonencode({
Statement = [{
Action = "sts:AssumeRole"
Effect = "Allow"
Principal = {
Service = "ec2.amazonaws.com"
}
}]
Version = "2012-10-17"
})
}
resource "aws_iam_role_policy_attachment" "AmazonEKSWorkerNodePolicy" {
policy_arn = "arn:aws:iam::aws:policy/AmazonEKSWorkerNodePolicy"
role = aws_iam_role.workernodes.name
}
resource "aws_iam_role_policy_attachment" "AmazonEKS_CNI_Policy" {
policy_arn = "arn:aws:iam::aws:policy/AmazonEKS_CNI_Policy"
role = aws_iam_role.workernodes.name
}
resource "aws_iam_role_policy_attachment" "EC2InstanceProfileForImageBuilderECRContainerBuilds" {
policy_arn = "arn:aws:iam::aws:policy/EC2InstanceProfileForImageBuilderECRContainerBuilds"
role = aws_iam_role.workernodes.name
}
resource "aws_iam_role_policy_attachment" "AmazonEC2ContainerRegistryReadOnly" {
policy_arn = "arn:aws:iam::aws:policy/AmazonEC2ContainerRegistryReadOnly"
role = aws_iam_role.workernodes.name
}
resource "aws_eks_node_group" "worker-node-group" {
cluster_name = aws_eks_cluster.my-eks.name
node_group_name = "my-workernodes"
node_role_arn = aws_iam_role.workernodes.arn
subnet_ids = [var.subnet_id_1, var.subnet_id_2]
instance_types = ["t2.medium"]
scaling_config {
desired_size = 2
max_size = 2
min_size = 1
}
depends_on = [
aws_iam_role_policy_attachment.AmazonEKSWorkerNodePolicy,
aws_iam_role_policy_attachment.AmazonEKS_CNI_Policy,
aws_iam_role_policy_attachment.AmazonEC2ContainerRegistryReadOnly,
]
}
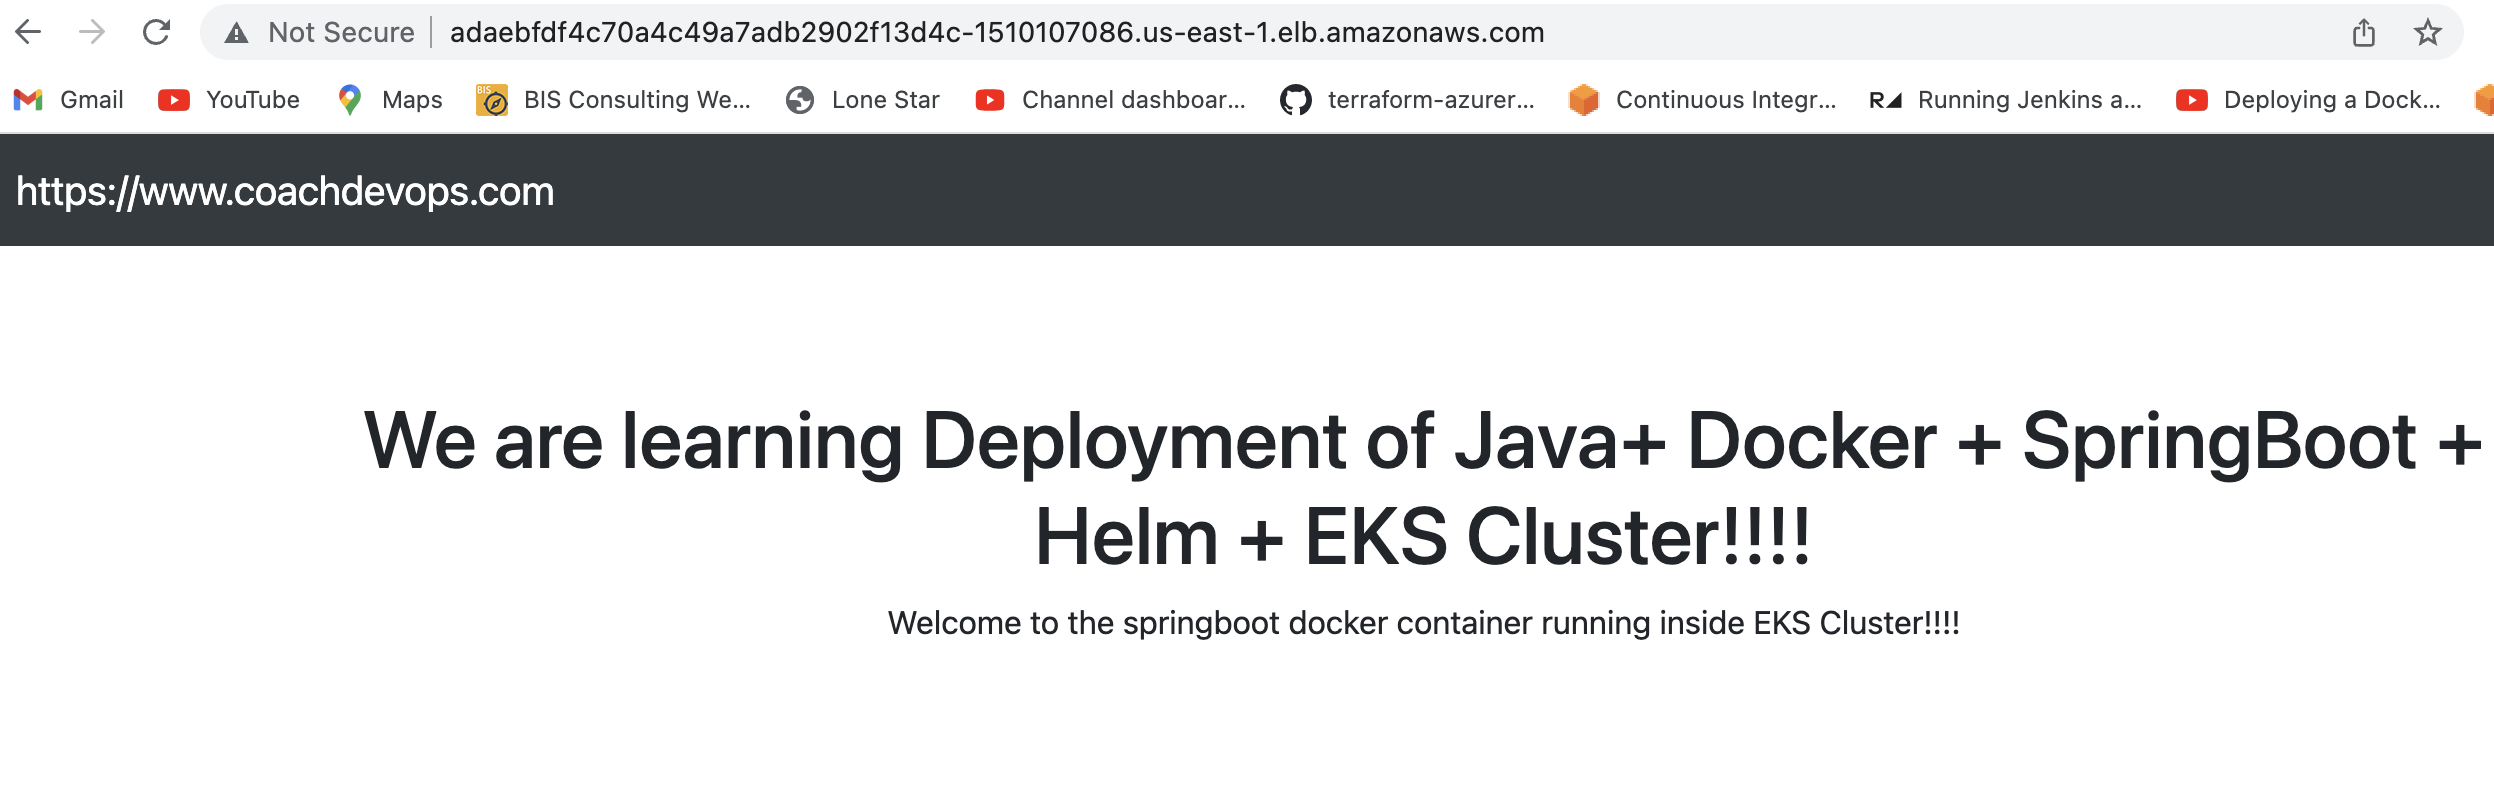
the above command should delete the EKS cluster in AWS, it might take a few mins to clean up the cluster.